


www.gateway.com
53
Recovering the BIOS
If you encounter a problem while you are updating the BIOS, such as a power outage, the BIOS
update may not be successful. If the system continues to try to boot from the new, corrupted BIOS,
you can manually recover the old BIOS so you can try another update. Also, if the ROM image is
damaged the system automatically enters recovery mode and updates the system ROM, without
the boot block.
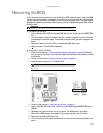
To recover the old BIOS:
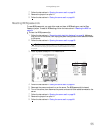
1 Insert a diskette, CD or DVD, or a bootable USB “disk-on-key” containing the AMIBOOT.ROM
file.
2 Turn on or restart the server. Press and hold CTRL+HOME during power up until the recovery
process begins (the server beeps). The process is complete when you see a message on the
screen.
3 Remove the diskette, the CD or DVD, or the bootable USB “disk-on-key.”
4 Restart the server. The old BIOS is recovered.
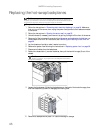
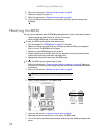
To manually recover the BIOS:
1 Follow the instructions in “Preventing static electricity discharge” on page 24. Make sure
that you turn off the server, then unplug the power cord(s) and all other cables connected
to the server.
2 Follow the instructions in “Opening the server case” on page 25.
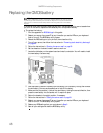
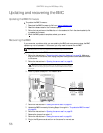
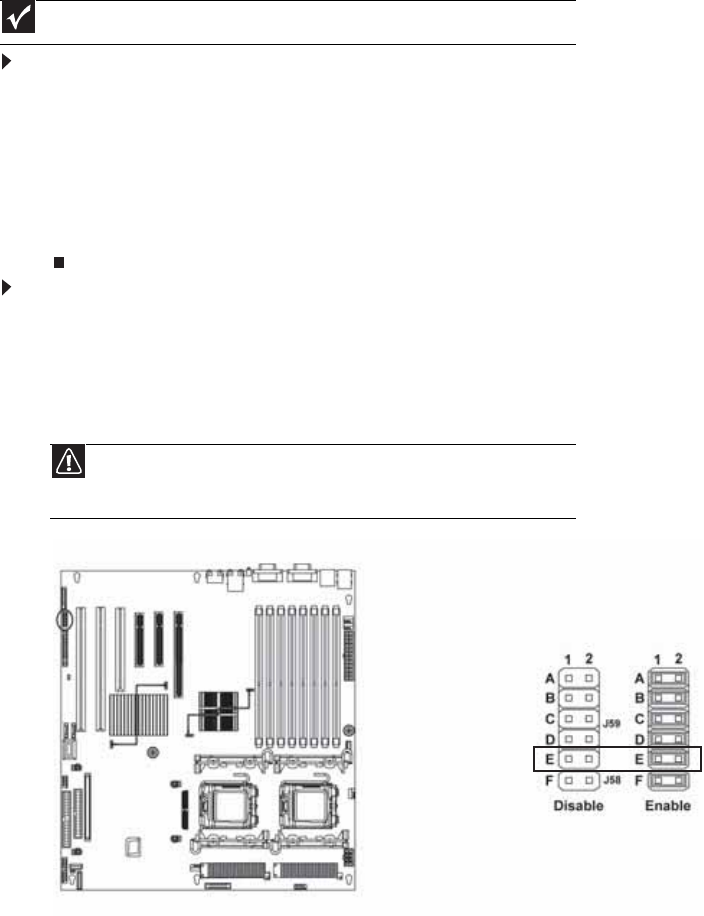
3 Install a jumper across pins 1-2 of header J59-E.
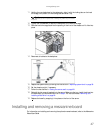
4 Follow the instructions in “Closing the server case” on page 26.
5 Insert a bootable USB “disk-on-key” containing a valid BIOS image (AMIBOOT.ROM) into a
USB port.
6 Reconnect the power cords and turn on the server. The BIOS recovery is initiated.
7 Wait until the BIOS recovery is completed. The process may take up to 5 minutes.
8 Remove the bootable USB “disk-on-key.”
9 Turn off the server, then disconnect the power cords and all other cables connected to the
server.
Important
This method does not work if the keyboard is connected through the KVM switch.
Caution
Moving the jumper while the power is on can damage your server. Always
turn off the server and unplug the power cords and all other cables before changing
the jumper.