


06/00 - 53 of 90 - 0116 7201
Rev. 00 © 2000 Hans Pausch Röntgengerätebau Graf-Zeppelin-Str. 1 D-91056 Erlangen ALL RIGHTS RESERVED Ru
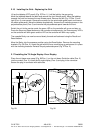
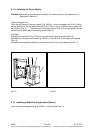
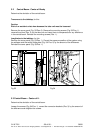
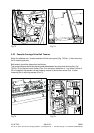
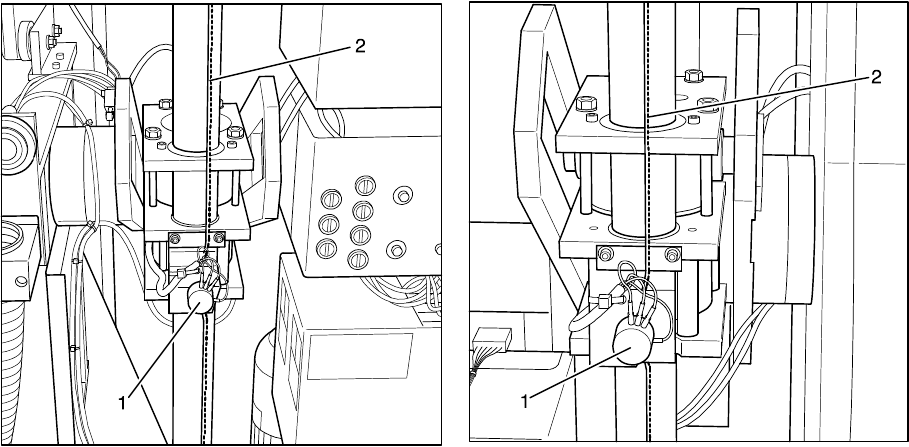
Fig.61 Fig.62
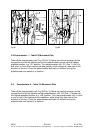
3.8 Potentiometer 1 – Table Tilt Movement Path
Take off the potentiometer belt (Fig. 61/Pos. 2). Move the vertical carriage into the
top position and tilt the tabletop so that the potentiometer moves into the highest
possible position, e.g. -20° position. Turn potentiometer =AU -R1 (Pos. 1) until it is
half a turn in front of the mechanical end position; while doing this, take note of the
direction of the turn. Place the potentiometer belt back on without turning the
potentiometer and secure it in position.
3.9 Potentiometer 2 – Table Tilt Movement Path
Take off the potentiometer belt (Fig. 62/Pos. 2). Move the vertical carriage into the
top position and tilt the tabletop so that potentiometer =AU -R3 (Pos. 1) moves into
the highest possible position, e.g. +88° position. Turn the potentiometer until it is half
a turn in front of the mechanical end position; while doing this, take note of the
direction of the turn. Place the potentiometer belt back on without turning the
potentiometer and secure it in position.