


MAINTENANCE
D1.4 D1.4
VANTAGE® 500
FUEL FILTERS:
When working on the fuel system:
• Keep naked lights away, do not smoke
• Do not spill fuel
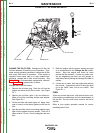
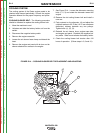
The Vantage® 500 is equipped with a Fuel Pre-
Filter/Water Separator Assembly located before the
lift pump and a Secondary Fuel Filter located after the
lift pump and before the fuel injectors. The Fuel Pre-
Filter/Water Separator is mounted to the engine block
just below the lift pump (Figure D.2). The Secondary
Fuel Filter is mounted directly to the engine just above
the oil filter (Figure D1.3).
Fuel Pre-Filter/Water Separator Assembly:
The pre-filter is a 150 micron screen designed to pro-
tect against gross fuel contamination of the water sep-
arator element and the Secondary Fuel Filter. If the
pre-filter becomes plugged, it may be removed,
inspected, cleaned and reinstalled. In general this only
needs to be done with each water separator element
change (about every 1,000 hrs). However, if at any
time excessive fuel contamination is suspected or a
sudden fall-off in engine performance is detected the
pre-filter screen should be inspected and cleaned. See
Figure D.2 and follow this procedure:
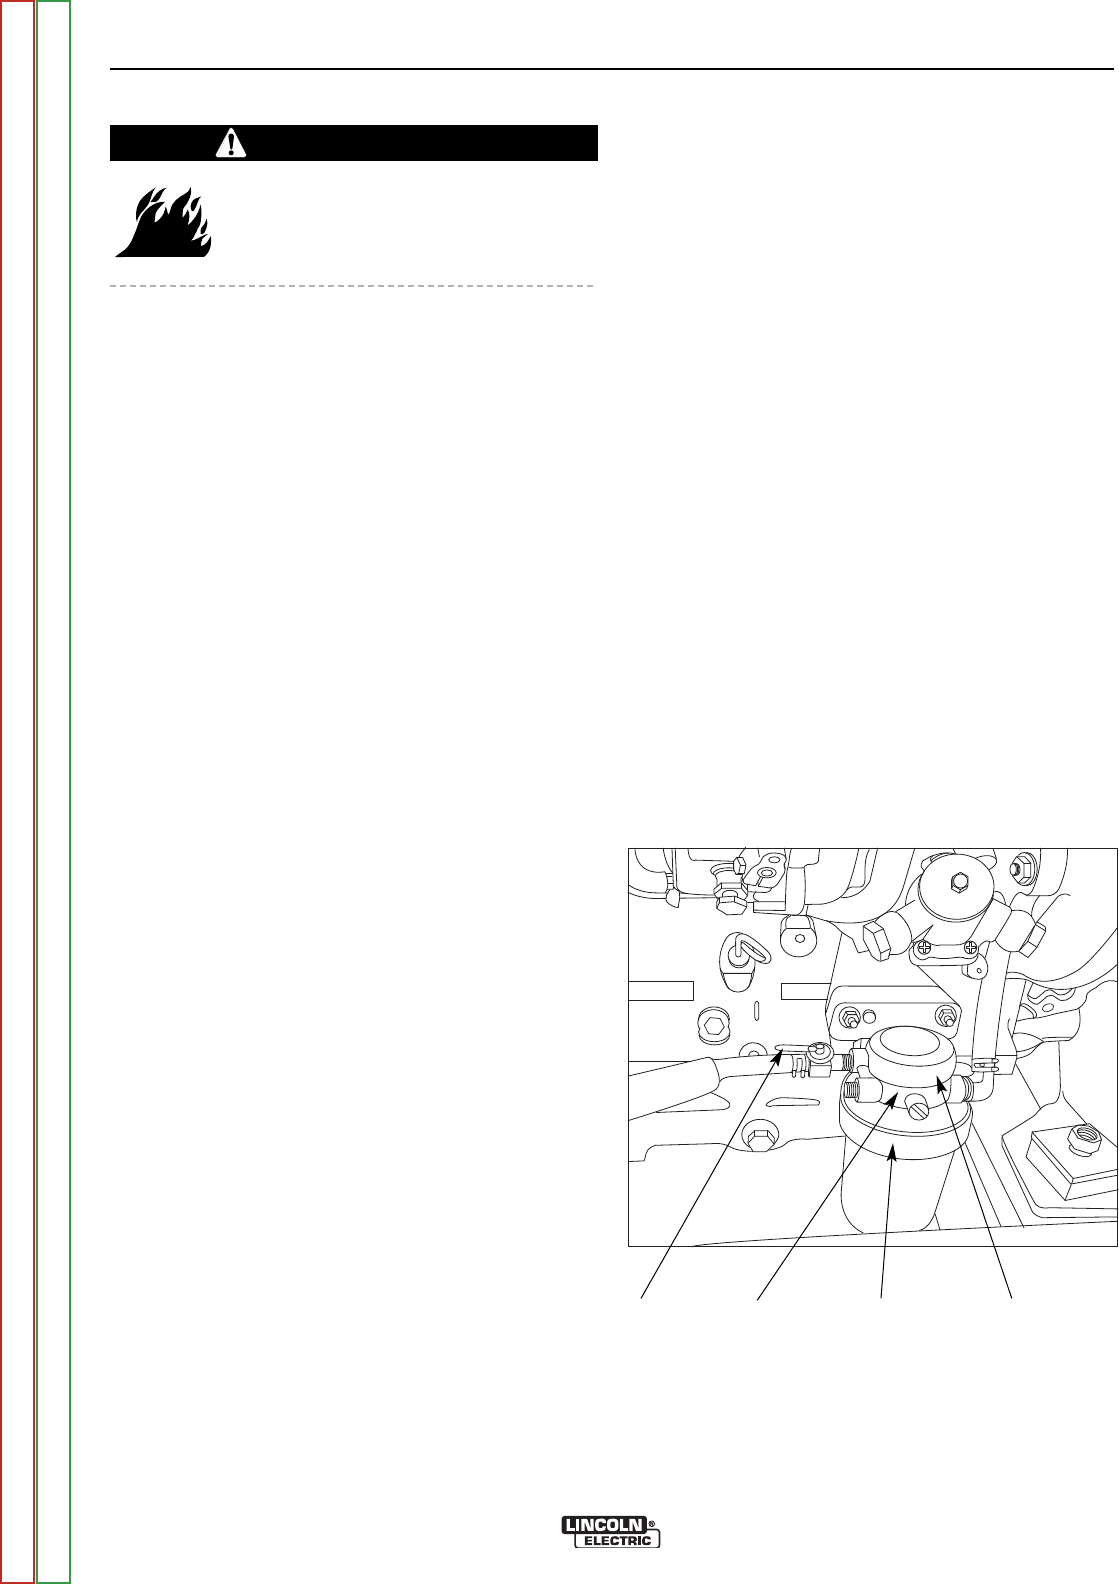
1. Close the fuel shutoff valve located on the side of
the Fuel Pre-Filter/Water Separator Assembly. The
lever should be perpendicular to the hose
2. Unscrew the cap ring located on the top of the filter
header and remove the plastic center cap and O-
ring.
3. Remove the large white volume plug located direct-
ly under the center cap in the upper cavity of the fil-
ter header. Use a small screwdriver (or similar
device) to lift the plug part way out of the cavity to
assist with its removal.
NOTE: Be careful not to damage the pre-filter screen
with the tool used to remove the plug.
4. Using a pair of pliers, gently tug on the pull tabs of
the pre-filter screen in an alternating pattern to
gradually remove the pre-filter screen.
5. Brush off any debris and rinse in diesel fuel.
6.
Re-install the pre-filter screen into the upper cavity of
the filter header making sure the four pull tabs are
pointing up. Putting your fingers on the pull tabs,
push down evenly until the lower body of the pre-fil-
ter screen contacts the floor of the upper cav
ity.
7. Re-insert the large white volume plug into the
upper cavity.
8. Place the O-ring onto the angled seal surface of
the filter header and re-install the plastic cap. Make
sure its flange rests on the O-ring.
9. Screw on the cap ring and tighten hand tight.
10. Remember to open the fuel shutoff valve (Lever in
line with the hose) before starting the engine.
Water Separator Element: The water separator ele-
ment is a two-stage filter with a special filtration/water
separating media. An expanded water reservoir pro-
vides maximum protection against water in the fuel.
The recommended change interval for the water sepa-
rator element is 1,000 hours. See Figure D.2 and follow
this procedure.
1. Close the fuel shutoff valve located on the side of
the Fuel Pre-Filter/Water Separator Assembly. The
lever should be perpendicular to the hose.
2. Rotate the quick change ring (located just below fil-
ter header) clockwise approximately 1/2 turn and
slide it down and off the element.
3. Grasp the element and pull down with a slight rock-
ing motion to remove the element from the grommet
post on the bottom of the filter header.1
WARNING
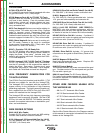
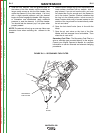
FIGURE D1.2 – FUEL PRE-FILTER/WATER
SEPARATOR ASSEMBLY
FUEL
SHUTOFF
VALVE
FILTER
HEADER
QUICK
CHANGE
RING
CAP
RING
Return to Section TOC Return to Section TOC Return to Section TOC Return to Section TOC
Return to Master TOC Return to Master TOC Return to Master TOC Return to Master TOC