X-Shop Sander Operation
The following Skil Sander Models may be used with the
sander insert: Model 7313 & 7500.
• Turn main power off and make sure that the table saw
blade is not spinning before using X-shop accessory
power tools. Contact with an unattended and spinning
blade can cause injury.
• Before making adjustments, make sure the sander switch
is in the OFF position and the cord is unplugged.
• Lower the table saw blade below table before using the
a
ccessory power tools.
•
Remove X-Shop tool inserts and reinstall blank inserts
before returning to table saw operation.
Note: See page 8 for Sander Safety.
1. Keep hands and fingers away from moving belt.
2. Do not hold small pieces.
3. Plan your sanding application to utilize the center of the sanding
belt. Edges of belt may damage workpiece if left in position for
too long a period of time.
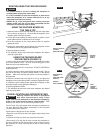
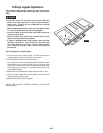
NOTE: The table saw rip fence may be used in combination with
the sanding fence S9 for in-line sanding operations. (Fig. 77)
CREATE A FENCE FACE FOR SANDING LONG
WORKPIECES WITH THE RIP FENCE (Fig. 78)
Note: Put the fence face on the side of the rip fence as appropriate
for your sanding application.
1. Cut piece of suitable wood 17 inches long by 3 inches high
AA.
2. The thickness of the wood
AA needs to be at least 1 inch thick
so the rip fence does not ride over the belt sander. Note: The
bottom of the rip fence may contact moving belt and damage the
rip fence if the rip fence is placed over the belt sander*.
3. Measure from the right edge of the board nearest the rip fence
3.93 inches (100 mm.) This is the location of the first through
hole. Drill the second through hole 6.85 inches (174 mm) to the
left of the first hole. Each hole is to be placed 5/8” from the
bottom of the wood edge. Countersink the through holes.
Maintain face no more than 1/16” above
sanding belt. Any more height may cause
pinching or entrapment of fingers.
NOTE: SEE SANDER OWNER’S MANUAL FOR MORE
INFORMATION.
100
.
S9
FIG. 77
AA
CC
T15
6.85”
17”
3.93”
5/8”
FIG. 78
W
ARNING
!
WARNING
!


