


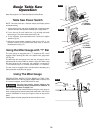
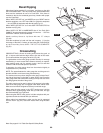
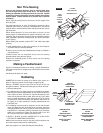
Bevel Ripping
W
hen bevel ripping material 6" or narrower, use fence on the right
side of the blade ONLY. This will provide more space between the
fence and the sawblade for use of a Push Stick. If the fence is
m
ounted to the left, the sawblade guard may interfere with proper
use of a Push Stick.
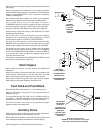
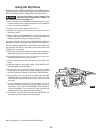
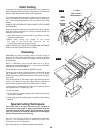
W
hen “WIDTH OF RIP” is 6" and WIDER use your RIGHT hand to
feed the workpiece, use LEFT hand ONLY to guide the workpiece
… do not FEED the workpiece with the left hand (Fig. 57).
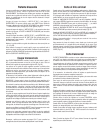
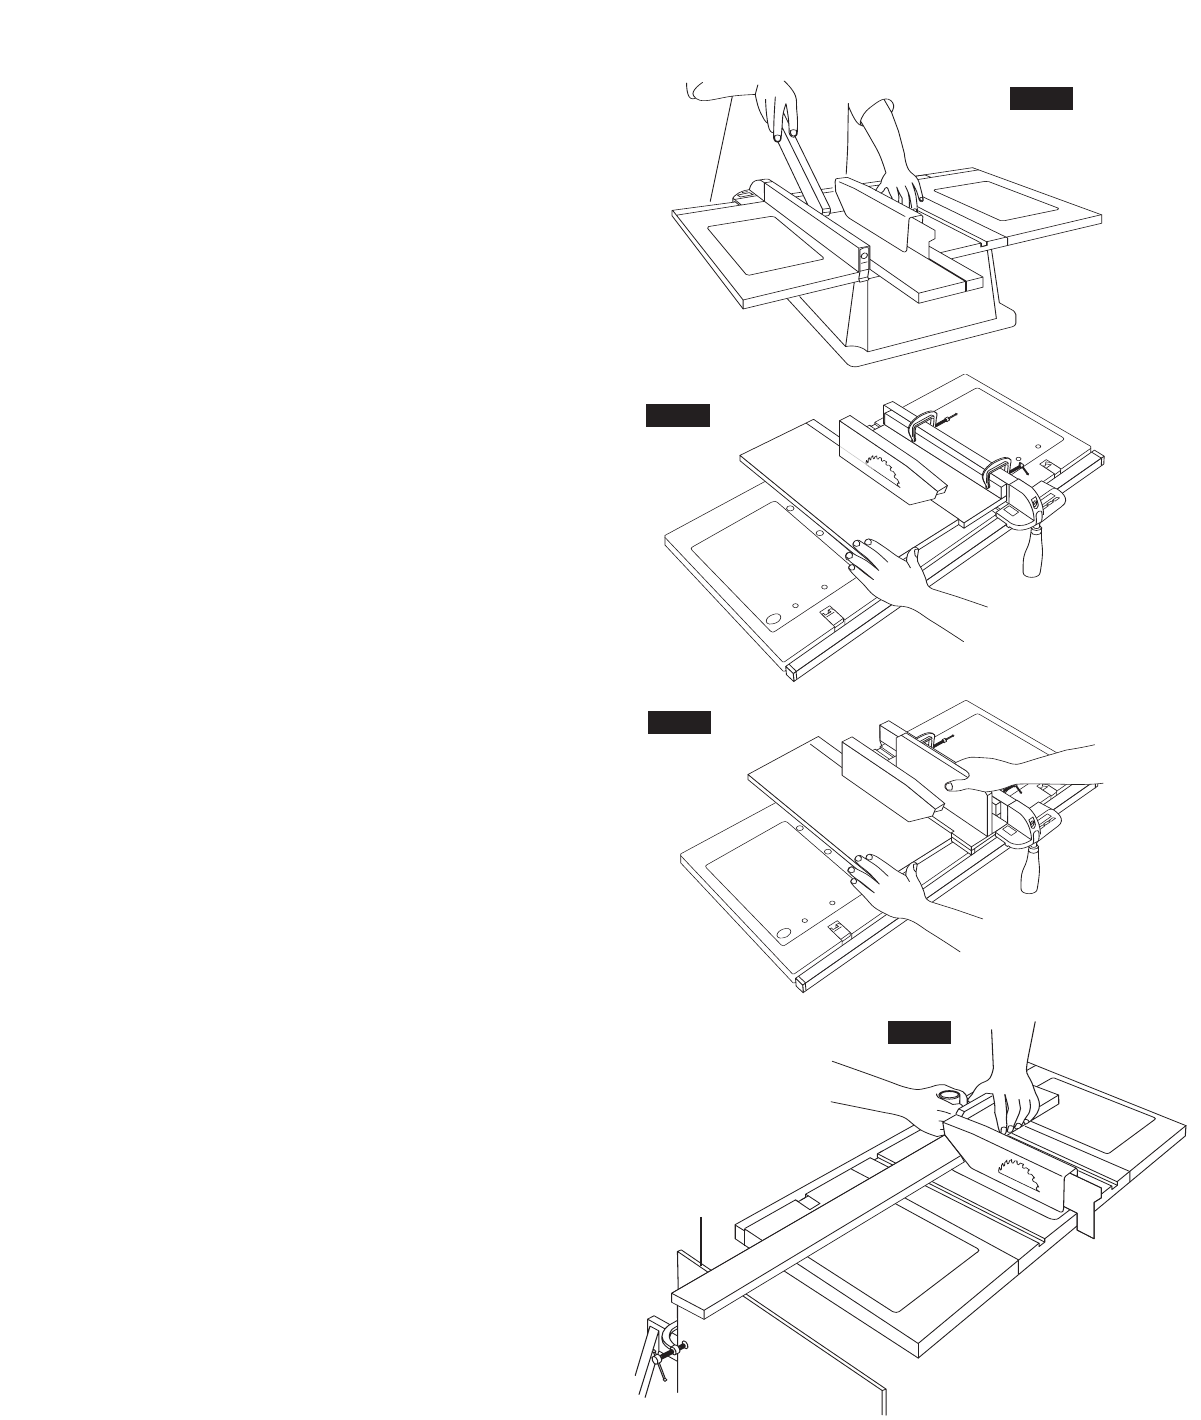
When “WIDTH OF RIP” is 2" to 6" wide USE THE PUSH STICK to
feed the work (Fig. 59).
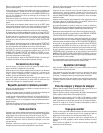
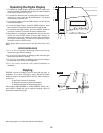
When WIDTH OF RIP is NARROWER than 2" the Push Stick
C
ANNOT be used because the guard will interfere … USE the
AUXILIARY FENCE, and PUSH BLOCK.
Attach auxiliary fence to rip fence with two “C” clamps
(Fig. 60).
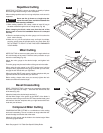
Feed the workpiece by hand until the end is approx. 1" from the
front edge of the table. Continue to feed using the PUSH BLOCK
on top of auxiliary fence UNTIL THE CUT IS COMPLETE
(Fig. 61).
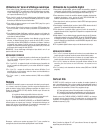
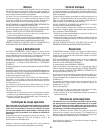
Crosscutting
CROSSCUTTING is known as cutting wood across the grain, at
90°, or square with both the edge and the flat side of the wood.
This is done with the miter gauge set at 90° (Fig. 62).
The graduations on the miter gauge provide accuracy for average
woodworking. In some cases where extreme accuracy is required,
when making angle cuts, for example, make a trial cut and then
recheck it with an accurate square or protractor.
If necessary, the miter gauge head can be swiveled slightly to
compensate for any inaccuracy.
NOTE: The space between the miter gauge bar and the groove in
the table is held to a minimum during manufacturing.
For maximum accuracy when using the miter gauge, always “favor”
one side of the groove in the table. In other words, don’t move the
miter gauge from side to side while cutting but keep one side of the
bar riding against one side of the groove.
The miter gauge may be used in either of the grooves in the table.
Make sure miter gauge bar is engaged under table retainer tabs.
Make sure lock handle is tightened securely to maintain angle.
When using the miter gauge in the LEFT hand groove, hold the
workpiece firmly against gauge head with your left hand, and grip
the lock handle with your right hand.
When using the RIGHT hand groove, hold the workpiece with your
right hand and the lock handle with your left hand.
When cutting long workpieces, make sure the end is supported
from the floor X (Fig. 62). Use blank inserts when using the table
saw.
Note: See pages 5-7 for Table Saw Specific Safety Rules.
X
FIG. 61
80.
FIG. 58
FIG. 59
FIG. 60
FIG. 59
FIG. 60
FIG. 61
FIG. 62