


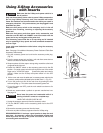
ROUTING USING THE FEATHER BOARD
• The feather board is an aid in holding the workpiece in
position when routing on a router table.
•
It is NOT intended to hold the workpiece in place alone
w
hen the workpiece is in contact with the bit, or at any
o
ther time when the bit is turning.
• NEVER let go of the workpiece when routing using the
feather board until the cut has been completed and the
w
orkpiece is completely clear of the bit.
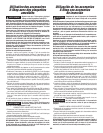
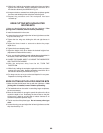
USING THE FEATHER BOARD ON
THE TABLE TOP
1
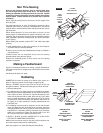
. Install the feather board onto the table top with the male knobs
R10 as shown by figure 73. Be sure that the diagonal of the
“feathers” point in the feed direction.
2. Loosen the knobs holding the feather board in position on the
router table and move it outward as far as it will go.
3. Place the workpiece on the router table so that it is squarely
against the fence.
4. Position the table feather board against the workpiece so that
the feather board is snug against the workpiece.
5. Securely tighten the knobs.
6. The workpiece should move with some resistance but without
requiring a great effort.
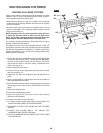
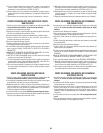
USING THE FEATHER BOARD
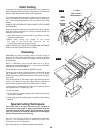
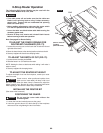
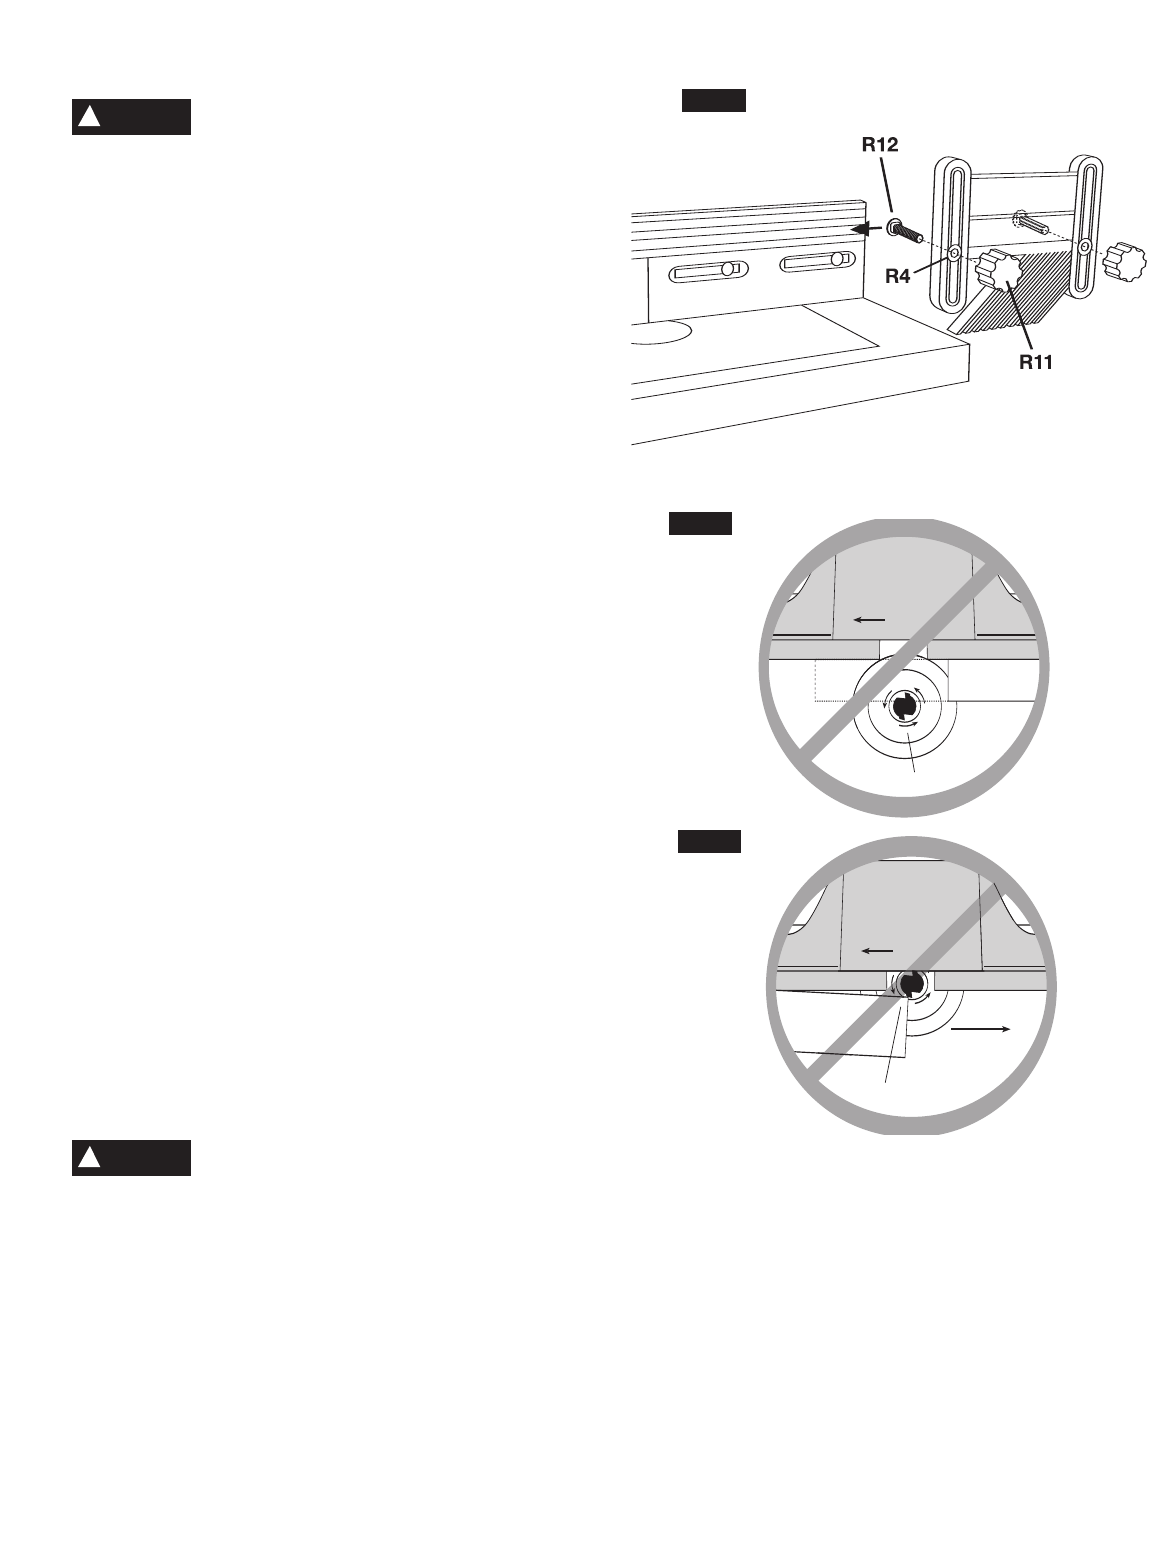
ON THE FENCE (FIGURE 74)
1. Insert a router guard bolt R12 through the elongated slot on each
end of the feather board. Be sure that the diagonal of the
“feathers” point in the feed direction.
2. Attach a female knob R11 to each bolt. DO NOT TIGHTEN the
knobs at this time.
3. From the end of the fence, slide the bolt heads into the T-slot on
the front of the fence rail until the feather board is in the desired
location. Make sure that both bolt necks are securely seated in
the keyed slot.
4. Raise the feather board as high as it will go and place the
workpiece on the router table so that it is squarely against the fence.
5. Position the fence feather board against the workpiece so that
the feather board is snug against the workpiece.
6. Securely tighten the knobs.
7. The workpiece should move with some resistance but without
requiring a great effort.
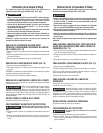
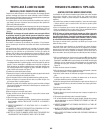
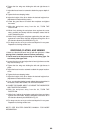
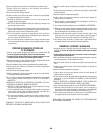
FENCE LOCATION AND WORKPIECE FEED
Warning: Position the fence in accordance
with these instructions to avoid "Fence
Traps" and feed the workpiece in the direction indicated by
arrow on the router fence to prevent “Climb-cutting”.
Both
situations can lead to loss of control and personal injury.
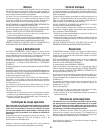
"Fence Traps" (Fig 75a) happen when the fence is positioned so
far back that front side (power switchside) of the workpiece
would be behind the router bit.
Fence traps are dangerous for two reasons:
• Exposure of the bit on the front side (power switch side) of the
workpiece
• Likeliness of climb cut, which can cause loss of control.
“Climb-cutting” (Fig 75b) the bit must not enter the workpiece in
the same direction as the feed direction, which is likely to cause
the workpiece to "climb" and may lead to loss of control during
operation.
92
.
WARNING
!
WARNING
!
WORKPIECE
EXPOSED BIT
WORKPIECE
CLIMB-CUTTING
DIRECTION
OF FEED
CORRECT
DIRECTION
OF FEED
INCORRECT
DIRECTION
FIG. 75a
FIG. 75b
(SENS DE L’AVANCE DE
L’OUVRAGE)
(SENTIDO DE AVANCE)
(SENS CORRECT DE
L’AVANCE)
(SENTIDO DE AVANCE
CORRECTO)
(
OUVRAGE)
(PIEZA DE
TRABAJO)
(MÈCHE EXPOSÉE)
(BROCA AL
DESCUBIERTO)
(SENS
INCORRECT)
(SENTIDO
INCORRECTO)
(« COUPE MONTANTE »)
(FRESADO CONCURRENTE)
(OUVRAGE)
(PIEZA DE TRABAJO)
FIG. 74