


ROUTING USING THE FENCE
JOINTING (FULL EDGE CUTTING)
U
sing a router table for jointing has several advantages over other
methods, such as using a freestanding power jointer, though it
cannot completely replace a power jointer.
• Small and short pieces of wood can be safely and successfully
routed because the opening between the faces can be adjusted
d
own to a minimum.
•
Because routers spin much faster than typical jointers, the cut
quality is much better. This is especially useful on types of woods
that are prone to tear-out.
NOTE: Jointing is the only routing operation using the fence
in which the left lower fence is offset from the right lower
fence. For all other routing operations, both lower fences are
always aligned. Use shim R9 provided to offset left fence.
For maximum strength and accuracy, boards that are to be joined
together should be smooth and true.
The edges should be true to the workpiece surface. Install 1/2”
straight bit or spiral bit in the router, because they are the strongest
bits with the least potential for deflecting. To further minimize the
potential for deflecting, use a bit with the shortest possible cutter
height sufficient to do the job.
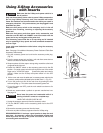
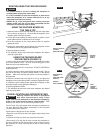
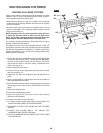
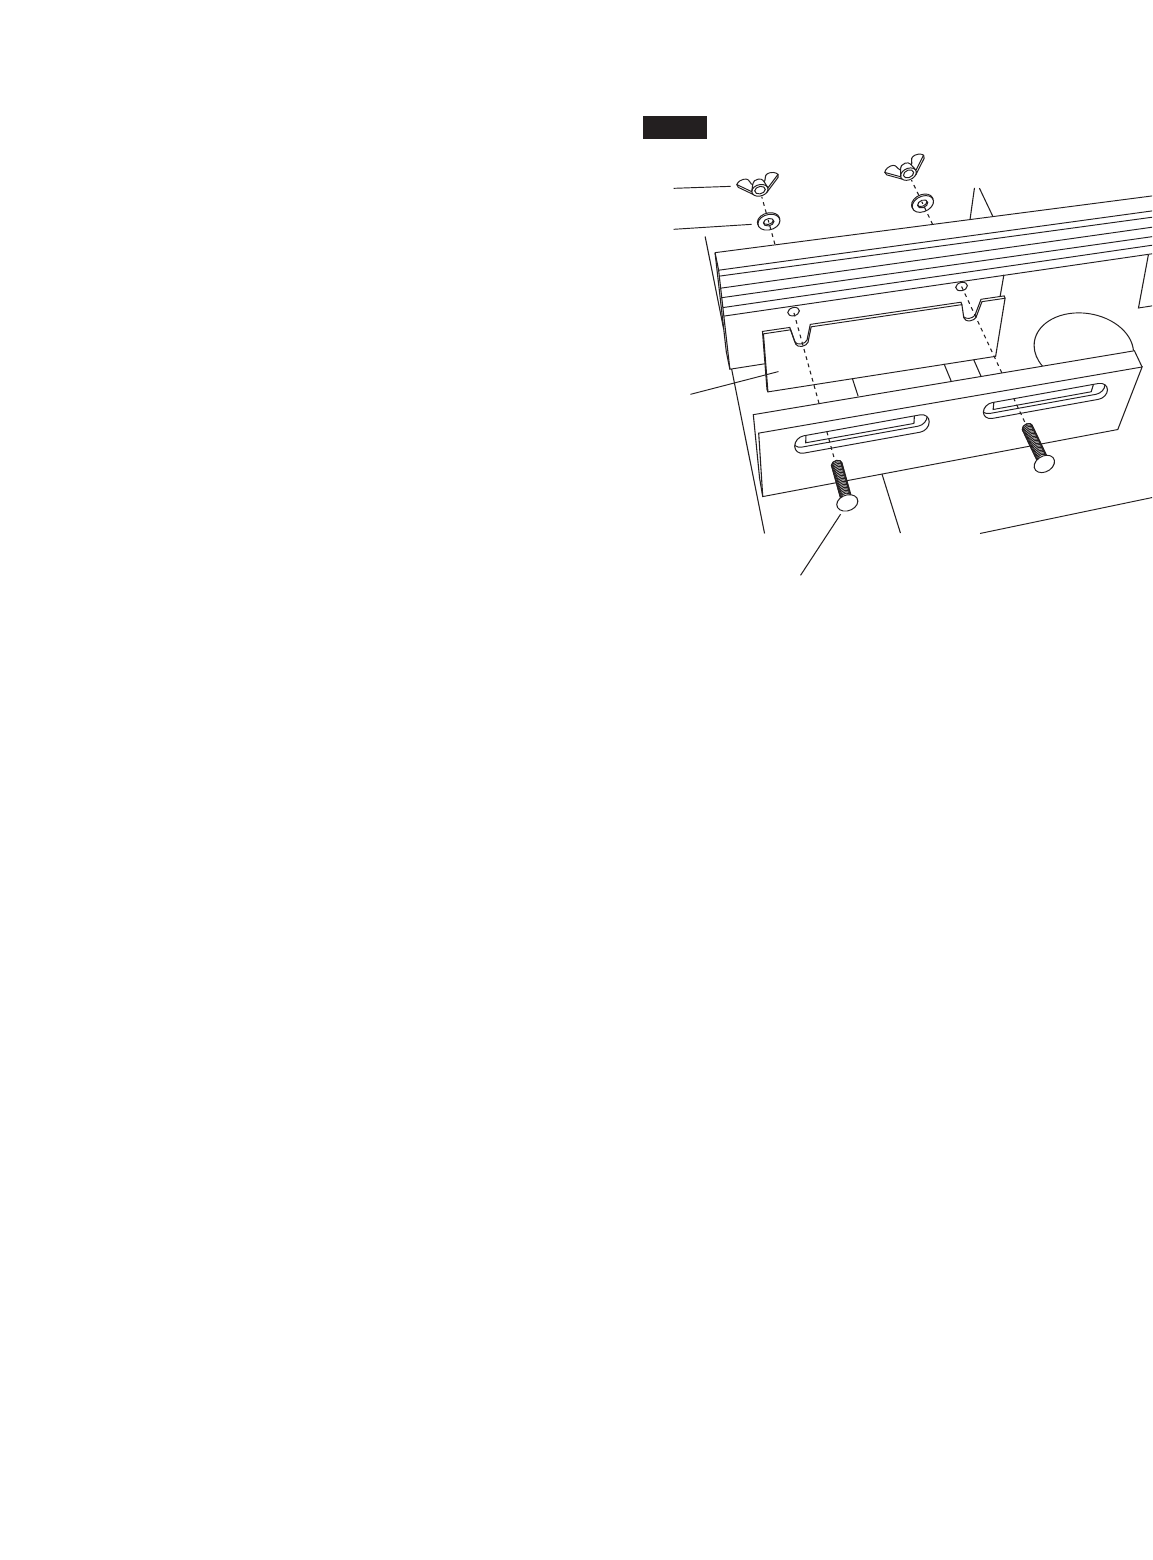
1. Loosen the two wing nuts
R2 behind the left fence completely
and remove the left fence facing. Holding the shim
R9 against
the back of the left fence facing, with the notches in the shim
aligned with the holes in the fence facing, reinstall the fence
facing. See Figure 76.
2. Install a straight bit in the router.
3. Loosen the wing nuts and adjust the left and right fences so that
they clear the bit by 1/4”.
4. Tighten the four wing nuts holding the left and right fences in
place.”
5. Place a straight edge or a straight piece of wood on the table so
that it rests against the left fence.
6.
Move the fences outward until the straight edge lines up with the
cutting edge of the bit and is still in contact with the left lower
fence.
7. Tighten the clamping knobs.
8. Remove the straight edge or board.
9.
Adjust the height of the bit so that it will cut the complete
thickness of the workpiece.
10. Place the workpiece on the router table.
11. If a feather board is being used, adjust it as described in the
section ROUTING USING THE FEATHER BOARD.
12.
SECURELY TIGHTEN THE KNOBS ON THE FEATHER
BOARD.
13. LOWER THE GUARD ABOUT 1/8” ABOVE THE
WORKPIECE AND TIGHTEN THE knobs.
14. WITH THE WORKPIECE AWAY FROM THE CUTTER, TURN
THE ROUTER ON.
94
.
R
2
R4
R12
R9
FIG. 76