11
Creating Embroidery Patterns
Creating Embroidery Patterns
Creating Embroidery Patterns From
Photos (Photo Stitch 1)
The sample file for this tutorial can be found at the following location.
Documents (My Documents)\PE-DESIGN PLUS\Tutorial
Step 1
Using the Photo Stitch 1
function to create an embroidery
pattern from an image
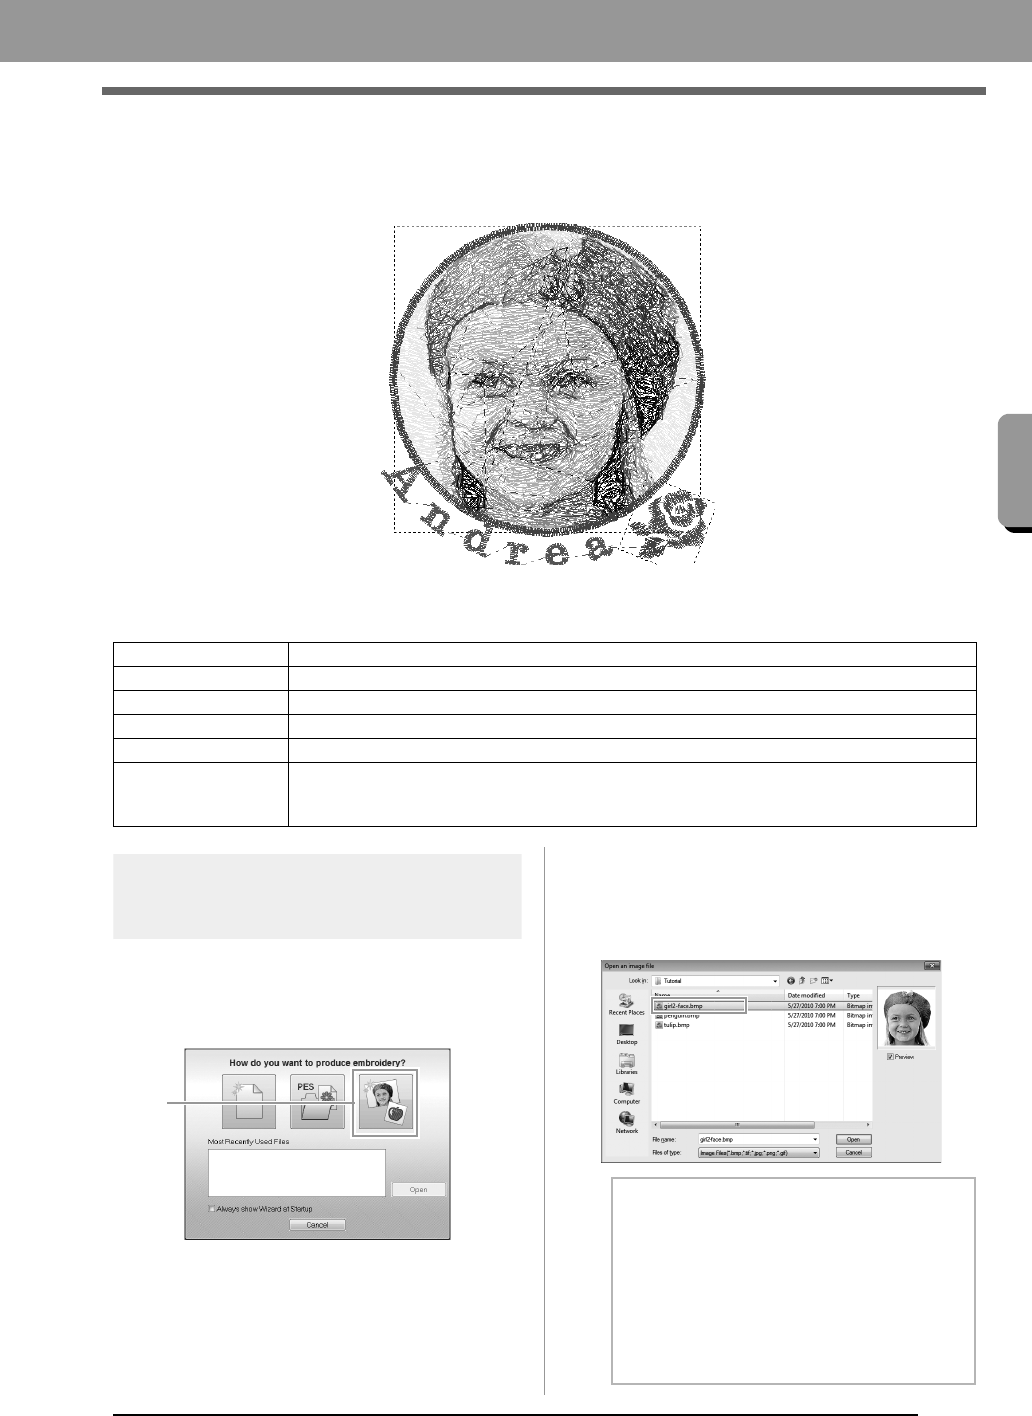
Now, we will open the image of the girl and convert
it to an embroidery pattern.
1. Click 1 in the Top Wizard.
2. Import the file girl2-face.bmp.
Select the file
girl2-face
.bmp
in the folder
Documents (My Documents)\PE-DESIGN
PLUS\Tutorial
Step 1 Using the Photo Stitch 1 function to create an embroidery pattern from an image
Step 2 Changing color of the circle
Step 3 Adding text and setting character spacing
Step 4 Transforming the text
Step 5 Importing and rotating an embroidery pattern
Step 6
Transferring embroidery patterns to embroidery machines
• Transferring the design to an original card
• Transferring data to embroidery machines via a USB media
b Memo:
Image file formats
Images in the following formats can be
imported.
• Windows bitmap (.bmp)
• Exif (.tif, .jpg)
• Portable Network Graphics (.png)
• GIF (.gif)
XE8656-001.book Page 11 Thursday, June 30, 2011 2:56 PM


