61
Supplement
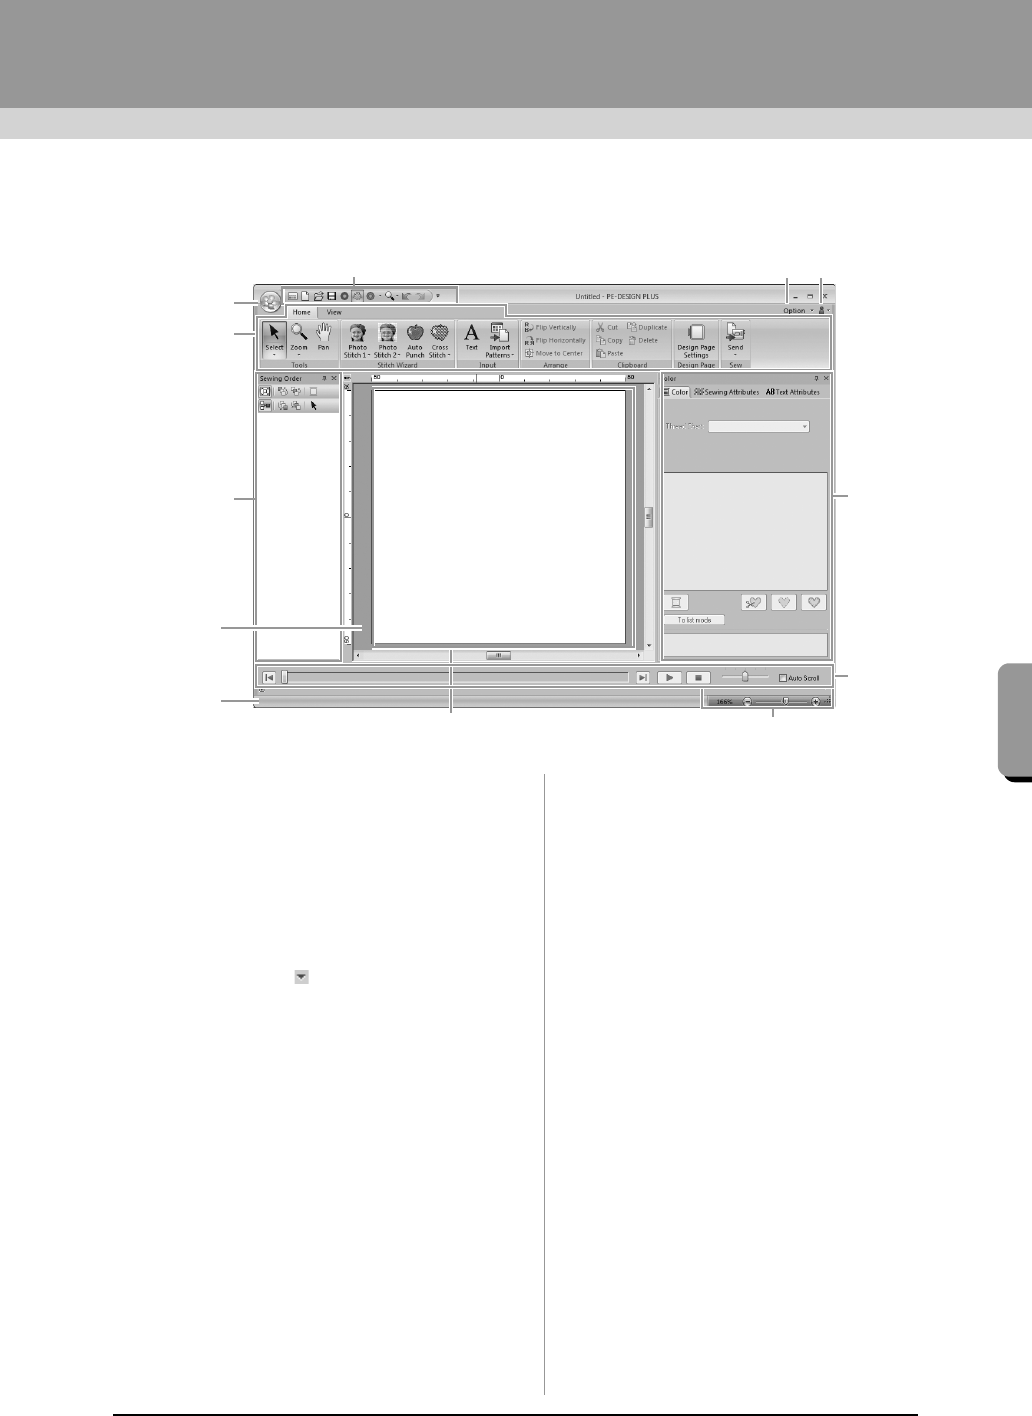
Understanding Windows
PE-DESIGN PLUS Window
1 Application button
Click to display a menu containing commands
for file operations, such as New, Save and Print.
2Ribbon
Click a tab at the top to display the
corresponding commands.
Refer to the name below each group when
selecting the desired command. Clicking a
command with the mark displays a menu
containing a choice of commands.
3 Quick Access Toolbar
This contains the most frequently used
commands. Since this toolbar is always
displayed, regardless of the Ribbon tab that is
selected, adding your most often used
commands makes them easily accessible.
c
“Customizing Quick Access Toolbar/
Shortcut keys” on page 63
4 Option button
Click this button to specify settings for the
Design Page and user thread chart.
5 Help button
Click this button to display the Operation Manual
and view information about the software.
6 Sewing Order pane
This pane shows the sewing order. Click the
buttons at the top of the pane to change the
sewing order or thread color.
7 Color/Sewing Attributes/Text Attributes pane
This pane combines tabs for specifying thread
colors, sewing attributes and text attributes.
Click a tab to display the available parameters.
8 Stitch Simulator pane
The Stitch Simulator shows how the pattern will
be sewn by the machine and how the stitching
will appear.
9 Design Page
The actual part of the work area that can be
saved and sewn.
10 Work area
11 Status bar
This displays the size of the embroidery data,
the number of stitches or a description of the
selected command.
12 Zoom
This displays the current magnification ratio.
Click to specify a value for the magnification
ratio.
Drag the slider to change the magnification ratio.
XE8656-001.book Page 61 Thursday, June 30, 2011 2:56 PM


