


54
Arranging Embroidery Designs
Printing
Specifying print settings
Before printing, you may need to change the print
settings for the embroidery design files.
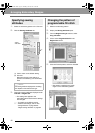
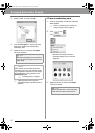
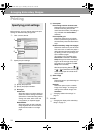
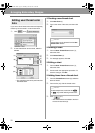
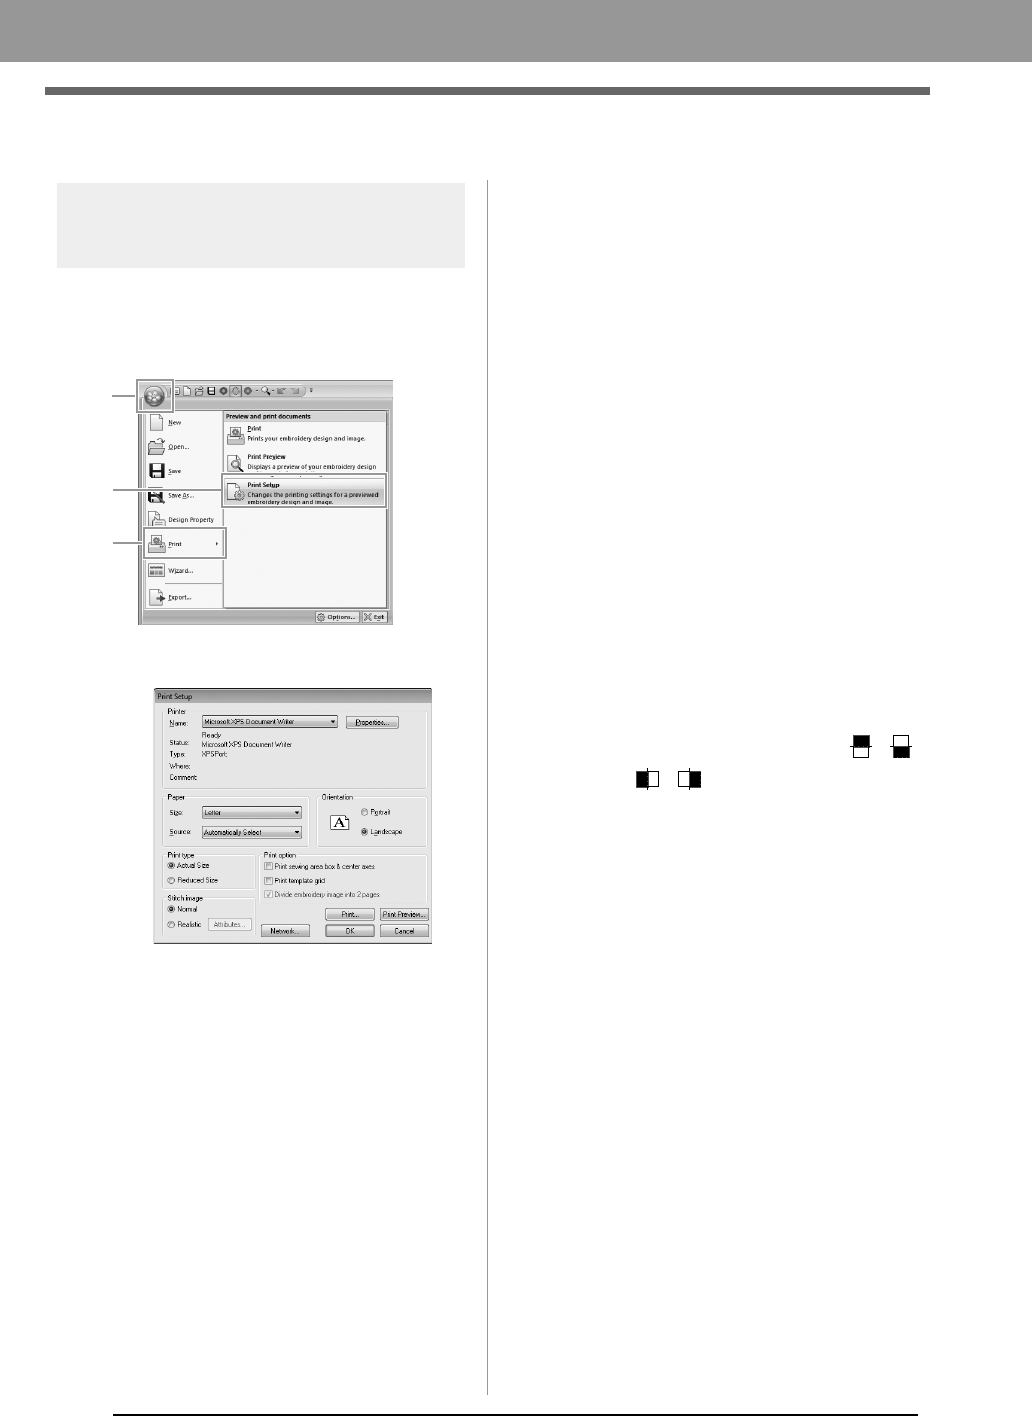
1. Click 1, then 2, then 3.
2. Specify the print settings.
(1) Specify the paper size.
(2) Specify the paper orientation.
(3) Print type
Actual Size:
Select this option to print the design at
actual size and the sewing information
(dimensions of the embroidery pattern,
sewing color order, stitch count and
hoop position) on separate pages.
Reduced Size:
Select this option to print a reduced
image together with all of the above-
mentioned information on a single
page.
(4) Print option
Print sewing area box & center axes:
Select this option to print black lines to
indicate the sewing area and the
center axes for the data. (This setting is
only available when Actual Size is
selected.)
Print template grid:
Select this check box to print green
lines to represent the grid printed on
the embroidery sheet included with the
hoop.
Divide embroidery image into 2 pages:
Select this check box to print at actual
size and on A4- or Letter-size paper a
design that is larger than the paper size
by dividing it in two and printing each
half on different pages.
(This setting is only available when
Actual size is selected in the Print
Setup dialog box and when the Design
Page is set to the larger hoop sizes.
This setting is not available if a User
Hoop size is selected.)
With this split printing feature, /
or / is printed in the lower-right
corner of the paper to indicate which
half is printed.
(5) Stitch image
Normal:
Select this option to print the design as
lines and dots.
Realistic:
Select this option to print a realistic
image of the design. To change the
settings of the realistic image, click
Attributes.
c
“Changing realistic view settings” on
page 41
3. Click OK.
c
“Changing the display of the embroidery
design” on page 41.
1
2
3
(3)
(4)
(5)
(2)
(1)
XE8656-001.book Page 54 Thursday, June 30, 2011 2:56 PM