12
Creating Embroidery Patterns
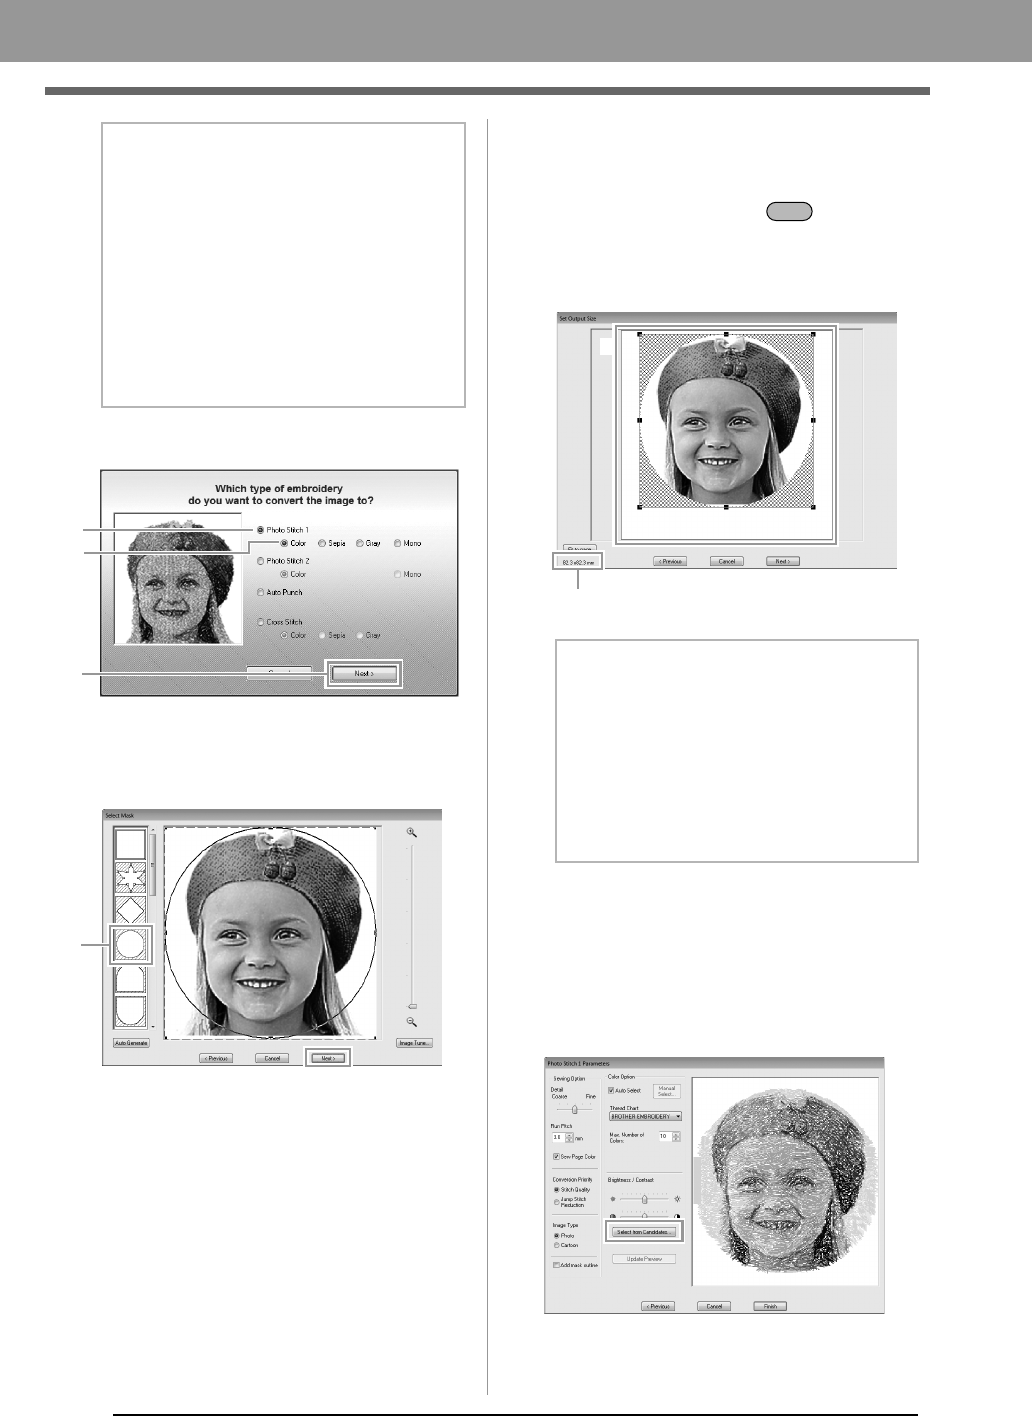
3. Click 1, then 2, then 3.
c
“Image To Stitch Wizard” on page 30
4. Click 1 to select the circle mask, and then click
Next.
c
“Select Mask dialog box” on page 30
5. Adjust the size and position of the image.
1 indicates the Design Page.
• Move the pointer over a handle, and then,
while holding down the key and the
left mouse button, drag the mouse to
reduce the size of the image.
• Drag the image to adjust its output location.
c
“Set Output Size dialog box” on page 31
and “Gray Balance / Set Output Size
dialog box” on page 31
6. Check the preview of the area to be converted
then click Next.
7. Click Select from Candidates.
c
“Photo Stitch 1 Parameters dialog box” on
page 19
b Memo:
Creating beautiful photo embroidery
• The following types of photos are not
appropriate for creating embroidery
patterns.
• Photos where the subject is small, such
as in photos of gatherings
• Photos where the subject appears
dark, such as photos taken in a room or
taken with backlighting
• An image with a width and height between
300 and 500 dots is suitable.
b Memo:
• The size of the embroidery pattern appears
in the lower left corner of the dialog box. The
user can change the size freely with this
display.
• For best results, change the size of the
embroidery pattern to the sizes listed below.
• Face only: 100 × 100 mm
• Head and shoulders: 130 × 180 mm
Shift
XE8656-001.book Page 12 Thursday, June 30, 2011 2:56 PM
