


42
Arranging Embroidery Designs
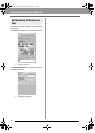
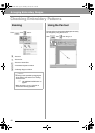
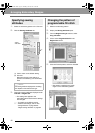
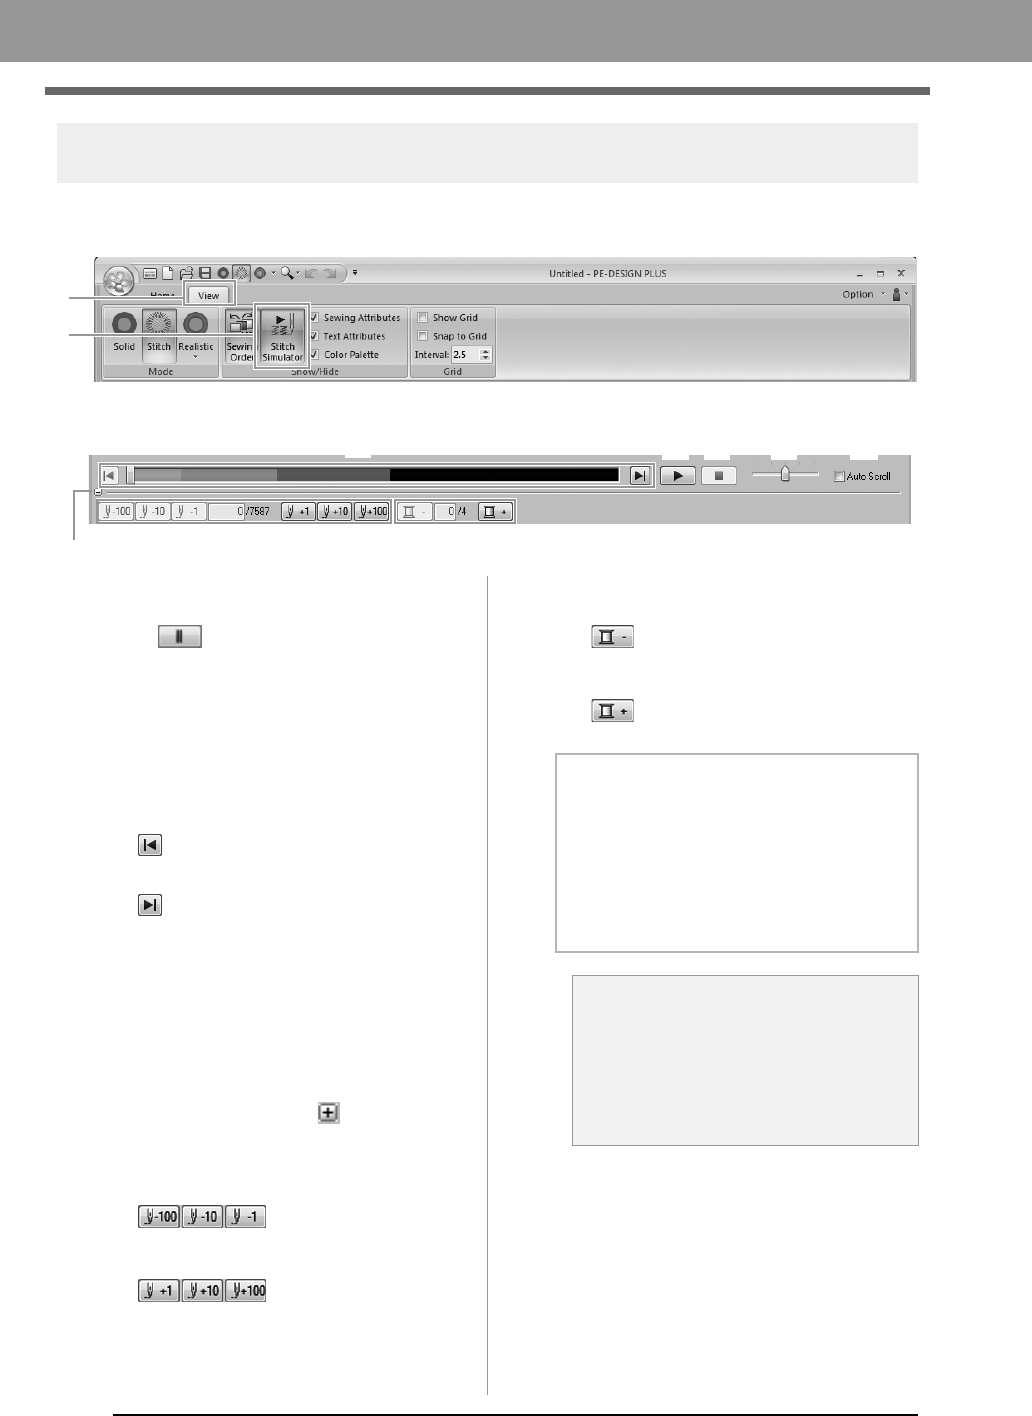
Checking the stitching with the Stitch Simulator
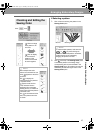
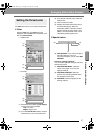
1. Click 1, then 2.
2. Click the buttons to view a simulation of the stitching.
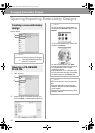
(1) Starts the stitching simulation. During
stitching simulation, this button changes
to , which can be clicked to
temporarily stop the simulation.
(2) Stops the simulation and returns to the
previous display.
(3) The slider shows the current location in
the simulation. In addition, the slider can
be moved to change the position in the
simulation.
: Returns to the beginning of stitching
and stops the simulation.
: Advances to the end of stitching and
stops the simulation.
(4) Drag the slider to adjust the simulation
stitching speed.
(5) Select this check box to automatically
scroll the simulation of the pattern when it
is too large to be fully displayed.
(6) Click to hide the bottom section of the
Stitch Simulator. Click to display it
again.
(7) Shows the number of the current stitch/
total number of stitches.
: Reverses the
simulation by the indicated number of
stitches.
: Advances the
simulation by the indicated number of
stitches.
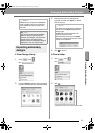
(8) Shows the number of the color being
drawn/total number of colors used.
: Returns to the beginning of
stitching for the current or previous thread
color.
: Advances to the beginning of
stitching for the next color.
1
2
(1) (4) (5)(2)
(6)
(7)
(3)
(8)
b Memo:
• The Zoom tools and Pan tool can be used
while a simulation is being viewed. If any
other command is selected, the
simulation stops.
• If a value is entered at (7) or (8), the
simulation is reversed/advanced to the
indicated location.
a Note:
• If a pattern was selected when the
stitching simulation was started, only the
selected pattern is drawn in the
simulation.
• The
Auto Scroll
check box is not
available in Realistic View.
XE8656-001.book Page 42 Thursday, June 30, 2011 2:56 PM