INSTALLING THE REAR RAIL
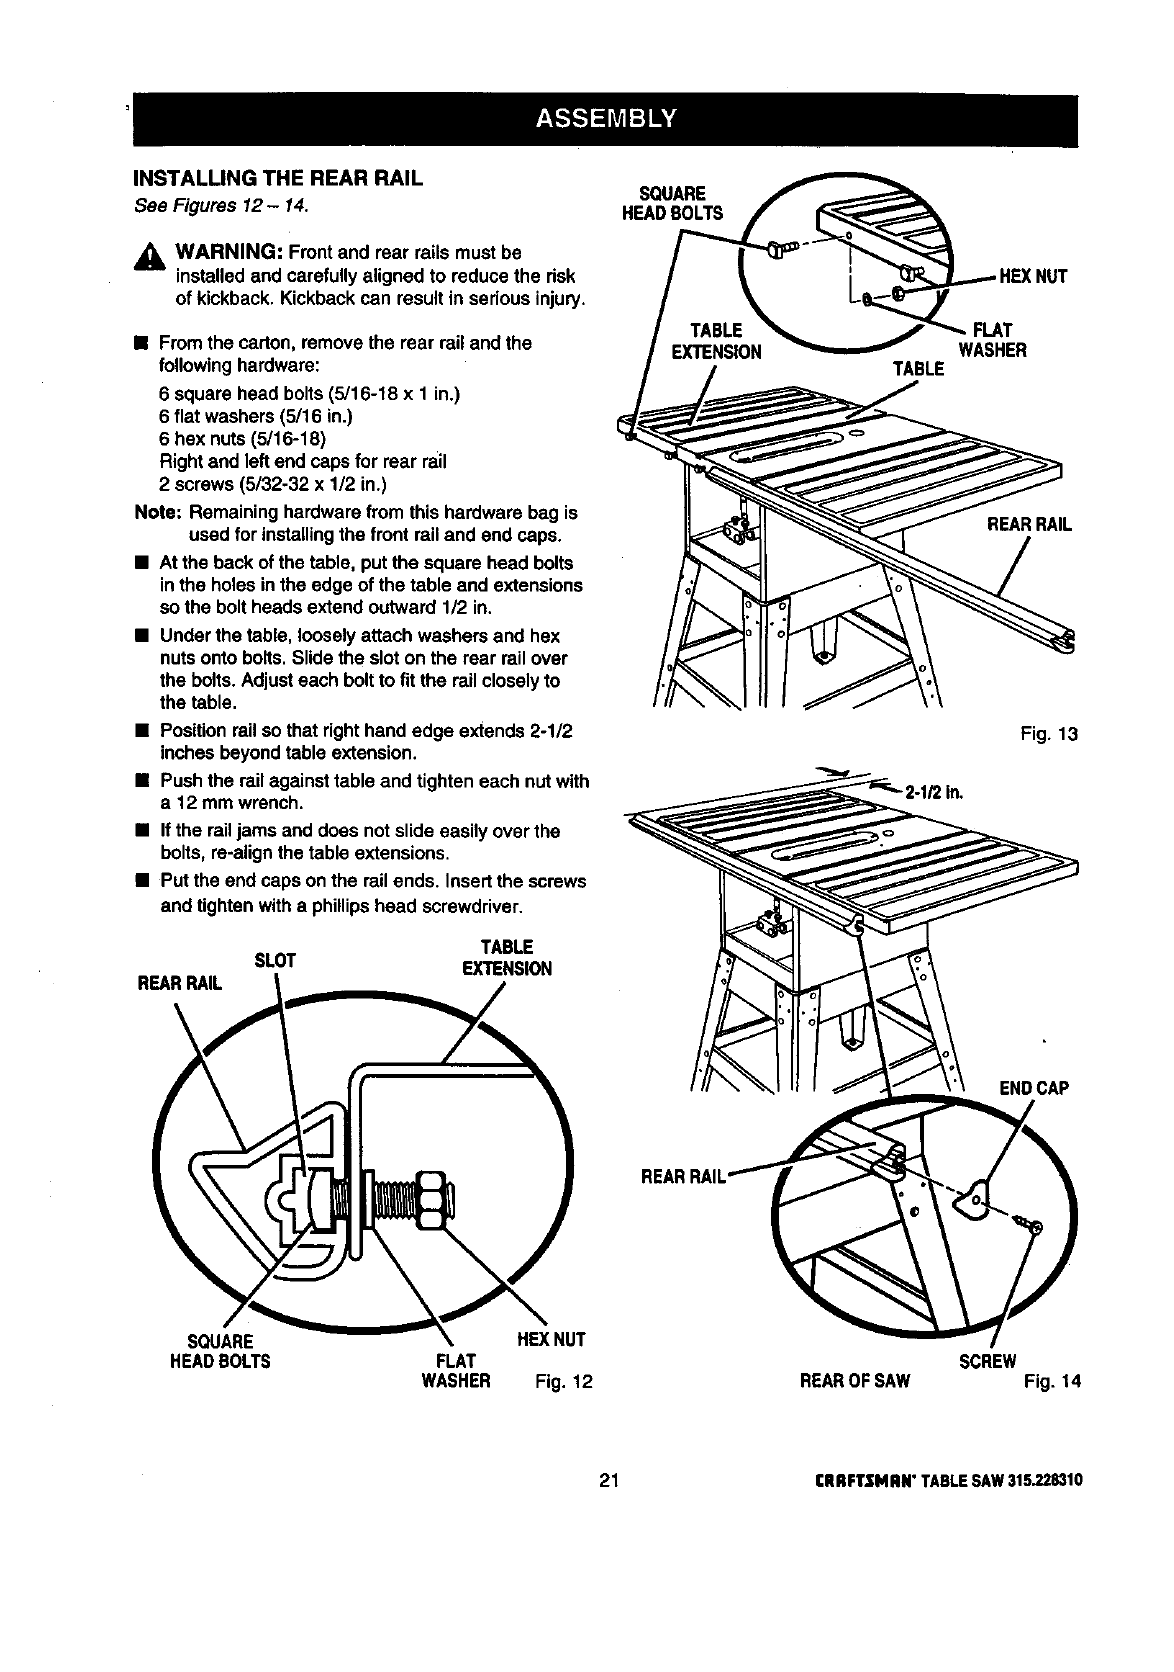
See Figures 12- 14.
,_ WARNING: Frontand rear rails mustbe
installedand carefullyaligned to reducethe risk
of kickback. Kickbackcan result in seriousinjury.
• Fromthe carton,remove the rear rail and the
followinghardware:
6 squarehead bolts(5/16-18 x 1 in.)
6 flatwashers (5/16 in.)
6 hex nuts(5/16-18)
Right and leftend capsfor rear rail
2 screws(5/32-32 x 1/2 in.)
Note: Remaininghardware from this hardware bag is
used for installingthe front rail and end caps.
• At theback ofthe table, put the square head bolts
inthe holes in theedge of the table and extensions
so the boltheadsextend outward 1/2 in.
• Underthe table, looselyattach washers and hex
nutsonto bolts.Slidethe sloton the rear railover
the bolts.Adjusteach boltto fit the railcloselyto
the table.
• Positionrailso thatrighthand edge extends 2-1/2
inchesbeyondtable extension.
• Pushthe rail againsttable and tighteneach nutwith
a 12 mm wrench.
• Ifthe railjams and does notslideeasily over the
bolts,re-alignthe table extensions.
• Putthe end caps onthe rail ends. Insert the screws
and tightenwitha phillipshead screwdriver.
SLOT
REARRAIL
TABLE
EXTENSION
SQUARE HEXNUT
HEADBOLTS FLAT
WASHER Fig. 12
SQUARE
HEADBOLTS
TABLE
FLAT
WASHER
SCREW
NUT
REARRAIL
Fig. 13
ENDCAP
REAROF SAW Fig. 14
21 CRRFTSNAN" TABLE SAW 315.228310


