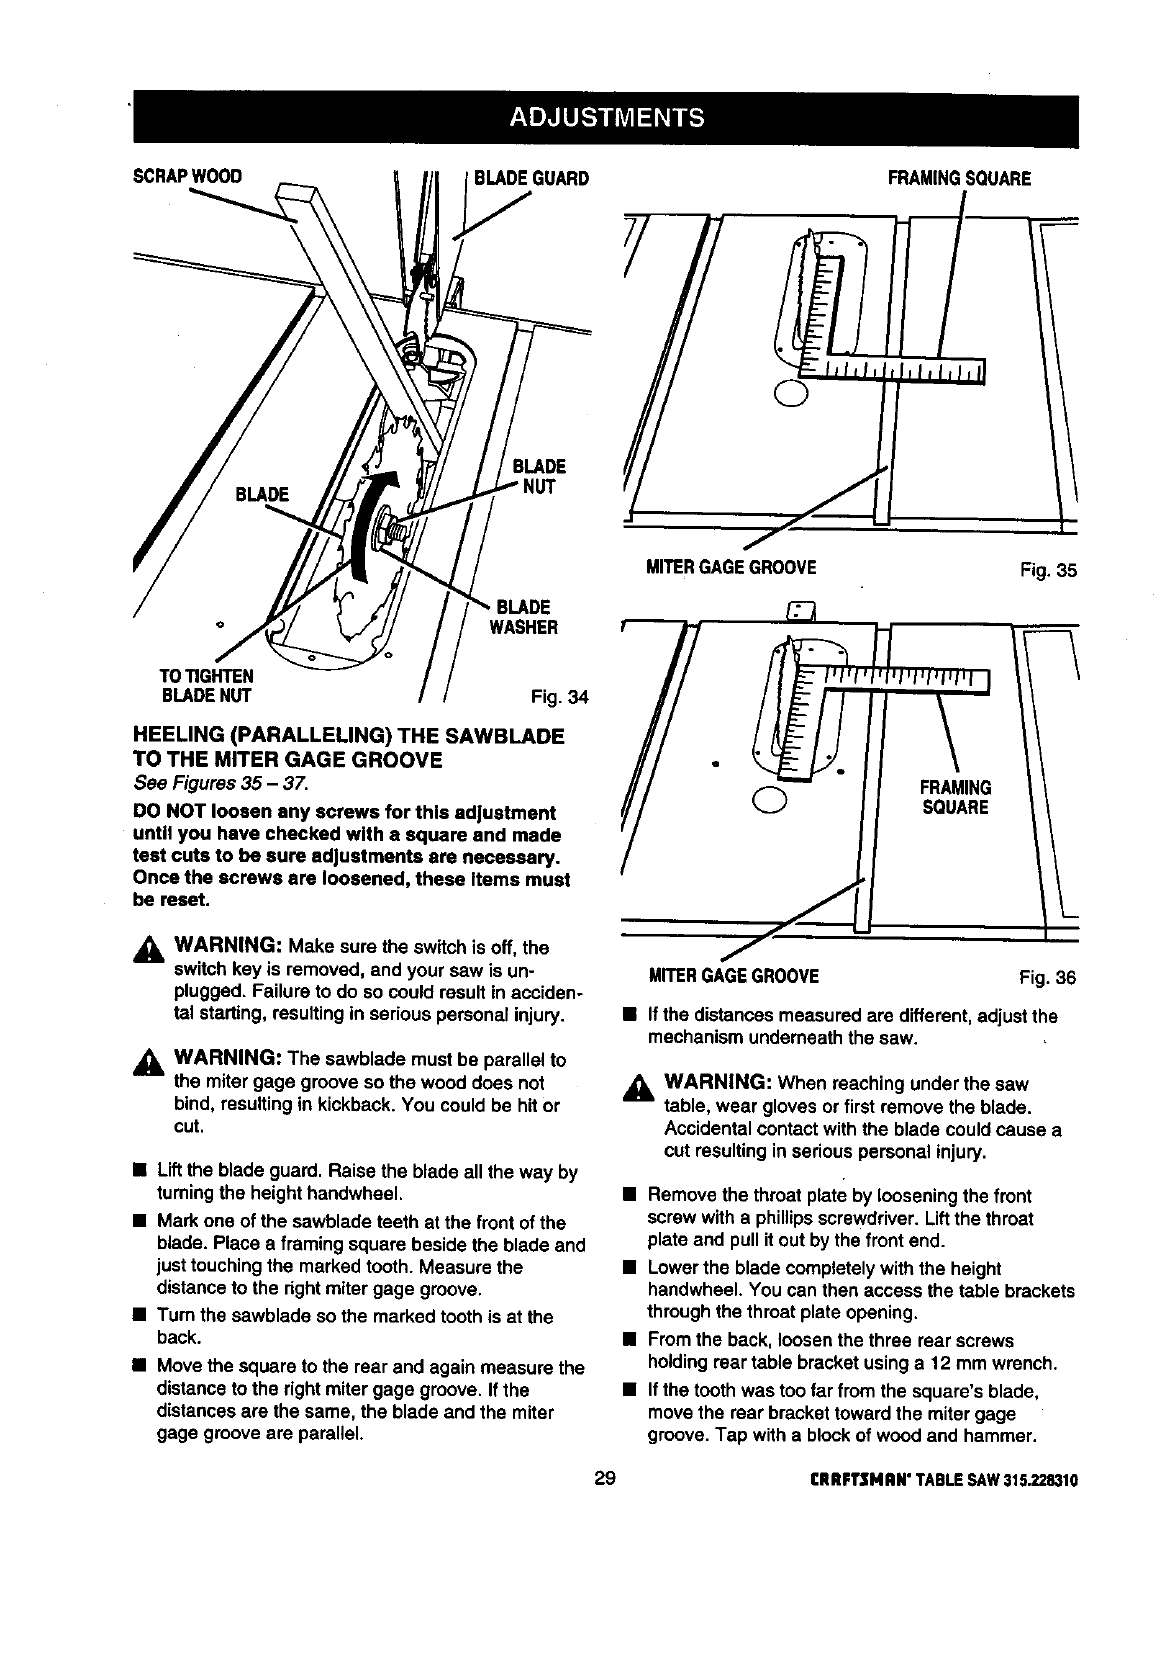
SCRAPWOOD
BLADEGUARD
BLADE
NUT
WASHER
TOTIGHTEN
BLADENUT Fig. 34
HEELING (PARALLELING) THE SAWBLADE
TO THE MITER GAGE GROOVE
See Figures 35 - 37.
DO NOT loosen any screws for this adjustment
until you have checked with a square and made
test cuts to be sure adjustments are necessary.
Once the screws are loosened, these Items must
be reset.
_k WARNING: Make sure the switchisoff, the
switchkey is removed, and your saw is un-
plugged.Failure to do so couldresultin acciden-
tal starting,resultingin seriouspersonal injury.
_l, WARNING: The sawblade mustbe parallel to
the mitergage groove sothe wood does not
bind,resultingin kickback.You couldbe hitor
cut.
• Liftthe blade guard. Raisethe blade all the way by
turning the height handwheel.
• Mark one of the sawblade teeth at the front of the
blade. Place a framing square beside the blade and
just touching the marked tooth. Measure the
distance to the right miter gage groove.
• Turn the sawblade so the marked tooth is at the
back.
• Movethe square to the rear and again measure the
distanceto the rightmitergage groove. If the
distancesare the same, the blade and the miter
gage groove are parallel.
/
MITERGAGEGROOVE
FRAMINGSQUARE
Fig. 35
(_ FRAMING
SQUARE
f
MITERGAGEGROOVE
Fig. 36
• Ifthe distancesmeasuredare different,adjustthe
mechanismunderneaththesaw.
j_ WARNING: When reaching under the saw
table, wear glovesor firstremove the blade.
Accidentalcontactwith the blade couldcause a
cut resultingin seriouspersonal injury.
• Removethe throatplate by loosening the front
screwwitha phillips screwdriver.Liftthe throat
plateand pull itout by the front end.
• Lowerthe blade completelywiththe height
handwheel.You can then access the table brackets
throughthe throatplate opening.
• Fromthe back, loosenthethree rear screws
holdingreartable bracketusinga 12 mm wrench.
• Ifthe toothwas too far from the square'sblade,
movethe rear brackettowardthe mitergage
groove.Tap with a blockof woodand hammer.
29 CRRFTSNRN"TABLESAW315.228310


