


The engine will not crank when the
start button is pushed.
Check the circuit breaker (CB5).
Reset if tripped.
Make sure the run/stop switch is in
the “RUN” position.
Check for loose or faulty battery
cable connections. See wiring dia-
gram.
The battery may be low or faulty. If
the battery will not accept a charge
replace it.
The starter or starter solenoid may
be faulty (have the engine serviced
at an authorized engine repair
shop).
Check the wiring and the connec-
tions at the starter motor, glow plug
button, CB5 circuit breaker, run /
stop switch and the start button.
See wiring diagram. Check the
chassis ground connections
between the engine block and the
negative battery terminal. Place
the run/stop switch to the “RUN”
position. Press the start button,
while checking for voltage between
a good clean chassis ground con-
nection (-) and lead #231 (+) at the
starter solenoid. See the wiring
diagram. If not voltage is present,
check the start button, the run/stop
switch and the CB5 circuit ground
breaker. See wiring diagram. If
battery voltage is present, the
starter motor or solenoid may be
defective, or the engine may be
prevented from turning due a
mechanical failure.
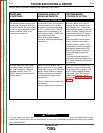
Observe Safety Guidelines detailed in the beginning of this manual.
If for any reason you do not understand the test procedures or are unable to perform the tests/repairs safely,
contact the Lincoln Electric Service Department for technical troubleshooting assistance before you proceed.
Call 1-888-935-3877.
CAUTION
TROUBLESHOOTING & REPAIR
F-13 F-13
VANTAGE® 400
PROBLEMS
(SYMPTOMS)
POSSIBLE AREAS OF
MISADJUSTMENT(S)
RECOMMENDED
COURSE OF ACTION
OUTPUT PROBLEMS
An Across-the-Arc type wire feeder
does not function when connected
to the weld output of the machine.
The Vantage® operated normally
in the CC-STICK mode, and has
normal AC auxiliary output.
Check that the welding terminals
switch is in the “WELD TERMI-
NALS ON” position.
Check the that WELD MODE
switch is in the correct position for
the process being used, typically
“CV-WIRE” mode.
Check for poor weld cable connec-
tions between the feeder and the
welder output terminal, and
between the work and the other
output terminal.
Check that the wire feeder’s work
sensing lead is properly connected
to the work piece and is in good
condition.
The wire feeder may be defective.
Use a voltmeter to check for the
presence of about 58 VDC open
circuit voltage (OCV) across the
output studs of the machine.
If the OCV is low, there may be a
problem with the mode switch.
Perform the CONTROL POTEN-
TIOMETER AND WELD MODE
SWITCH RESISTANCE TEST.
If there is no OCV, see the trou-
bleshooting sections for “No weld
output in any mode”.
Return to Section TOC Return to Section TOC Return to Section TOC Return to Section TOC
Return to Master TOC Return to Master TOC Return to Master TOC Return to Master TOC