


882.00207.00 Chapter 3: Installation 41 of 102
5. Add the calibration weight to each load cell mounting bracket and write down the value
displayed in “weight,” as in step 4.
6. Subtract the values recorded in step 4 from step 5. This is the measured weight. If the
measured weight is within a 0.003 pounds of the weight stamped on the calibration weight,
then you are within spec. If not, follow the steps above to calibrate the blender. (If your
blender is frequently out of calibration, verify the operator is being cautious when removing
the weigh hopper during cleanout).
7. Press “Done” until you have reached the Recipe screen.
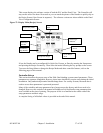
Feeder Calibration (Auger Blenders)
Feeder calibration should be done on all Auger blenders prior to start-up. This allows the blender to
configure the parameters which will best suit the auger size and gearbox ratio of the feeder. To
perform a feeder calibration, the operator must enter the “Feeder Calibration” screen (see menu
structure), select a feeder number, then touch “Press Here.” The feeder calibration will start
automatically and will notify the operator when complete. If the operator so desires, they can repeat
the process by entering in a new feeder number and touching the “Press Here” button.
If the blender does not see enough weight gain during the calibration process or if the weigh hopper
reaches maximum weight, then an error is given and the calibration is a failure. Another useful
feature on the “Feeder Calibration” screen is the ability to manually enter in the “weight per
second” values. This increases the blender learning process and the values can be recorded for
future blending.
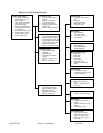
Alarm Setup
This screen allows the operator to configure the alarm settings for each individual feeder. It can
configure whether a feeder will retry during the metering of a batch, and enable or disable the “Out
of Material” alarm for any feeder. If the alarm flag is set to “Stop,” the blender will not
continue. It
stops on that component while continuing to try and meter. The optional low level proximity
switches have their own separate alarm. The alarm will sound, but does not
stop the blender. To
configure each hopper do the following:
1. Enter the Setup Menu.
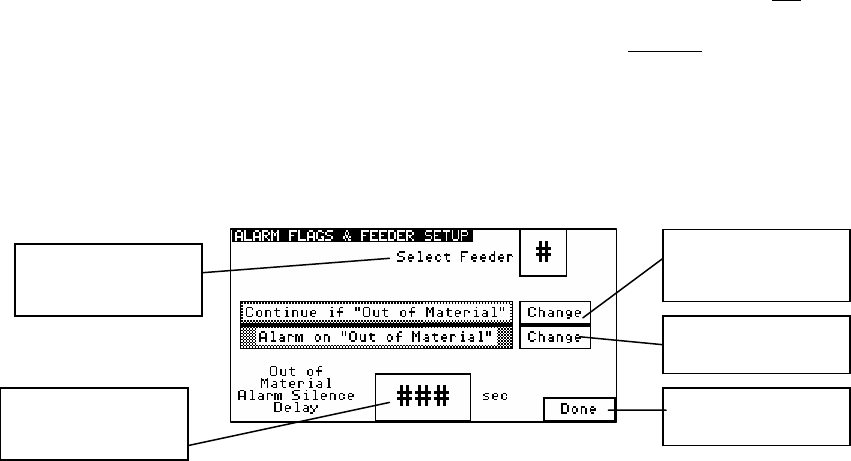
2. Once in the Setup menu, press “Alarm Setup.” This will take you to the “Alarm Flags &
Feeder Setup” screen.
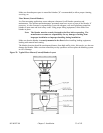
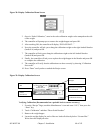
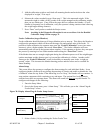
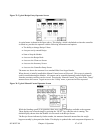
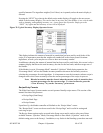
Figure 30: Display Alarm Flags & Feeder Setup Screen
3. Select a feeder (1-6) by touching the “Select Feeder” box.
Note: Anything in the Diagnostics Menu that is not covered here is in the Detailed
Controller Setup Section on page 33.
Enable or Disable
Retries
Enable or Disable
Alarms
Go back to Setup
Directory
Change the Alarm
Silence Delay
Select a Feeder to
Configure