31
4 The 3D Cutting mode
Loading Material
You use the included adhesive sheet to secure material to engrave to the table on the EGX-20.
NOTICE
Before you load material, attach the included adhesive sheet.
See --> p. 10 "Attaching the Adhesive Sheet"
Be sure the unit is in View status when loading material.
Place the plate on the adhesive sheet, then press down
on it from above to anchor it securely.
6 7
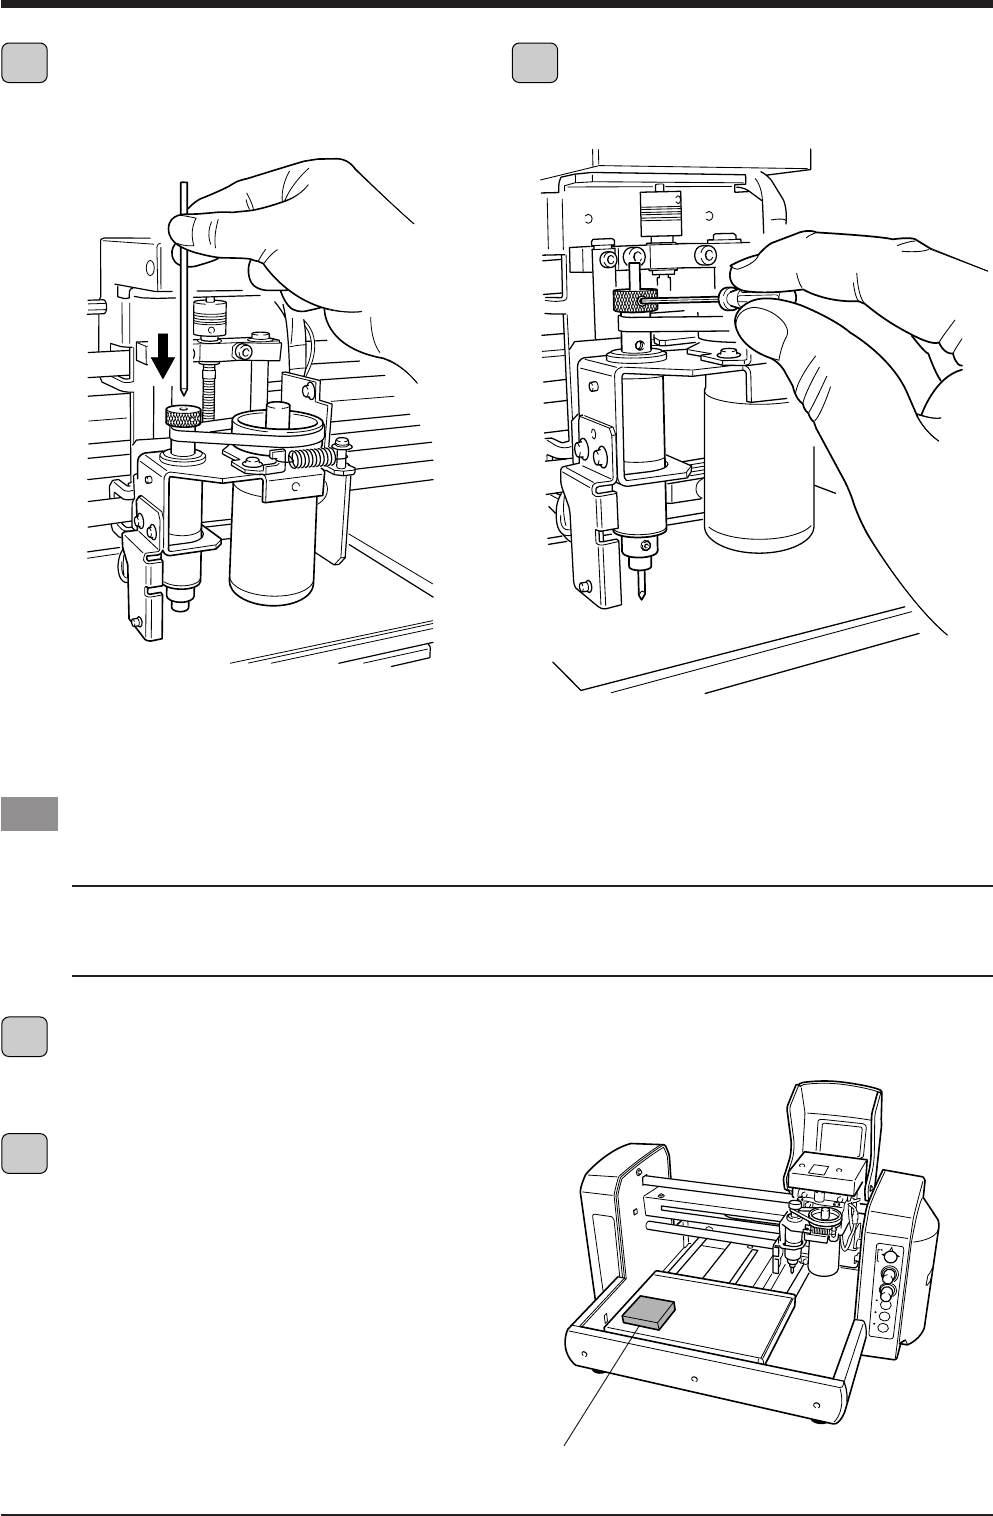
1
2
Insert the cutter into the hole in the cutter holder, then
slowly lower the cutter.
Lower it until the cutter touches the adhesive sheet.
If the View light is dark, then press the View button.
The carriage moves to the right edge and the table moves
to the front, the unit goes into View status, and the Power
and View lights light up.
Place a piece of material on the adhesive sheet, then
press down on it from above to anchor it securely.
You can place the item anywhere on the adhesive sheet.
However, if the plate is placed at an angle with respect to
the table, the engraving will not be straight.
Place it so that it is aligned straight with the corners and
sides of the table.
Use the included hexagonal wrench to tighten the
retaining screw for the cutter holder and secure the cutter
in place.


