35
4 The 3D Cutting mode
In 3D Engrave, go to the [Relief] menu and select [Relief
Size].
The [Relief Size] dialog box appears.
For Size, type in the size values for the relief in the
[Vertical] and [Horizontal] entry boxes, and in
[Resolution], enter the degree of detail. Then click [OK].
Click the shape or text string you want for adding
thickness to select it.
Click the
button.
The [Create Relief] dialog box appears.
The dialog box may differ depending on the type of
object you selected. The window shown below is the
dialog box that appears when you are creating a shape or
text.
Make the settings for the items required to create the
relief, then click [OK].
Specifying the Size of the Relief
Relief area of the 2D screen
Creating Shapes and Text
To create shapes and text, you click the shape-drawing buttons and
drag in the relief area.
To type in text, click the button, then click inside the relief
area. When the character cursor appears, type in the text from the
keyboard.
To change the size of shapes or text, refer to "Working with Text
Strings" on page 22.
Shape-drawing buttons
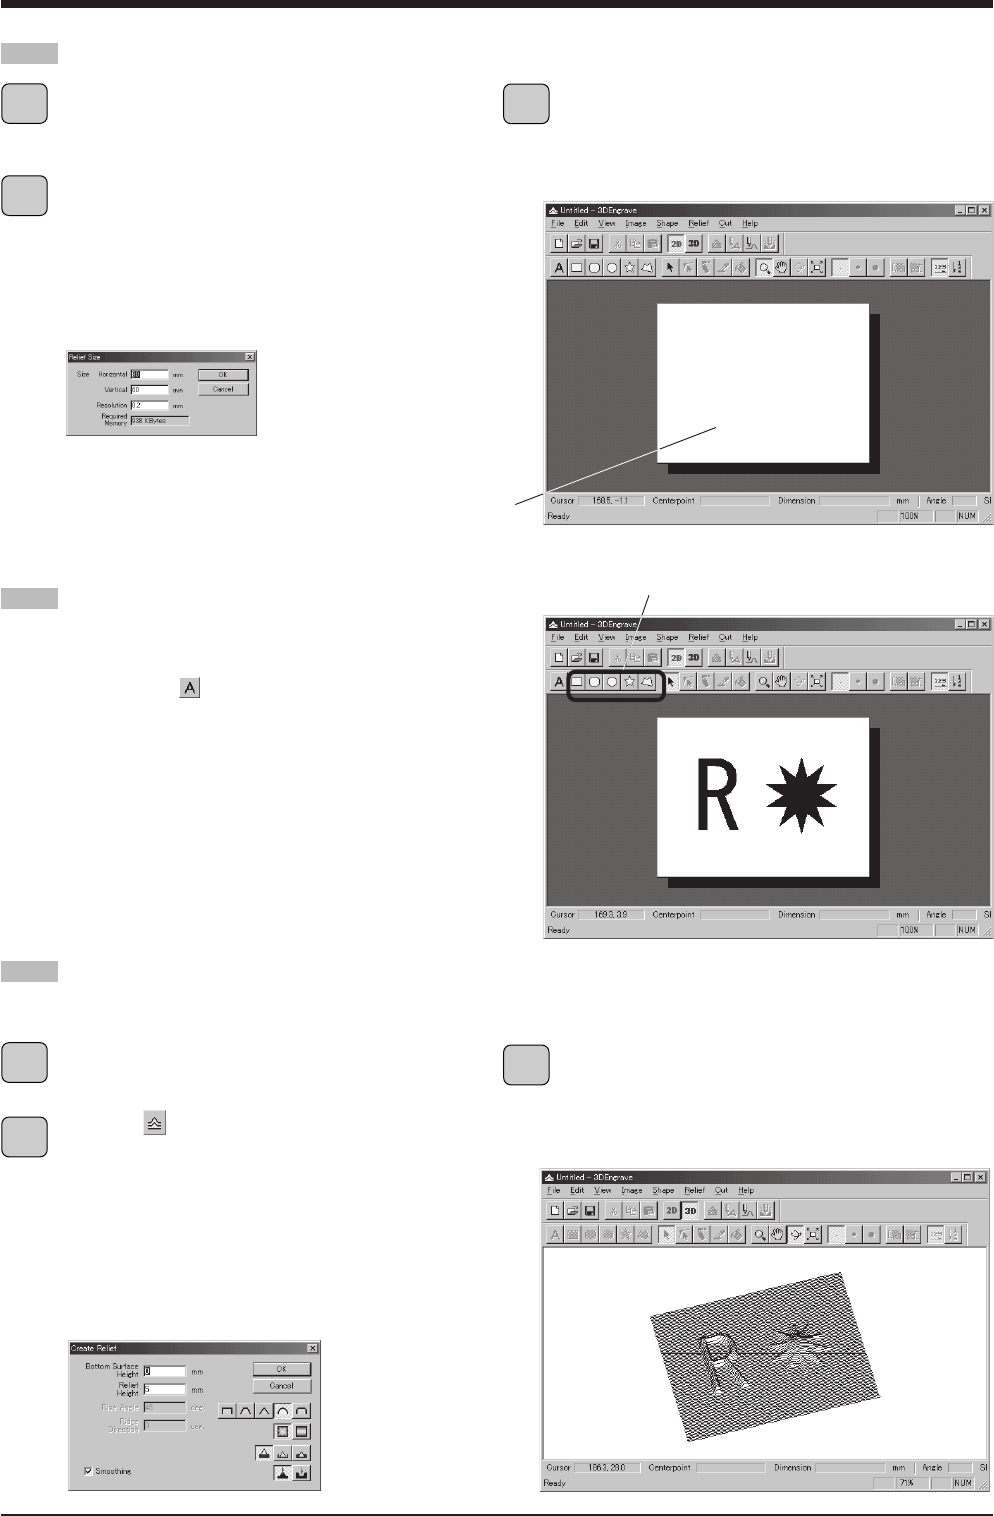
Creating a Raised Engraving (Relief)
Add thickness to shapes and text to create a relief.
* The maximum
cutting height is 7 mm.
The shape of the relief is displayed as a three-
dimensional solid.
This window is called the "3D screen." It displays the
shape of the relief and the tool path. You cannot edit
shapes or text.
The relief area is displayed. The relief area is where you
design the relief.
The screen displayed at this time is called the "2D
screen." It's the screen for typing in text and creating
shapes.
1
2
1
2
3
3


