


Dual Servo Spin Welder User’s Manual
Dukane Manual Part No. 403-570-01Page 34
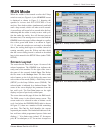
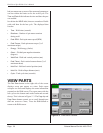
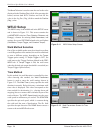
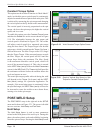
The Move To button is used to rotate the tool to the value
displayed in the Position (Deg.) eld. After pressing this
button, activate both RUN switches and wait for the
value in the Jog Pos. (Deg.) eld to match the Position
(Deg.) value
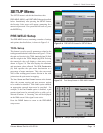
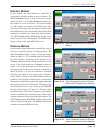
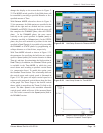
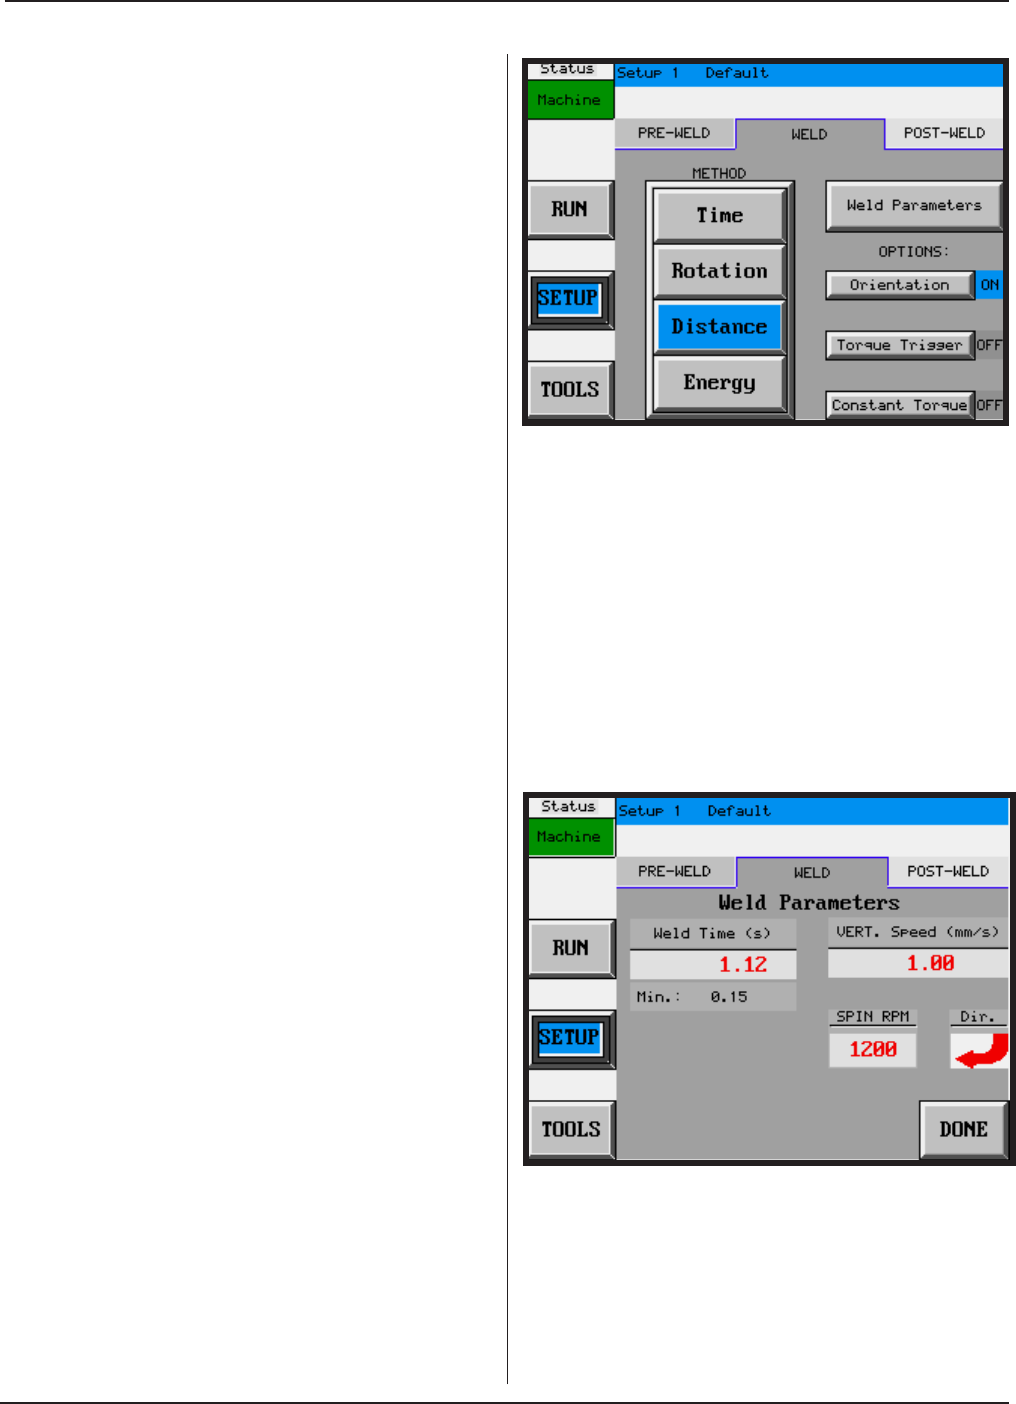
WELD Setup
The WELD setup is the middle tab in the SETUP menu
and is shown in Figure 5-11. This screen contains the
weld METHOD selection (Time, Rotation, Distance, and
Energy), a button for entering Weld Parameters, and
settings for several OPTIONS related to the weld phase
(Orientation, Torque Trigger, and Constant Torque).
Weld Method Selection
One of the available modes must be selected to perform
a weld. Regardless of the method, the weld is considered
to start at different points, depending on the Torque
Trigger option setting. If Torque Trigger is OFF, the
weld starts at the Trigger Position dened in the PRE-
WELD tab. If Torque Trigger is ON, the weld starts
when the desired spin torque threshold is exceeded (see
Torque Trigger Option below).
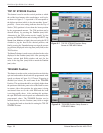
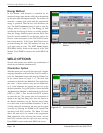
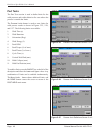
Time Method
In this method, the weld duration is controlled by time.
After choosing this method, the Weld Parameters
button is used to enter the weld settings shown in
Figure 5-12. The Weld Time (s) entry species the weld
duration in seconds. Below this entry, a minimum weld
time value is displayed. This value corresponds to the
time needed for decelerating (i.e., slowing down and
stopping) the servo motors and is included as part of the
total weld time. The VERT. Speed (mm/s) sets the press
weld speed in millimeters per second. The SPIN RPM
species the spin tool speed, which is constant during
the weld until the start of deceleration. The Dir. eld
species the spin direction. The DONE button causes a
return to the main WELD tab screen.
Figure 5–11 WELD Main Setup Screen
Figure 5–12 Weld Parameters Screen for Time
Method