


Return to Section TOC Return to Section TOC Return to Section TOC Return to Section TOC
Return to Master TOC Return to Master TOC Return to Master TOC Return to Master TOC
PRO-CUT 25
TROUBLESHOOTING & REPAIR
F-32 F-32
PROCEDURE
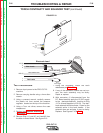
1. Remove input power to the PRO-CUT 25 machine.
2. Remove carrying handle using a 4mm allen
wrench.
3. Using a crescent wrench, carefully remove the
plastic nut from around the pressure regulator
located on the top of the machine.
4. Using a 7mm nut driver, remove the case wrap-
around.
5. Perform Capacitor Discharge Procedure.
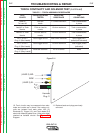
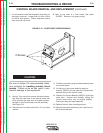
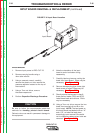
6. Using a very small flathead screwdriver or a thin
knife blade, carefully remove the red plastic cap
from the front of the plastic OUTPUT knob located
on the front of the machine. See Figure F14.
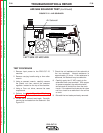
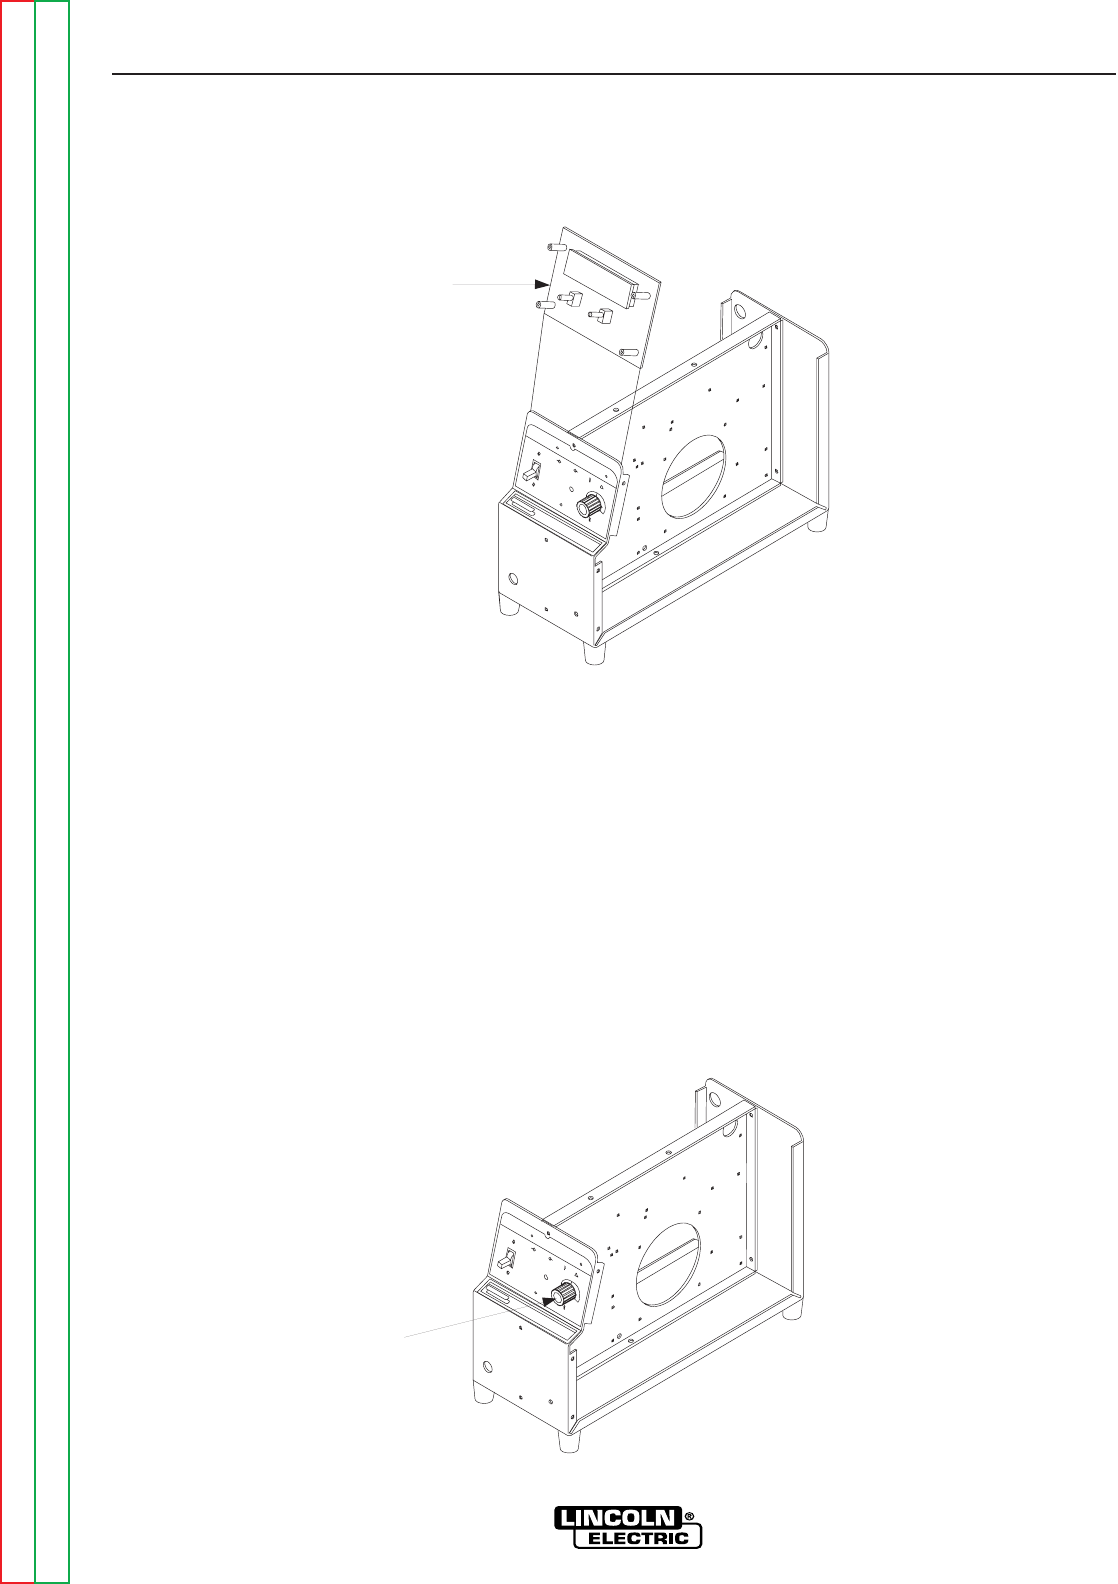
CONTROL BOARD REMOVAL AND REPLACEMENT (continued)
L
IN
C
O
L
N
E
L
E
C
T
R
IC
PRO-CUT 25
ON
OFF
PURGE
P
OW
ER
GAS PR
ESSURE
T
HERMAL
SAFETY
!
R
E
Q
U
I
R
E
S
2
0
A
/
1
1
5
V
B
R
A
N
C
H
C
I
R
C
U
I
T
R
E
Q
U
I
R
E
S
3
0
A
/
1
1
5
V
B
R
A
N
C
H
C
I
R
C
U
I
T
2
5
2
0
1
5
Small Red
Cap
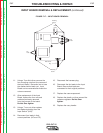
FIGURE F.13 - CONTROL BOARD LOCATION
FIGURE F.14 - SMALL RED CAP REMOVAL
L
IN
C
O
L
N
E
L
E
C
T
R
I
C
PRO-CUT 25
ON
OFF
PURGE
PO
WER
G
AS PRESSURE
TH
ERM
A
L
SAFETY
!
R
E
Q
U
I
R
E
S
2
0
A
/
1
1
5
V
B
R
A
N
C
H
C
I
R
C
U
I
T
R
E
Q
U
I
R
E
S
3
0
A
/
1
1
5
V
B
R
A
N
C
H
C
I
R
C
U
I
T
2
5
2
0
1
5
Control
Board