31
INSTALLATION
SECTION 3-5
CHECK FOR MECHANICAL INTERFERENCES
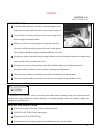
TURN POWER OFF and LOCK IT OUT per OSHA 1910.147 OR ANSI Z244.1-1982
(Lockout/Tag-out of Energy Sources).
Open the cutting chamber. Refer to the procedures entitled Screen Replacement and Cutting
Chamber Access in Section 6.
Turn the rotor slowly with gloved hands, at least one full revolution, to verify that there are no
interferences between the rotor knives and bed knives and/or with the screen.
SET UP THE MACHINE FUNCTIONS
Set and torque the rotor knives and bed knives as shown in Section 4, Settings and
Adjustments.
Adjust the V-belt drive per the procedure in Section 4 entitled Drive Belt Replacement or
Adjustment
CHECK ROTATION OF MOTORS
With the cutting chamber closed, jog the drive motor by pushing the start and stop buttons in
quick succession. This starts and stops the granulator motor. Be alert for mechanical
interferences between parts. Stop the machine immediately if you hear unexpected sounds.
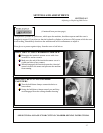
Jog the motor to check the rotational direction. The V-belt sheave must rotate in the direction
shown by the arrow located on top of the belt guard. Have a helper confirm the direction by
looking at the V-belt through the viewing window on the side of the belt guard cover.
If your unit has the optional discharge blower located on either the right or left side of the
machine, check the direction of rotation of the blower.
It is extremely important that a licensed electrician performs these steps.
If any motor rotates in the wrong direction, stop the machine by depressing the stop button.
TURN OFF AND LOCK OUT the power at the disconnect switch which supplies power to the main
electrical control panel per OSHA 1910.147 OR ANSI Z244.1-1982 (Lockout/Tag-out of Energy
Sources). If the disconnect is not lockable, remove the fuses.
(Continued on next page)


