


4 Operating the Power Supply Remotely
52 Series N5700 User’s Guide
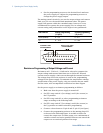
5 You can now use Interactive IO within the Connection Expert to
communicate with your instrument, or you can program your
instrument using the various programming environments. You
can also use the Web browser on your computer to communicate
with the instrument as described under “Using the Web Server”.
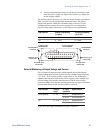
LAN Communication
The Agilent IO Libraries Suite along with instrument drivers for
specific programming environments can be used to communicate
with your power supply. Your can also communicate with your power
supply using its built-in Web server, the Telnet utility, or sockets.
These latter methods are a convenient way to communicate with the
power supply without using I/O libraries or drivers.
Ethernet Connection Monitoring
Agilent N5700 power supplies that have the LXI label on the front
panel provide Ethernet connection monitoring. With Ethernet
connection monitoring, the instrument’s LAN port is continually
monitored, and automatically reconfigured when the instrument is
unplugged for a minimum of 20 seconds and then reconnected to a
network. The front panel LAN indicator will come on when the LAN
port is connected and configured.
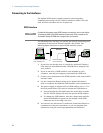
Using the Web Server
Your power supply has a built-in Web server that lets you control it
directly from an internet browser on your computer. With the Web
server, you can control and configure all of the front panel functions
as well as additional functions such as triggering and the LAN
parameters, which are not available from the front panel.
NOTE
The built-in Web server only operates over the LAN interface. It requires Internet
Explorer 5+ or Netscape 6.2+. You also need the Java (Sun) plug-in. This is
included in the Java Runtime Environment. Refer to Sun Microsystem’s website.
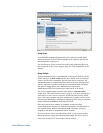
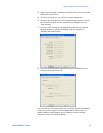
The Web server is enabled when shipped. To launch the Web server:
1 Open the internet browser on your computer.
2 In the Tools menu, under Internet Options, select Connections,
then LAN Settings, and make sure that the Bypass proxy server
for local addresses box is checked.
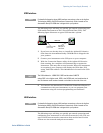
3 Enter the instrument’s hostname into the browser’s Address field
to launch the Web server. The following home page will appear.
4 Click on the Browser Web Control button in the navigation bar
on the left to begin controlling your instrument.
5 For additional help about any of the pages, click on the Help with
this Page button.
If desired, you can control access to the Web server using password
protection. As shipped from the factory, no password is set. To set a
password, refer to the section “Configuring the LAN Parameters”.