


21
Performance Route Processor Installation and Configuration Guide
OL-11656-01
Removing and Installing a PRP
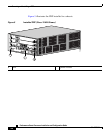
Note The procedures in the following sections use illustrations of a Cisco 12404
Internet Router to support the descriptions of installing and removing a route
processor card. The card cages of Cisco 12000 Series Routers differ in many
ways. However, the process of installing and removing a route processor card are
basically the same across the entire chassis line. Therefore, separate procedures
and illustrations for each chassis are not included in this publication.
Caution Cisco recommends that you do not remove a PRP while the system is operating.
Doing so will cause the system to stop forwarding packets and might cause the
system to cease network operation. If you are upgrading your router from a GRP
to a PRP, you must first power down the router and then switch out the RP cards.
Cisco strongly recommends that you avoid configuring your router using mixed
RP cards. If RP redundancy is desired, you must install two PRPs.
Note You must remove the PRP-2 before you can install or remove the compact flash
disk or the hard disk drive. See the “Additional Configuration and Maintenance
Tasks” section on page 54 for more information.
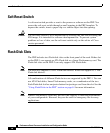
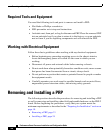
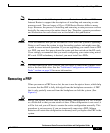
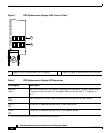
Removing a PRP
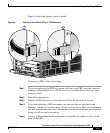
When you remove a PRP from a slot, be sure to use the ejector levers, which help
to ensure that the PRP is fully dislodged from the backplane connector. A PRP
that is only partially removed from the backplane can halt the system. (See
Figure 6.)
Caution Before you replace the PRP, back up the running configuration to a TFTP server
or a Flash disk so that you can retrieve it later. If the configuration is not saved, it
will be lost and you will have to reenter the entire configuration manually. This
procedure is not necessary if you are temporarily removing a PRP; lithium
batteries will retain the configuration in memory until you replace the PRP in the
system.