


41
Performance Route Processor Installation and Configuration Guide
OL-11656-01
Upgrading to the PRP
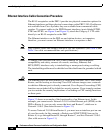
Step 7 Make a note of the image name that is being used on the PRP. You can use the
command dir disk1:.
Step 8 Set the boot system command to boot the new IOS image. Note that the reference
will be against disk0:. This is deliberate. Use the command boot system flash
disk0: PRP-image-name.
Step 9 Save the running configuration to disk1: by using the command copy
running-config disk1: config-name. You can check the configuration by using
the command more disk1: config-name.
Note Do not save the configuration on the GRP. In other words, do not type
copy running-config startup-config or write memory. Not saving the
configuration ensures that the GRP maintains its original configuration,
which will enable you to reinstall the GRP in the future if necessary.
Step 10 Confirm that disk1 now contains the IOS image and configuration by using the
command dir disk1:. The Cisco IOS image needs to be the first image on the disk.
Step 11 Turn off the router.
Step 12 Remove the GRP and insert the PRP in its place.
Step 13 Connect the Ethernet and console cables to the PRP.
Step 14 Remove the Flash disk from slot1: on the GRP and insert the Flash disk into slot0:
on the PRP.
Step 15 Boot the router.
Step 16 The router will come up with no configuration and prompt you to enter the Initial
Configuration menu. Abort the Initial Configuration options by entering no when
prompted.
Step 17 Copy the configuration file which is stored on disk0: to the startup-configuration
on the PRP by using the command copy disk0: config-name startup-config.
Note Do not copy the configuration file to the running configuration.