Upgrading to the PRP
40
Performance Route Processor Installation and Configuration Guide
OL-11656-01
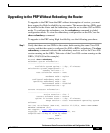
Upgrading to the PRP With Rebooting the Router
If for any reason you cannot use High Availability, you should use the following
procedure to upgrade from a GRP to a PRP.
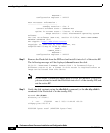
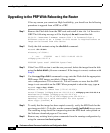
Step 1 Remove the Flash disk from the PRP card and install it into slot 1 of the active
GRP. The following message will be displayed; do not format the disk.
22:21:31: %PCMCIAFS-5-DIBERR: PCMCIA disk 1 is formatted from a
different router or PC. A format in this router is required before an
image can be booted from this device
Step 2 Verify the disk contents using the dir disk1: command.
Router# dir disk1:
Directory of disk1:/
1 -rw- 17329392 Dec 3 2003 11:44:46 +00:00
c12kprp-p-mz.120-27.S
63832064 bytes total (46465024 bytes free)
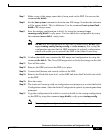
Step 3 If the Cisco IOS version is not the one you need, delete the image from the disk
using the delete disk1: filename command. If the image is correct, continue with
Step 6.
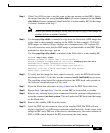
Step 4 Use the copy tftp: disk1: command to copy onto the Flash disk the appropriate
PRP image. PRP images are titled c12kprp-<feature
set>-<compression>.120-<release id>. You will receive an error that the PRP
image is not executable on the GRP. When prompted to abort the copy, type n.
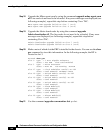
Router# copy tftp: disk1:
Address or name of remote host [172.16.16.254]?
Source filename [c12kprp-boot-mz.120-26.4.S]? c12kprp-p-mz.120-26.4.S
Destination filename [c12kprp-p-mz.120-26.4.S]?
Accessing tftp://172.16.16.254/c12kprp-p-mz.120-26.4.S...
%Warning: File not a valid executable for this system
Abort Copy? [confirm] n
Step 5 To verify that the image has been copied correctly, verify the MD5 hash for the
new image on disk1:. To do this, use the command verify /md5 disk1image-name.
The resulting string should be compared against the MD5 hash value posted on
the Software download page on Cisco.com.
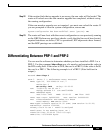
Step 6 Remove any existing boot system commands from the running configuration by
using the command no boot system.


