


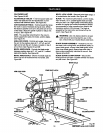
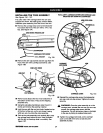
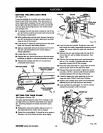
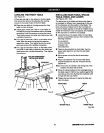
SETTING THE ARM LOCK KNOB
See Figure 16.
It may be possibleto move the arm when locked,if
the arm lockknob istoo loose. Ifthe arm does not
move freely when unlocked, the arm lockknob may
be too tight. Use this procedure to checkand set the
arm lock knobbyturning the arm lockwheel (under
the carriage arm).
• To release the arm lock knob,located on topof the
arm at the front, pullthe arm lockknobforward until
the springiscompressed.
• While holdingthe arm lockknobforward, swingthe
arm 30" tothe leftorthe right,referringtothe miter
scale on top of the column.
• Lockthe arm in place bypushingthe arm lock knob
back untilit pops inthe locked position.
• Apply a reasonable amountof pressureon the arm.
The arm can beforced butif itmoveseasily, it
needs adjustment.
• Locate the arm lockwheel.
• Release the arm lock knoband turnthe lockwheel
clockwisetotighten or counterclockwiseto loosen.
• Repeat above stepsuntilthe arm movementis
minimizedwhen locked.
ARMLOCKKNOB
ARM
TURNCOUNTERCLOC_
WISETOLOOSEN
CARRIAGE
TURNCLOCKWISE
STOPSCREW ARM TOTIGHTEN
LOCKWHEEL Fig. 16
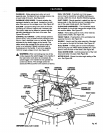
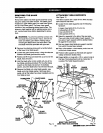
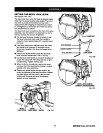
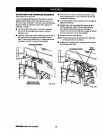
SETTING THE YOKE CLAMP
See Figures 17,4and 17B.
The yoke clamp keeps the yokefrom rotatingonthe
carriage when you want the saw blade to be station-
ary. Use this procedure to check and set the yoke
clamp.
• Release the yoke lock handle (belowthe arm on
the rightside) so the motorcan be rotated.
• Swivel the motorslightly.It shouldbe atan angle in
between one of the preset positive stop angles.
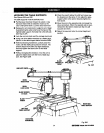
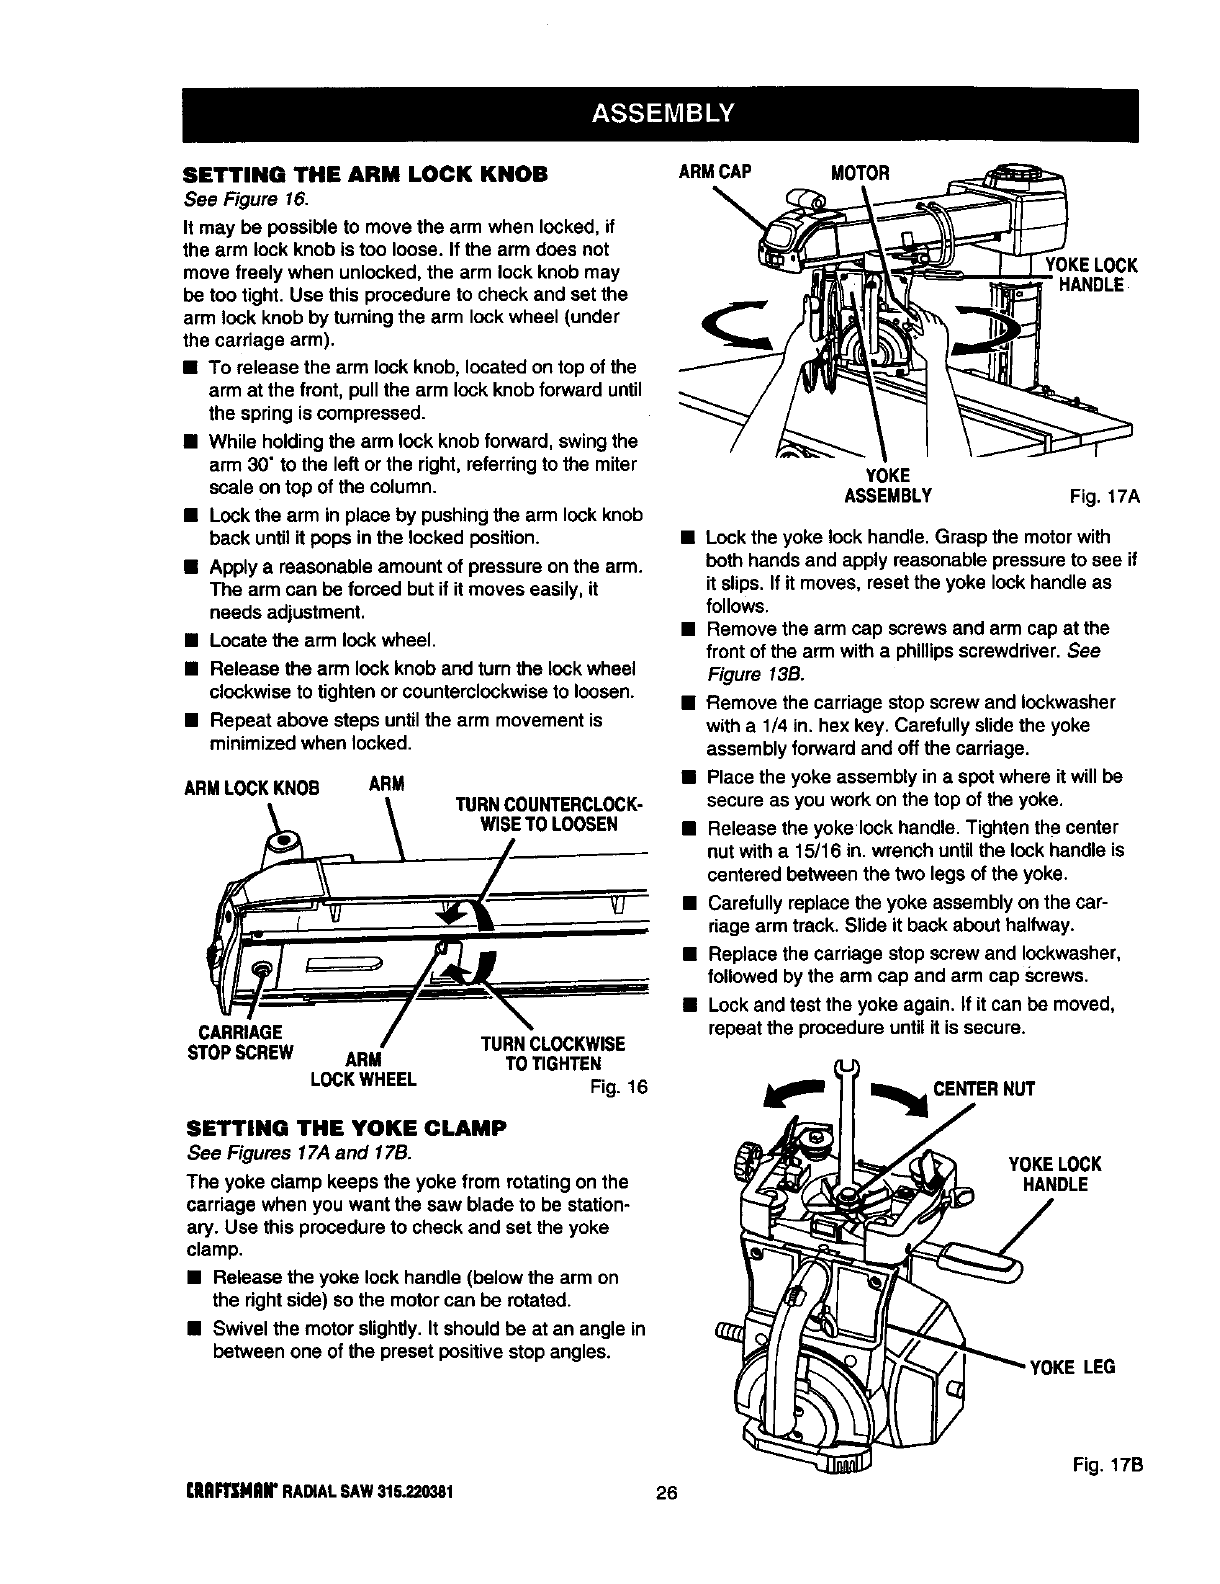
ARMCAP MOTOR
YOKELOCK
HANDLE
YOKE
ASSEMBLY Fig. 17A
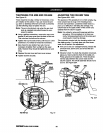
• Lockthe yoke lock handle. Grasp the motorwith
bothhands and applyreasonable pressure to see if
itslips. Ifit moves, resetthe yoke lockhandle as
follows.
• Remove the armcap screwsand armcap at the
front ofthe arm witha phillipsscrewdriver.See
Figure 13B.
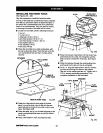
• Remove the carriage stopscrew and Iockwasher
witha 1/4 in. hex key. Carefullyslidethe yoke
assembly forward and offthe carriage.
• Place the yoke assembly in a spotwhere itwillbe
secure as you work on thetop ofthe yoke.
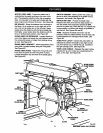
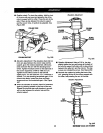
• Release the yoke lock handle.Tighten thecenter
nut with a 15/16 in.wrench untilthe lockhandle is
centered between the two legs ofthe yoke.
• Carefullyreplacethe yoke assembly on thecar-
riagearm track. Slide itback abouthalfway.
• Replace the carriage stop screw and Iockwasher,
followed bythe arm cap and arm cap Screws.
• Lockand test the yoke again. If it can be moved,
repeat the procedureuntil itis secure.
_lil _J_ m_ CENTERNUT
YOKELOCK
HANDLE
LEG
Fig. 17B
tlIAFI_MRIr RADIALSAW315.220381 26