


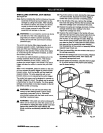
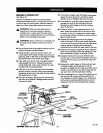
RIP CUT HAZARDS AND PRECAUTIONS
Two hazards are specificallyassociated with rip
cutting:outfeed zone and wrong way feed,
In the ouffeedzone (behind the blade), the blade
teeth pointdown. The slightestcontact whilethe blade
is stillspinningcan snag clothing,jewelry, the work-
piece, or even skin, causing seriouspersonal injury.
Wrongway feed occurswhen the workpiececontacts
the blade from the ouffeedside. It is very hazardous
and willjerk the workpiece violently.You could be cut
ifyou are holdingthe workpiece.
,_k WARNING: Failure to observe any ofthese
precautionscan result inserious injury.
• The first precaution is, ofcourse, simplyto stay
completely away from the ouffeed zone. Keep
handsaway from the outfeed zone.
• Pointthe anti-kickback pawls away from the blade
teeth to snag a workpiece ifthe blade grabs. They
should be positionedto rest lightlyon the
workpiece.The flat side of the pawls should be
level and horizontal.
• Set the rivingknifeto just clear the table.
• Set the hold downin front ofthe bladeto just clear
the workpiece.
• Start and finish yourcut from the infeed side.
• Push the workpiece past the pawls with push-
blocksand pushstickstofinish the cut.
• If the blade jams, turnthe saw offwith the switch
on the arm, remove the yellow key, and waitfor the
blade to fullystop beforefreeing it.
• Make sure the blade is parallelto the fence and the
workpiece is not warped or twisted.
• Make sure no pressure isapplied to the workpiece
on the ouffeedside.
• Make sure the blade guard is lowered and is
workingproperly.
• Alwaysset up the workpiece so the wider part of
the wood is between the blade and the fence. This
stabilizesthe workpiece better.
• Do not release the workpiece until ithas moved
pastthe pawls. Keep pushsticksfirmly in place.
• Use pushsUcksand pushblocks,not yourhands,
when the trailing edge of the workpiece iswithin
3 in. ofthe blade. Ifthe blade isset 2 in. or more
from the fence, use a pushstiok.Use a pushblock
and auxiliaryfence when the blade is between 2 in.
and 1/2 in.from the fence. (If the cut isnarrower
than 1/2 in., use a different saw.) For large panel
ripcuts, use a featherboard instead of pushblocks
or pushsticks.See the sectionon CuttingAids.
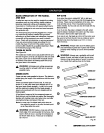
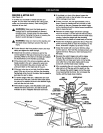
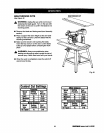
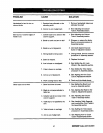
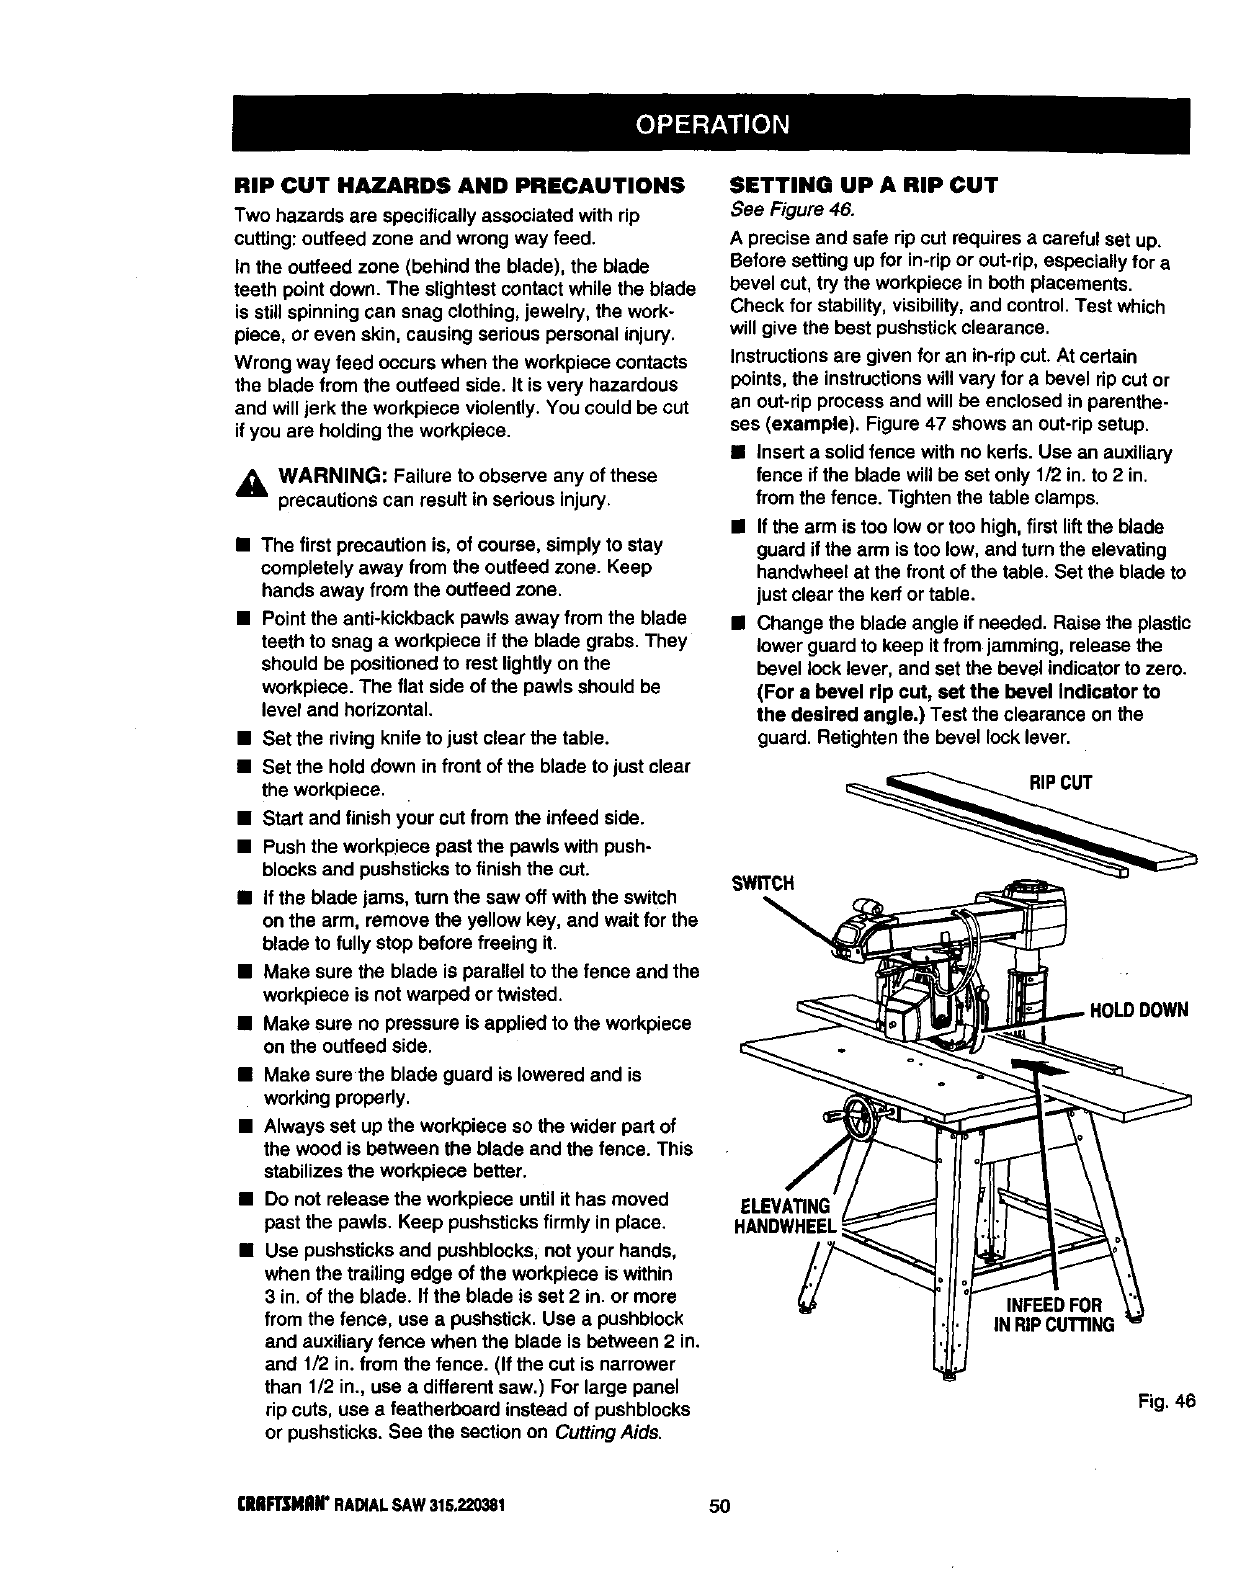
SETTING UP A RIP CUT
See Figure 46.
A preciseand safe ripcutrequires a careful set up.
Beforesettingup for in-ripor out-rip, especiallyfor a
bevel cut, trythe workpiece in both placements.
Check for stability,visibility,and control.Test which
willgive the best pushstickclearance.
Instructionsare givenfor an in-ripcut. At certain
points,the instructionswillvary for a bevel ripcut or
an out-ripprocessand will be enclosed in parenthe-
ses (example), Figure47 shows an out-ripsetup.
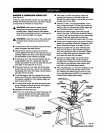
• Inserta solidfence withno kerfs. Use an auxiliary
fenceif the bladewillbe set only 1/2 in.to2 in.
from the fence. Tighten the table clamps,
• Ifthe armis too lowor too high,firstliftthe blade
guard ifthe arm istoo low, and turnthe elevating
handwheelat thefrontof the table. Set the bladeto
justclear the kerf or table.
• Change the bladeangle if needed. Raise the plastic
lowerguard to keep itfromjamming, release the
bevel lock lever,and set the bevel indicatorto zero.
(For a bevel rip cut, set the bevel Indicator to
the desired angle.) Test the clearance on the
guard. Retightenthe bevel lock lever.
ELEVATING
HANDWHEEL
INFEEDFOR
IN RIPCUTTING
Fig. 46
I'IIIIFTSMIIIP RADIALSAW315.220381 50