


OPERATION
BB-10 BB-10
V160-S & -T
Return to Section TOC Return to Section TOC Return to Section TOC Return to Section TOC
Return to Master TOC Return to Master TOC Return to Master TOC Return to Master TOC
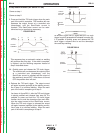
4-Step Restart Enabled (DIP Switch 4 = ON)
Same as step 1.
Same as step 2.
3. Press and hold the TIG torch trigger when the main
part of the weld is complete. The machine will now
decrease the output current at a controlled rate
(downslope), until the Start/Crater current is
reached. This Start/Crater current can be main-
tained as long or as short as necessary.
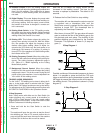
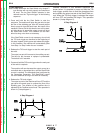
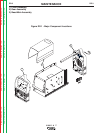
FIGURE BB.10
This sequence has an automatic restart so welding
will continue after this step. If the weld is complete-
ly finished, use the following sequence instead of
step 3 described above.
3A. Quickly press and release the TIG torch trigger.
The machine will now decrease the output current
at a controlled rate (downslope), until the
Start/Crater current is reached and the output of
the machine is turned OFF. After the arc is turned
OFF the postflow time will start.
4. Release the TIG torch trigger. The output current
will again increase (upslope) to the welding current,
like in step 2, to continue welding. When the main
part of the weld is complete go to step 3.
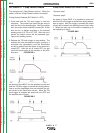
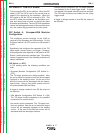
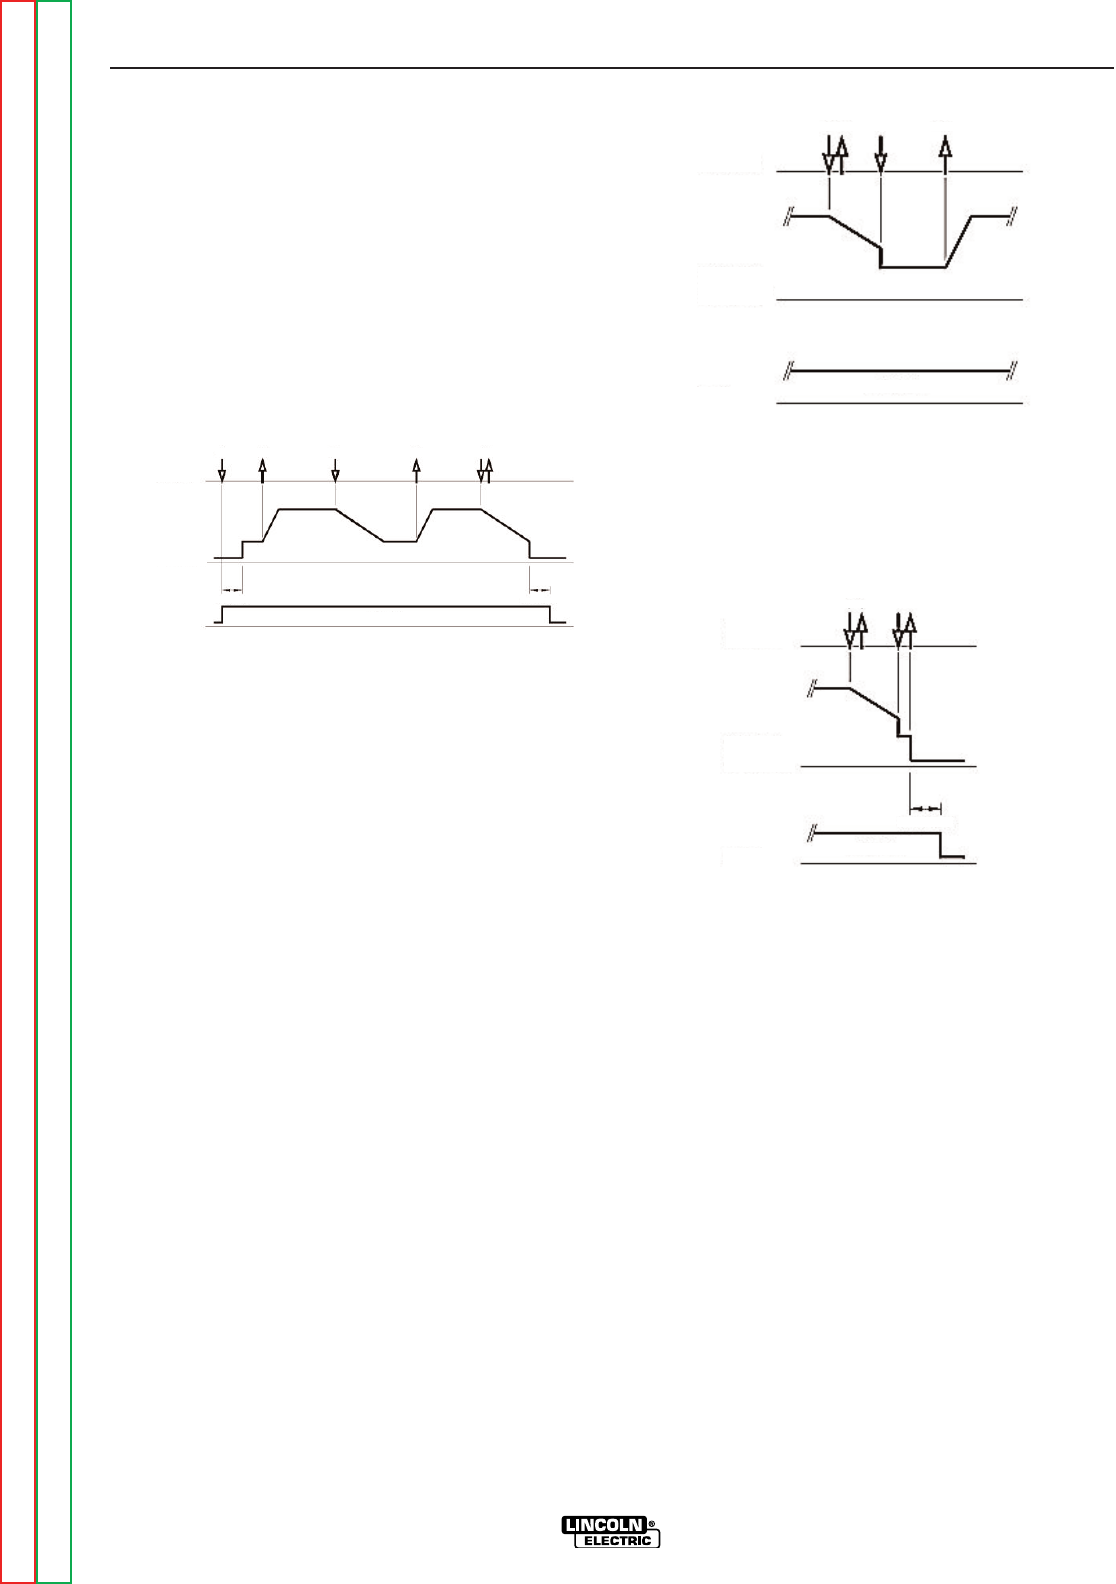
As shown in figure BB.11, after the TIG torch trigger
is quickly pressed and released from step 3A, it is
possible to press and hold the TIG torch trigger
another time to end the downslope time and main-
tain the output current at the Start/Crater current.
When the TIG torch trigger is released the output
will again increase (upslope) to the welding current,
like in step 4, to continue welding. When the main
part of the weld is complete go to step 3.
FIGURE BB.11
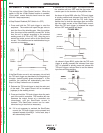
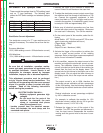
As shown in figure BB.12, again after the TIG torch
trigger is quickly pressed and released from step 3A,
it is possible to quickly press and release the TIG
torch trigger a second time to end the downslope
time and stop welding.
FIGURE BB.12
TORCH
BUTTON
OUTPUT
CURRENT
G
AS
––GAS ON––
P
OST-FLOW
POST-FLOW
(1) (3A)
(4)
(3)
(2)
TORCH
B
UTTON
O
UTPUT
CURRENT
GAS
––GAS ON––
(3A)
(
4)
TORCH
BUTTON
OUTPUT
CURRENT
GAS
––GAS ON––
(3A)
POST-FLOW