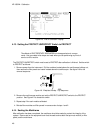
3. Touch the Channel field, then select S1 from the pop-up menu (where S is the slot letter where the
oscilloscope module is installed in the mainframe).
4. Touch the Start field and follow the instructions on the display.
5. After completion of channel 1 delay calibration, remove the cable from the rear panel of the
oscilloscope.
6. Repeat steps 3 through 5 for channel S2.
7. After completing all of the channel delay calibrations, remove the cable from the rear panel of the
oscilloscope.
Calibrate the Time Null of the Self Cal menu as follows:
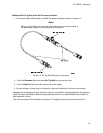
1. Connect two BNC 50-Ω, 9-inch cables to the BNC tee adapter.
Note
When you touch Start, the instrument will prompt you to connect the cables to
the appropriate locations on the rear panel of the module.
2. Touch the Procedure field, then select Time Null from the pop-up menu.
3. Touch the Channel field, then select S2 from the pop-up menu (where S is the slot letter where the
oscilloscope module is installed in the mainframe).
4. Touch the Start field and follow the instructions on the display.
5. Repeat steps 3 through 4 for each channel, replacing S2 with the appropriate channel number.
6. At the conclusion of the time null calibration, remove the cables from the rear of the module.
Calibrate the Logic Trigger of the Self Cal menu as follows:
1. Obtain one BNC 50 Ω 9-inch cable.
Note
When you touch Start, the instrument will prompt you to connect the cables to
the appropriate locations on the rear panel of the module.
2. Touch the Procedure field, then select Logic Trigger from the pop-up menu.
3. Touch the Start field, then follow the instructions on the display.
4. At the conclusion of the Logic Trigger calibration, remove the cable from the rear of the module.
HP 16532A - Calibration
4-6


