


8 Cutting Printed Material
42
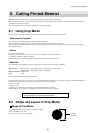
For sizes larger than A4For A4 size (portrait)
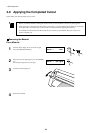
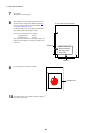
Crop Marks and Figure Layout
Place the crop marks at three locations, as shown in the figure below.
: There must be no soiling and
no figures other than crop
marks within this area.
: Printable area
15 mm
(0.59 in.)
55 mm (2-3/16 in.) or more
CX-24: 610 mm (24 in.) or less
CX-12: 305 mm (12 in.) or less
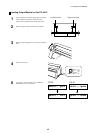
30 to 60 mm
(1-3/16 to 2-5/16 in.)
12.5 to 42.5 mm
(0.5 to 1-5/8 in.)
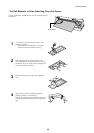
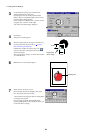
Position the left and right
pinch rollers outside the
crop marks.
Right pinch rollerLeft pinch roller
Blade Protector
Position the crop marks above
the blade protector.
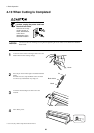
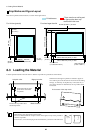
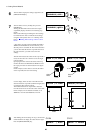
Material may warp when printed on the printer.
Do not use material that has warped as shown in the figure. It may not be possible to
read the crop marks.
In such cases, correct the warping of the material before you load it on the CX-24/12.
20 mm
(0.79 in.)
When the left and right crop marks are slanted 5 degrees or
more with respect to the direction of movement of the cutting
carriage, or when they are displaced by 15 mm (0.59 in.) or
more in the direction of material feed, the crop marks cannot
be detected.
X: the center of the crop marks
M
a
t
e
r
i
a
l
M
a
t
e
r
i
a
l
210 mm
(8-5/16 in.)
500 mm or less
(19-11/16 in.)
57 mm
(2-1/4 in.)
297 mm
(11-11/16 in.)
15 mm
(0.59 in.)
20 mm
(0.79 in.)
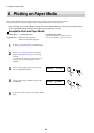
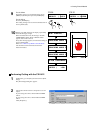
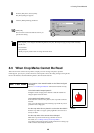
8-3 Loading the Material
Load the printed material on the CX-24/12 so that the crop marks are positioned as shown below.