


8 Cutting Printed Material
48
5
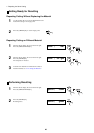
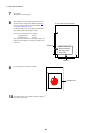
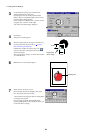
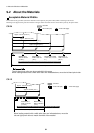
Move the origin point for the page to match the crop
mark you laid out at the lower left in "
Creating
Data and Printing the Material."
In Illustrator's toolbox, choose the page tool ( )
and move the center of the page tool to the location
shown in the figure.
The origin point for cutting is set at the same location
as on the CX-24/12.
6
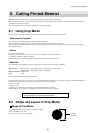
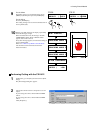
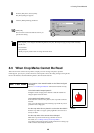
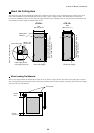
Make the line to cut around the figure.
7
Select the line you drew in step 6.
In the [Stroke] window, for [Weight], enter [0.01]
mm, and specify the line for cutting.
* The method of specifying the line for cutting differs
according to the program.
If you're using a program other than Illustrator,
specifying [Minimum] for the weight may allow you
to select the line for cutting.
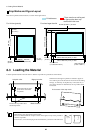
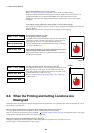
5 mm
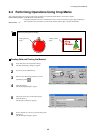
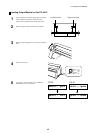
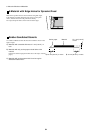
3
At the [Size] tab, specify a size identical to the
printed material as the cutting area.
Specifying the same size as the printed material
makes it easier to visualize the figure laid out on the
material and the cutting location.
In this example, for [Width], enter "210 mm," and for
[Length], enter "297 mm." Click [OK].
You return to the [Print Setup] dialog box.
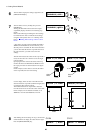
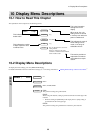
4
Click [OK].
The preview window appears.
5 mm
Cutting Line
Origin Point
for the Page