


8 Cutting Printed Material
49
8
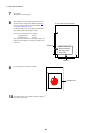
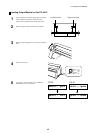
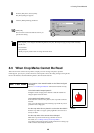
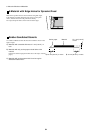
From the [File] menu, choose [Print].
The [Print] dialog box appears.
9
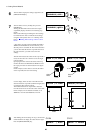
Clear the [Bitmap Printing] check box.
10
Click [OK].
The CX-24/12 cuts the data that has the line you
specified for cutting.
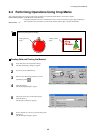
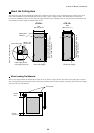
If the program you're using has the following features, they may be handy in laying out crop marks accurately.
- Zoom view
- Grid function
- Snap function
- Ability to specify location and size using numerical values
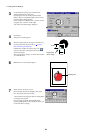
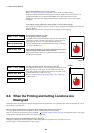
MARK 1 NOT FOUND
Is the location of the material loaded on the CX-24/12 aligned
correctly?
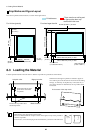
Refer to "8-3 Loading the Material" and load the material correctly.
Is the load material warped upward?
Straighten out the warping of the material so that the material lies
along the platen of the CX-24/12.
Is the material solid white in color?
If the material is colored or has patterns, then crop marks cannot be
detected.
Also, even if the material is white, detecting crop marks may not be
possible if it has a high gloss.
Are the crop marks faint or printed in a color other than black?
Print the crop marks over again, specifying black as the color and a
density of 100%.
Are the crop marks of the correct size and shape?
Make each crop mark a circle having a diameter of 10 mm.
For details, see "8-2 Shape and Layout of Crop Marks."
Crop marks printed using program-specific functions for creating crop
marks cannot be detected by the CX-24/12.
MARK 1
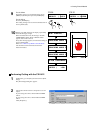
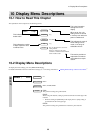
8-5 When Crop Marks Cannot Be Read
When the CX-24/12 cannot read crop marks, it displays an error message and pauses operation.
If this happens, press any key on the CX-24/12's control panel to move the cutting carriage to the right side.
Remove the material, check the following matters, then reload the material.