


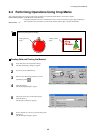

8 Cutting Printed Material
46
7
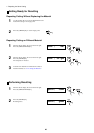
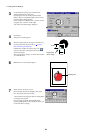
Turn the dial to choose [AUTO], then press the
[ENTER] key.
Turning the dial while in the state shown at right
sequentially displays the menus for detecting crop
marks.
Refer to the following for making the menu settings.
For information on how to make the menu settings
using the control panel, refer to "4-3 Turning on the
Power - Making Menu Settings with the Control
Panel."
* The values set at the menus for BASE X, BASE Y,
WIDTH, and LENGTH are stored in memory even
after the power is switched off. This means that when
you use other data that has the crop marks laid out at
the same locations, you don't need to redo the
settings.
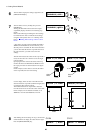
BASE X|<5.0mm>
WIDTH |<170mm> LENGTH|<210mm>
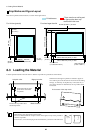
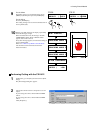
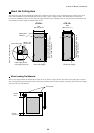
The CX-24/12 detects the centers of the crop marks it
reads, and uses these as a reference to set the origin
point for cutting.
Specifying the same value as the radius of the crop
marks at the menus for BASE X and BASE Y causes
the origin point to be set at the location in the figure
at right.
In this example, set the values to 5.0 mm (the radius
of the crop marks) for each menu setting.
BASE Y|<5.0mm>
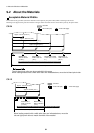
Use the display menus to enter in the CX-24/12 the
distances between crop marks (width and length) laid
out using the data-creation program.
The distance between two crop marks is detected
from the center of one circle to the center of the other.
In this example, A4-size material is loaded, so set
WIDTH to 170 mm and LENGTH to 210 mm.
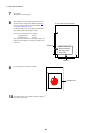
8
After making the menu settings in step 7, turn the dial
counterclockwise to display the value shown at right.
Press the [MENU/PARAM] key.
CROPMARK|<AUTO>
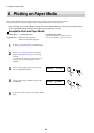
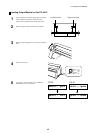
6
Turn the dial to display the setting at right. Press the
[MENU/PARAM] key.
CROPMARK|<OFF>
SELECT | ROLL
SETUP -> ENTER
CX-24 CX-12
Origin
Point
Origin
Point
5 mm
5 mm
Length
Width