


3-8
Cisco ASA 5500-X Series Hardware Installation Guide
Chapter 3 Installing and Connecting the ASA 5500-X
Rack Mounting the Chassis
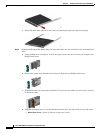
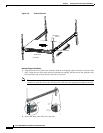
c. Secure the other inner slide rail to the chassis by repeating the previous steps on this page.
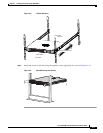
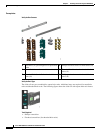
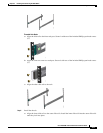
Step 3 (Round and Threaded Hole Racks Only) Customize the slide rails for round hole racks or threaded hole
racks.
a. Using a Phillips head screwdriver, remove the square insert from the rear of the rail. Keep the two
Phillips head screws.
b. Remove the square insert from the front of the rail. Keep the two Phillips head screws.
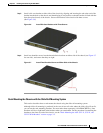
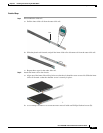
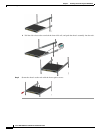
c. (Round hole racks only) Align the round hole (C) insert to the rear of the rail, and secure it with two
of the saved screws.
d. Align the round hole insert (C) or threaded hole bracket (D) to the front of the rail over the hooks.
–
Round hole insert—Secure it with two of the saved screws.
330905
330904
330884
330882
330881