


4-22
Cisco ASA 5500-X Series Hardware Installation Guide
Chapter 4 Maintenance and Upgrade Procedures for the ASA 5500-X
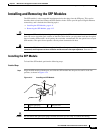
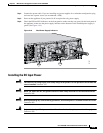
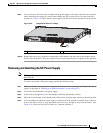
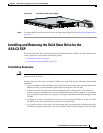
Installing and Removing the Solid State Drive for the ASA CX SSP
Installing and Removing SSDs
To install and remove SSDs in the ASA 5500-X series, follow these steps.
Detailed Steps
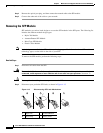
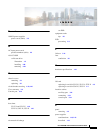
Step 1 If you need to remove an old drive, from the front panel of the ASA, remove the SSD by pressing the
button on the right side of the bay until the lever is released. Pull out the SSD.
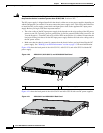
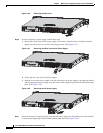
Figure 4-30 shows the ASA 5512/5515/5525-X models with one SSD. Figure 4-31 shows the
ASA 5545/5555-X with two SSDs.
Figure 4-30 Removing the SSD from the ASA 5512/5515/5525-X
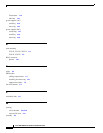
Figure 4-31 Removing the SSD from the ASA 5545-X and ASA 5555-X
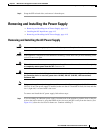
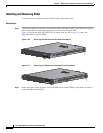
Step 2
On the front panel of the appliance, line up the SSD carrier with the SSD bay and push it in until it is
seated. Push the lever into place.
334566
334566