


4-21
Cisco ASA 5500-X Series Hardware Installation Guide
Chapter 4 Maintenance and Upgrade Procedures for the ASA 5500-X
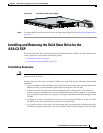
Installing and Removing the Solid State Drive for the ASA CX SSP
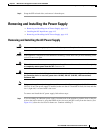
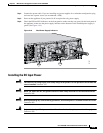
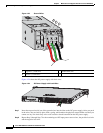
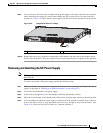
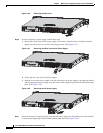
Figure 4-29 Installing the DC Power Supply
Step 8
To connect the DC input power source wires, see Step 5 though Step 10 in Installing the DC Input Power,
page 4-15.
Installing and Removing the Solid State Drive for the
ASA CX SSP
This section describes how to install and remove the Solid State Drive (SSD) in the ASA 5500-X series
security appliances, and contains the following topics:
• Installation Scenarios, page 4-21
• Installing and Removing SSDs, page 4-22
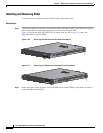
Installation Scenarios
Caution Make sure that you replace a failed SSD as soon as possible to avoid data loss. Removal of all SSDs shuts
down the ASA CX service.
You may need to install, remove, or replace a SSD in your ASA 5500-X series ASA under the following
conditions:
• If you are adding the ASA CX SSP to an existing ASA for the first time, after you have installed the
SSD in the ASA, you must reload the ASA and then reimage the ASA CX SSP.
• If the drive fails in the single-drive models or both drives fail simultaneously in the dual-drive
models, you need to replace the drives. ASA CX SSP shuts down when this happens, so CX features
are not available as part of the recovery process. You must reload the ASA and then reimage the ASA
CX SSP.
• If a single drive fails in the dual-drive model, you can hot-swap the failed drive. In this case, ASA
CX SSP does not shut down and you do not need to reload the ASA.
• If you want to replace a drive that is still functioning. Back up and gracefully shut down the ASA
CX SSP before replacing the drive. You must reload the ASA and then reimage the ASA CX SSP.
333064