


Vertical Drilling Motor, Type GE752, GEK–91584D
11
3. Continue tapping as described in Step 1 until the
0.753 dimension falls between 0.751 and 0.755.
4. If, due to excessive pounding, the inside dimen-
sion becomes less than 0.751 in., file back to size
with a fine mill file.
Additional repairs can be made to restore damaged
brushholder bodies. Brushholder damage is fairly typi-
cal when flashovers have occured, resulting in some
burning or melting of metal at the corners of the brush-
holder. Metal thus removed can be restored according
to the following instruction, unless more than 1/4 in.
buildup of metal is required in the affected area, in which
case the brushholder should be scrapped. Proceed as
follows:
1. Thoroughly clean the affected area by wire
brushing, and grind off any metal flow resulting
from a flashover.
2. Apply a suitable brazing flux such as
GE–A10B15 to the area to be built up.
3. Insert a carbon brush into the brushholder to pre-
vent the brazing material from flowing into the
carbonway.
4. Using a brazing torch and a 1/16 in. diameter
brass brazing rod, puddle in sufficient metal to
restore the metal that had been removed.
5. Check the carbonway for size with the “Go/No–
Go” gage after the brushholder has cooled to
room temperature.
6. Resize as required using the preceding method.
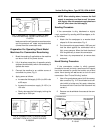
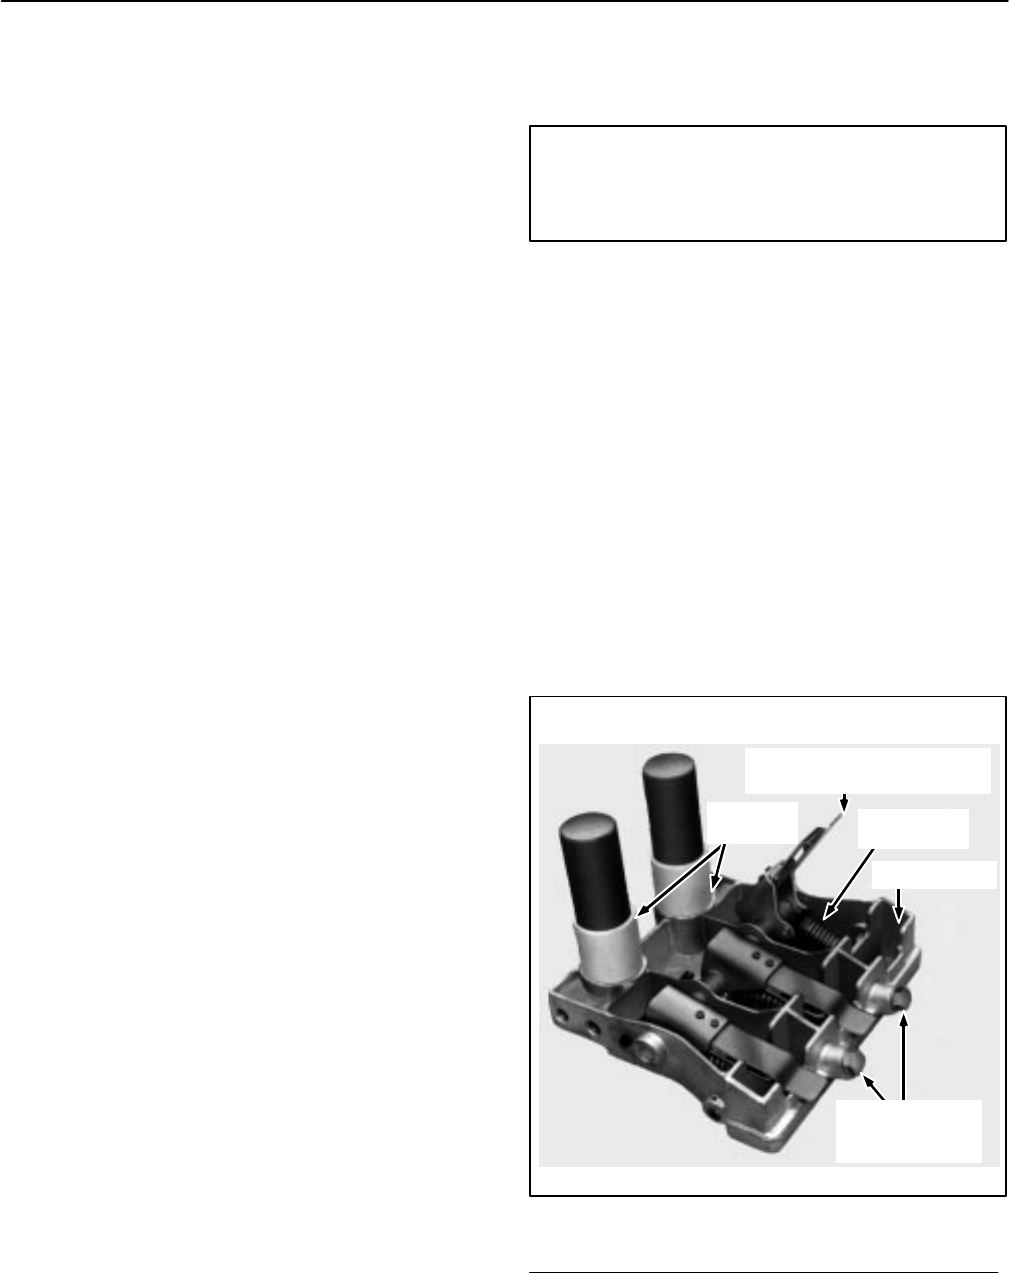
Brushholder Sleeves
Use a clean, lintless cloth and wipe dirt and grease
from the Teflon* brushholder sleeves, Fig. 5. If neces-
sary, use a cleaner such as MEK (methyl ethyl ketone)
to clean the sleeves. Inspect sleeves for cracks and thin
spots caused by flashovers. Replace any damaged
brushholder or one having a damaged sleeve.
WARNING: MEK is a volatile solvent. The fumes
should not be inhaled. Use only in a well–venti-
lated area and take adequate precautions to pro-
tect eyes, skin and hands.
NOTE: Never paint these sleeves. Periodically
wipe them clean with a dry cloth or a cloth
dipped in an approved non–oily cleaning sol-
vent.
Inspect the brushholder cables and make sure all
terminal bolts and all brushholder clamp bolts are tight.
Brush Spring Pressure
Lift the brush pressure fingers to the “toggled–up”
position, Fig. 5, and check for free movement of the
spring assembly.
Inspect the brush springs for obvious failure or dam-
age. Check brush–spring pressure by comparing spring
pressure with a spring known to be good. Refer to the
DATA section for brush spring–pressure value.
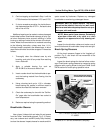
FIG. 5. BRUSH SPRING ARRANGEMENT.
E–18963.
TEFLON
SLEEVES
BRUSH PRESSURE FINGER
(IN TOGGLED–UP POSITION)
PRESSURE
SPRING
CARBONWAY
BRUSH–SHUNT
TERMINAL
SCREWS
*Product of E.I. duPont de Nemours Company.