


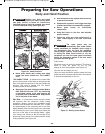
9.:=@
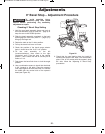
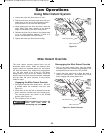
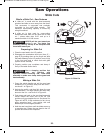
(@6;4 A52 *<?8=6202 9.:= – This clamp easily
s
ecures a workpiece to the table or base.
1. Insert the clamp’s knurled bar down into a clamp
post hole; there are two post holes located in the
base behind the fence. The knurled end must be
in the post at least 1/2".
2. Slide the clamp down until its rubber foot contacts
the workpiece.
3. Adjust the clamp height so it does not touch the
sliding fence.
4. Rotate the clamp’s knob until the workpiece is
firmly held in place.
5. Move saw head up and down and forward and
back to be sure it clears the clamp.
'52?2 :.F /2 2EA?2:2
0<:=<B;1 0BA@ D52?2 09.:=
0.;;<A /2 B@21 &B==<?A D<?8=6202 D6A5 F<B?
5.;1<BA@612A52K"<.;1@LG<;2<;<AA?FA<
0BA @5<?A =6202@ A5.A 0.;;<A /2 09.:=21 .;1
0.B@2F<B?5.;1A</26;A52K"<.;1@LG<;2
64B?2*<?8=62029.:=
9.:=@ – Other hold-down devices such as C-
clamps can be used to hold the workpiece firmly
against the table and the fence. Make sure the
clamps are clear of the cutting path.
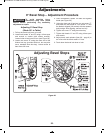
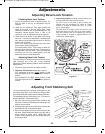
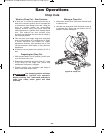
&9616;42;02@
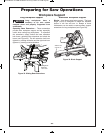
'< =?<C612 @B336062;A :6;6:B:
@=.06;4 3?<: 5.;1 A< @.D
/9.12 2EA2;1 A52 @9616;4 32;02@ .;1 /.@2
2EA2;@6<;@D52;:.86;42EA?2:2/2C29:6A2?<?
0<:=<B;10BA@.
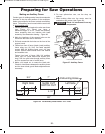
#=2?.A6;4&9616;42;02@
1. Pull the fence lock lever toward front of tool to
loosen fence.
2. Slide fence to the desired position.
3. Push the lock lever toward rear of tool to lock
fence position.
64B?2
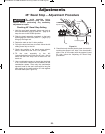
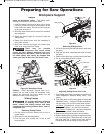
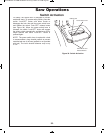
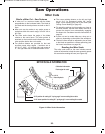
%2:<C6;4&9616;42;02@
1. Lift up on the cover plate tab and rotate it away from
the fence.
2. Push the lock lever toward the saw head to loosen
the fence.
3.
Slide the fence all the way out, away from the saw head.
4. Lift up on the sliding fence to remove.
64B?2
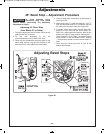
17B@A6;4&9616;42;02 <08 2C2?
1. If the sliding fence does not operate as described, it
needs adjustment. Remove sliding fence – see
above.
2. Push firmly down on the locking block to expose the
adjustment screw – Using a #2 Phillips screwdriver,
turn the screw 1/12 turn to the next notch in block.
Left Fence:
To tighten lock - turn the screw counter-
clockwise. To loosen - turn the screw clockwise.
Right Fence: To tighten lock - turn screw clockwise.
To loosen - turn screw counter-clockwise.
3. Release the locking block back to its up position.
4. Replace sliding fence by putting its large square hole
over the locking block. Slide fence fully in and close
the cover plate tab. It should move freely and be
locked tightly anywhere along its range of travel.
!
Clamp
Workpiece
*%""
!
Sliding Fence
Fence Lock
Lever
Locking
Block
Adjustment
Screw
Cover Plate Tab
Fence Lock
Lever
*%""
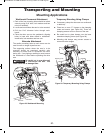
Preparing for Saw Operations
*<?8=6202&B==<?A
BM 2610007877 04-10:BM 2610007877 04-10.qxp 4/26/10 8:13 AM Page 29