


&2?C602
$?2C2;A6C2:.6;A2;.;02=2?3<?:21
/
F B;.BA5<?6G21 =2?@<;;29 :.F
?2@B9A6;:6@=9.06;4<36;A2?;.9D6?2@.;10<:=<;2;A@
D5605 0<B910.B@2@2?6<B@5.G.?1*2?20<::2;1
A5.A.99A<<9@2?C602/2=2?3<?:21/F.<@05.0A<?F
&2?C6022;A2?<?BA5<?6G21<@05&2?C602&A.A6<;
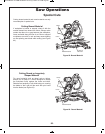
!<A<??B@52@
The brushes and commutator in your tool have been
engineered for many hours of dependable service. To
maintain peak efficiency of the motor, we recommend
every 2-6 months the brushes be examined. Only
genuine Bosch replacement brushes specially
designed for your tool should be used.
!<A<??B@5%2=9.02:2;A
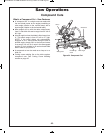
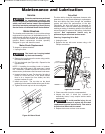
To inspect or replace brushes:
1. Unplug the saw.
'52 /?B@5 0.= 6@ @=?6;49<.121
/FA52/?B@5.@@2:/9F
2. Remove the brush cap on the motor using a wide,
flat-blade screwdriver.
3. Pull out the brush (see Figure 64). Repeat for the
opposite side.
NOTE: If installing the existing brush or brushes,
make sure the brush goes in the same way it came
out. Otherwise, a break-in period will occur that will
reduce motor performance and increase brush wear.
4. Inspect brushes for wear. On the wide, flat side of
brush is a wear limit line. If the brush contact
face is at or beyond (no line visible) the limit,
replace brushes as a set.
5. Install new brush. The two tabs on the brush
terminal go in the same hole the carbon part fits into.
6. Tighten the brush cap but do not overtighten.
64B?2!<A<??B@5
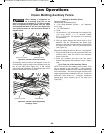
?6C229A
The drive belt is a long life component; however, after
e
xtensive use, it may require cleaning or replacement.
Dust and debris may enter through the ventilation
system and affect the performance of the belt.
Periodically, the drive belt should be inspected for
excessive wear. If the belt shows signs of drying out,
c
racking or tearing, it should be replaced. If the belt will
not track properly or comes off the pulleys, it should be
replaced. 29A ?2=9.02:2;A @5<B91 <;9F /2
=2?3<?:21/F.;.BA5<?6G21@2?C60202;A2?
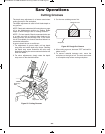
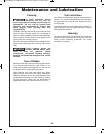
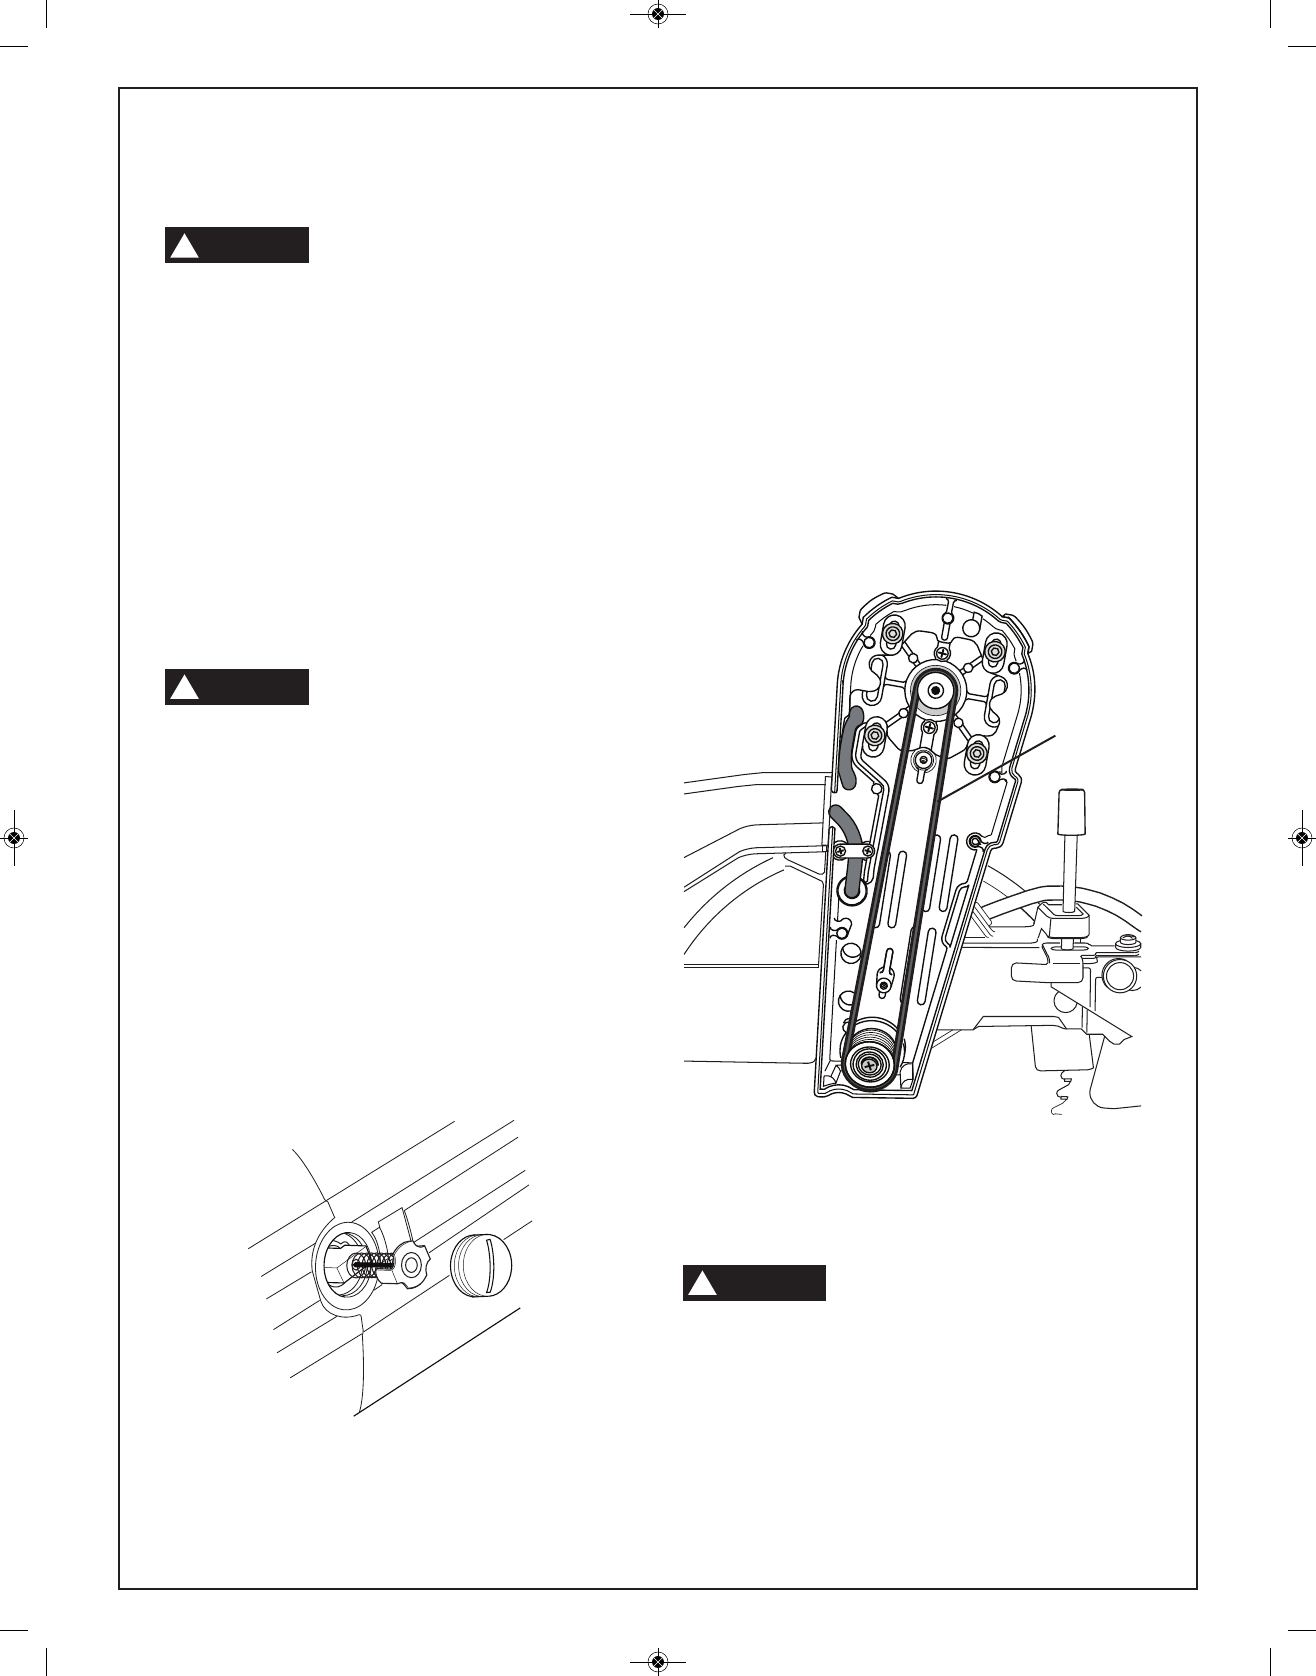
92.;6;4;@=20A6;4?6C229A
1. Unplug the saw.
2. Remove the two belt cover screws using a #2
Phillips screwdriver.
64B?2?6C229A
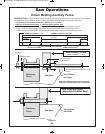
3. Clean area with a brush or compressed air.
4. Inspect the belt. If dried out, cracked or
excessively loose, it may require service and/or
replacement.
'< .C<61 =<@@6/92 6;7B?F 1< ;<A
.AA2:=AA<?2=9.02A521?6C2/29A
?2=9.02:2;A?2>B6?2@@=206.9A<<9@'.82@.DA<
.;.BA5<?6G21<@05@2?C60202;A2?
5. Replace belt cover and two cover screws.
*%""
!
*%""
!
Drive Belt
*%""
!
Maintenance and Lubrication
BM 2610007877 04-10:BM 2610007877 04-10.qxp 4/26/10 8:13 AM Page 51