


Emerson Process Management GmbH & Co. OHG 2-13
2
Installation
X-STREAM XEFD
Instruction Manual
HASXEDE-IM-EX
03/2012
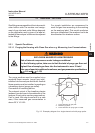
2.4 Installation - Electrical
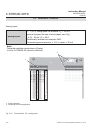
All signal cables are to be
connected via screw terminals,
except the USB and ethernet
connectors, located inside the
analyzer.
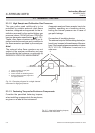
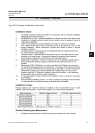
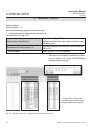
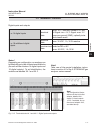
Preparation of signal cables
Screw Terminals Data
Supported wire cross
sections:
0.14 to 1.5 mm
2
(26 to 15 AWG),
no need to use wire end sleeves
Cable skinning length: 5 mm
Screw thread: M2
Tightening torque, min: 0.25 Nm (2.3 in.lb)
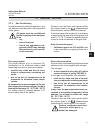
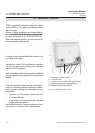
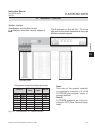
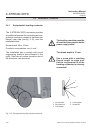
Installation with conduits
Ensure all required parts are available:
Adaptors, suitable conduits, compound and
plugs for not used entries (see accessory kit).
Install the required number of adaptors into
the related cable entries:The 3 rear entries
are reserved for signal cables, the rst one is
for the power cord.
Tightening torque:
max. 354 in.lb / 40 Nm!
Ensure the explosionproof seal is placed
at the analyzer enclosure or within 2“ from
enclosure.
All cables need to be fed properly through
conduits when entering the instrument and
connected to the terminals ( warning
notes, page 2-8).
To seal the cable entries proceed according to
the installation instruction given in the related
conduits manufacturer documentation.
Keep the original manufacturer‘s
documentation available for fu-
ture reference!
Seal unused entries utilizing the ameproof
certied plugs.
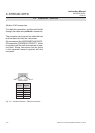
Installation with cable glands
Ensure all required parts are available:
Cable glands sets and plugs for not used
entries (see accessory kit).
Verify the provided cable gland is designed
for your type of cable (e. g. armoured, non-;
diameter), see marking on the cable gland.
Install the required number of cable glands
according the manufacturers instruction into
the related cable entry:The 3 rear entries are
reserved for signal cables, the rst one is for
the power cord.
Tightening torque:
max. 354 in.lb / 40 Nm!
All cables need to be fed properly through the
cable glands when entering the instrument
and connected to the terminals ( warning
notes, page 2-8).
To seal the cable entries proceed according to
the installation instruction given in the related
cable glands manufacturer documentation.
Keep the original manufacturer‘s
documentation available for fu-
ture reference!
Seal unused entries utilizing the ameproof
certied plugs.