


Prosine Installation & Operation Guide 39
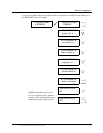
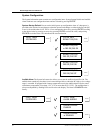
Section 4: Inverter/Charger Installation
13. Tighten the cable clamps and secure the cables to the wall or bulkhead to prevent
unnecessary strain on the connections. Replace the cover over the AC connection block.
14. Connect a cable from the Chassis GND terminal on the inverter to earth ground for on-
shore installations, to the vehicle chassis for RV installations, or to the engine negative
terminal for marine installations. DO NOT connect this conductor to the AC input
ground wire or directly to the negative pole of the battery. Refer to “DC Grounding,”
below.
15. For residential installations, a DC wiring enclosure is required to cover DC
connections and cables. Contact Xantrex or your distributor for this part.
16. Route your DC supply cables from the battery bank to your inverter/charger. Provide
an anti-chaffing device around the cables where they pass through a bulkhead or
partition. Seal around the cables where they pass through the bulkhead or partition to
prevent gasses from passing through them.
17. An inline fuse is recommended between the inverter/charger and the battery and is
required by regulations for some installations. This protects your wiring in case of
accidental shorting. The fuse and fuse holder need to be installed in the positive side of
the DC circuit, as close as possible to the batteries. Attach the cable from the positive
(+) terminal on the fuse to the positive DC connector post on the inverter/charger.
Tighten the hex nut on the inverter/charger connector to 216–240 inch-pounds (24–
27Nm). Secure the cable to the bulkhead or partition to prevent unnecessary strain on
the connector.
18. Attach the cable to the negative (–) terminal on the battery first, and then connect it to
the negative DC connector post on the inverter/charger. There will be a “snap” or spark
as electrical current jumps from the cable to the connector post. This is normal. Tighten
the hex nut on the DC terminal to 216–240 inch pounds.
19. Attach the DC terminal covers and the vent cover/drip shield.
20. Connect the standard or ACS control panel by inserting the RJ-11 telephone-type
connector plug into one of the jacks labeled “Remote Output” on the inverter/charger.
Secure the EMI bulb on the control panel cable to the wall or bulkhead adjacent to the
inverter/charger to prevent unnecessary strain on the cable connector.
21. Reconnect your AC shorepower supply.
22. Slide the BYPASS/ON switch on the side of the inverter/charger to the ON position.
23. Verify that you have configured the unit correctly, and that it is operating correctly.