


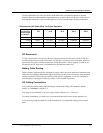
Recommended DC Cable Sizes For Proper Operation
48 Prosine Installation & Operation Guide
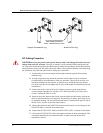
DC Cabling Procedure
CAUTION Reversing the positive and negative battery cables will damage the Prosine inverter/
charger and void your warranty. This type of damage is easily detected. Before making the final
DC connection, check cable polarity at both the battery and the inverter/charger. Follow the procedure
outlined below to make your DC cable connections. Observe the polarities carefully while performing
the installation, and route both cables before making any connections.
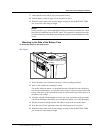
1. Cut the cables to the correct length with enough insulation stripped off to properly
install the lugs.
2. If using compression lugs, attach the terminals to both cables using the crimp tool
recommended by the manufacturer of the ring terminals. There must be no stray wire
strands protruding from the terminal. If using box lugs, attach the lug to the Prosine
first, then insert the wire and tighten the set screw to the torque recommended by the lug
manufacturer.
3. Connect the positive cable to the positive battery connector (stud) on the Prosine
inverter/charger and tighten to a torque of 216–240 inch-pounds (24–27Nm) with a
wrench. Test that the cable is secure.
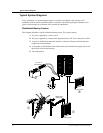
4. Install an inline fuse between the Prosine inverter/charger and the battery. Refer to the
tables to determine the fuse sizes required. This protects your battery and wiring in case
of accidental shorting. The fuse and fuse holder must be installed in the positive side of
the DC circuit, as close as possible to the batteries.
5. Connect the cable from the POSITIVE connector on the Prosine inverter/charger to the
POSITIVE (POS +) terminal on the battery fuse.
6. Connect the DC NEGATIVE cable to the NEGATIVE (NEG -) terminal on the battery.
7. Connect the DC NEGATIVE cable to the negative terminal on the inverter/charger. This
connection should be the last connection made. A spark when making this final
connection is normal.
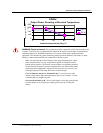
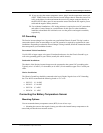
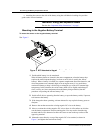
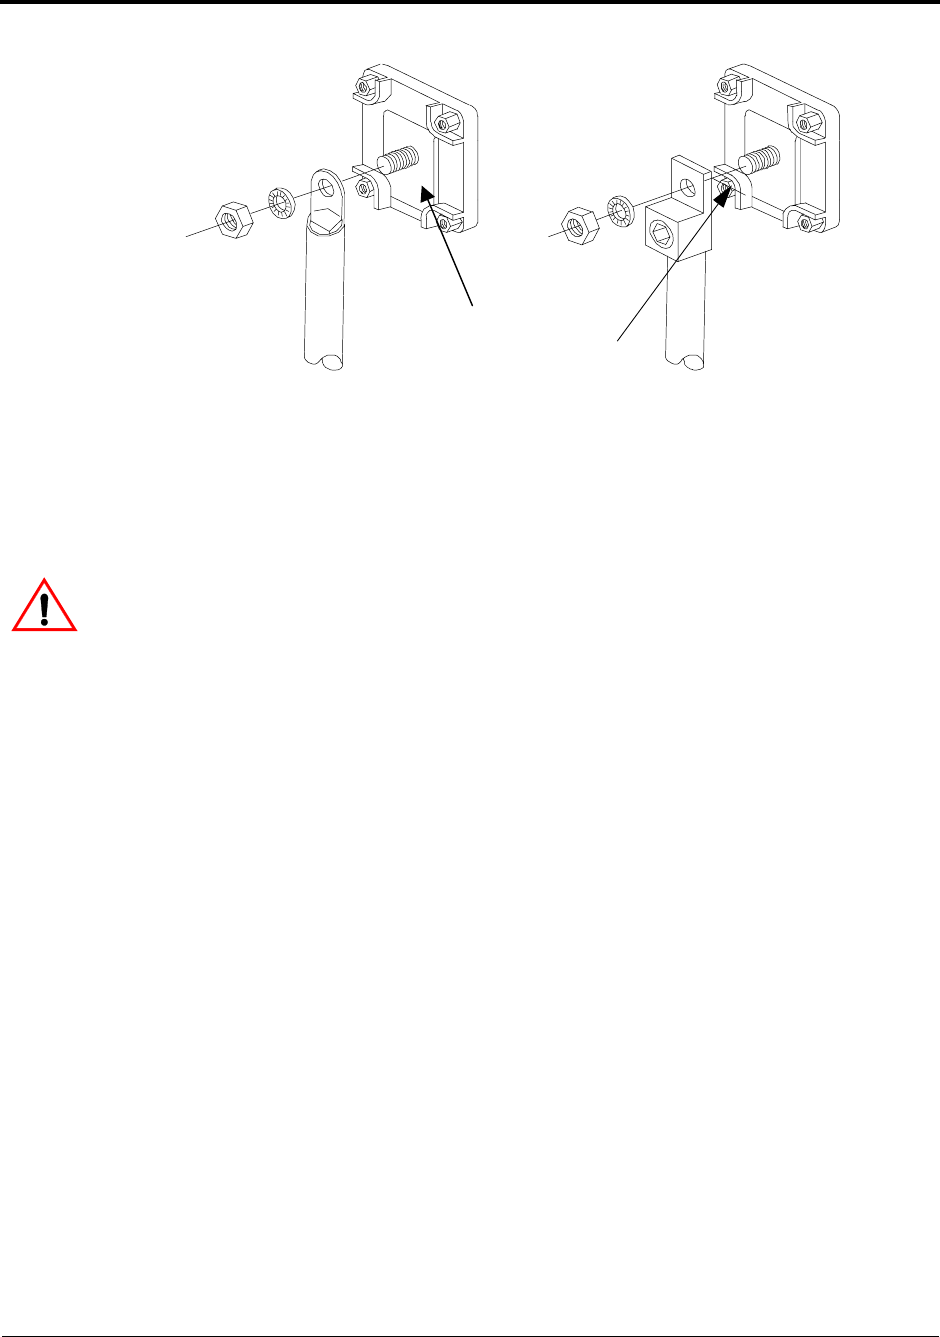
2/0 Copper Compression Lug
2/0 Aluminum Mechanical Lug
Do not place anything between
battery cable lug and terminal
surface. Assemble exactly as shown
Aluminum Box Lug
Copper Compression Lug