


Return to Section TOC Return to Section TOC Return to Section TOC Return to Section TOC
Return to Master TOC Return to Master TOC Return to Master TOC Return to Master TOC
OPERATION
PRO-CUT 60
B-5
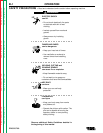
8. Pull the torch trigger to cut.
- OUTPUT ON LED glows.
If postflow has not timed out, the pilot arc
lights immediately.
If postflow air has timed out (after 20 sec-
onds), air preflows for two seconds before
pilot arc lights.
If the arc is not transferred by bringing plasma
in contact with the work with in 2.5 seconds,
the pilot arc shuts off.
9. Make a cut.
10. Stop cutting by releasing the torch trigger.
- Arc stops.
- Postflow air continues for 20 seconds.
- To continue cutting, repeat Step 8.
11. Turn ON/ OFF POWER SWITCH to OFF
when job is done.
If the SAFETY LED glows at any time during oper-
ation, check the following:
-Torch consumables are assembled properly.
Machine will not start if they are not properly
in place.
-Nozzle condition. The nozzle must be clean.
After the problem is corrected or no problem is
found, press the SAFETY RESET button. If
SAFETY LED goes out, machine is ready for use.
If SAFETY LED continues to glow, refer to the
TROUBLESHOOTING GUIDE in the TROU-
BLESHOOTING AND REPAIR SECTION of this
manual for a recommended course of action.
CUTTING PROCEDURE
RECOMMENDATIONS
For best results, use proper cutting or gouging
procedures. Plasma arc cutting is a very eco-
nomical process when used properly. Improper
procedures or equipment use will result in poor
quality work and high operating costs. The follow-
ing procedures will help you get maximum perfor-
mance from your PRO-CUT 60.
Use Pilot Arc Properly
The pilot arc transfers the arc to the work piece for
cutting. Do not start the pilot arc repeatedly over
short periods of time. This could reduce consum-
able life. Start the pilot arc and then make and fin-
ish the cut before releasing the trigger.
If the pilot arc sputters or does not start each time
the torch trigger is pulled, check the consumable
for wear or high air pressure. If either is found,
take proper action.
Cutting and Gouging Recommendations
General
1. Make a continuous cut. Do not pause
during cutting, gouging, or at the end of
the work piece. Stopping and starting
causes poor cuts and results in poor
machine operation. In addition, it
reduces consumable life.
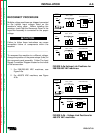
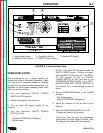
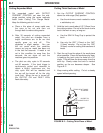
2. Position the torch so that dross and hot
air cannot be deflected into the torch.
3. Do not drag the nozzle when cutting
above the mid-range setting. Above mid
range, always hold the torch 1/8" away
from the work piece.
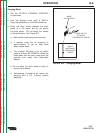
4. Proper drag cup/shield cup use gives you
maximum nozzle and consumable life.
- When operating in the blue or red current
ranges, use a drag cup when possible.
- When operating in the yellow range, use a
drag cup or a shield cup.
5. Use the proper machine setting for the
work to be done. Adjusting the machine
to maximum output does not produce the
best cutting in most situations.