


Return to Section TOC Return to Section TOC Return to Section TOC Return to Section TOC
Return to Master TOC Return to Master TOC Return to Master TOC Return to Master TOC
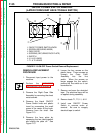
ON/OFF POWER SWITCH REMOVAL
(LATER CODES MAY HAVE TOGGLE SWITCH)
TROUBLESHOOTING & REPAIR
PRO-CUT 60
F-35
REMOVAL/REPLACEMENT
PROCEDURE
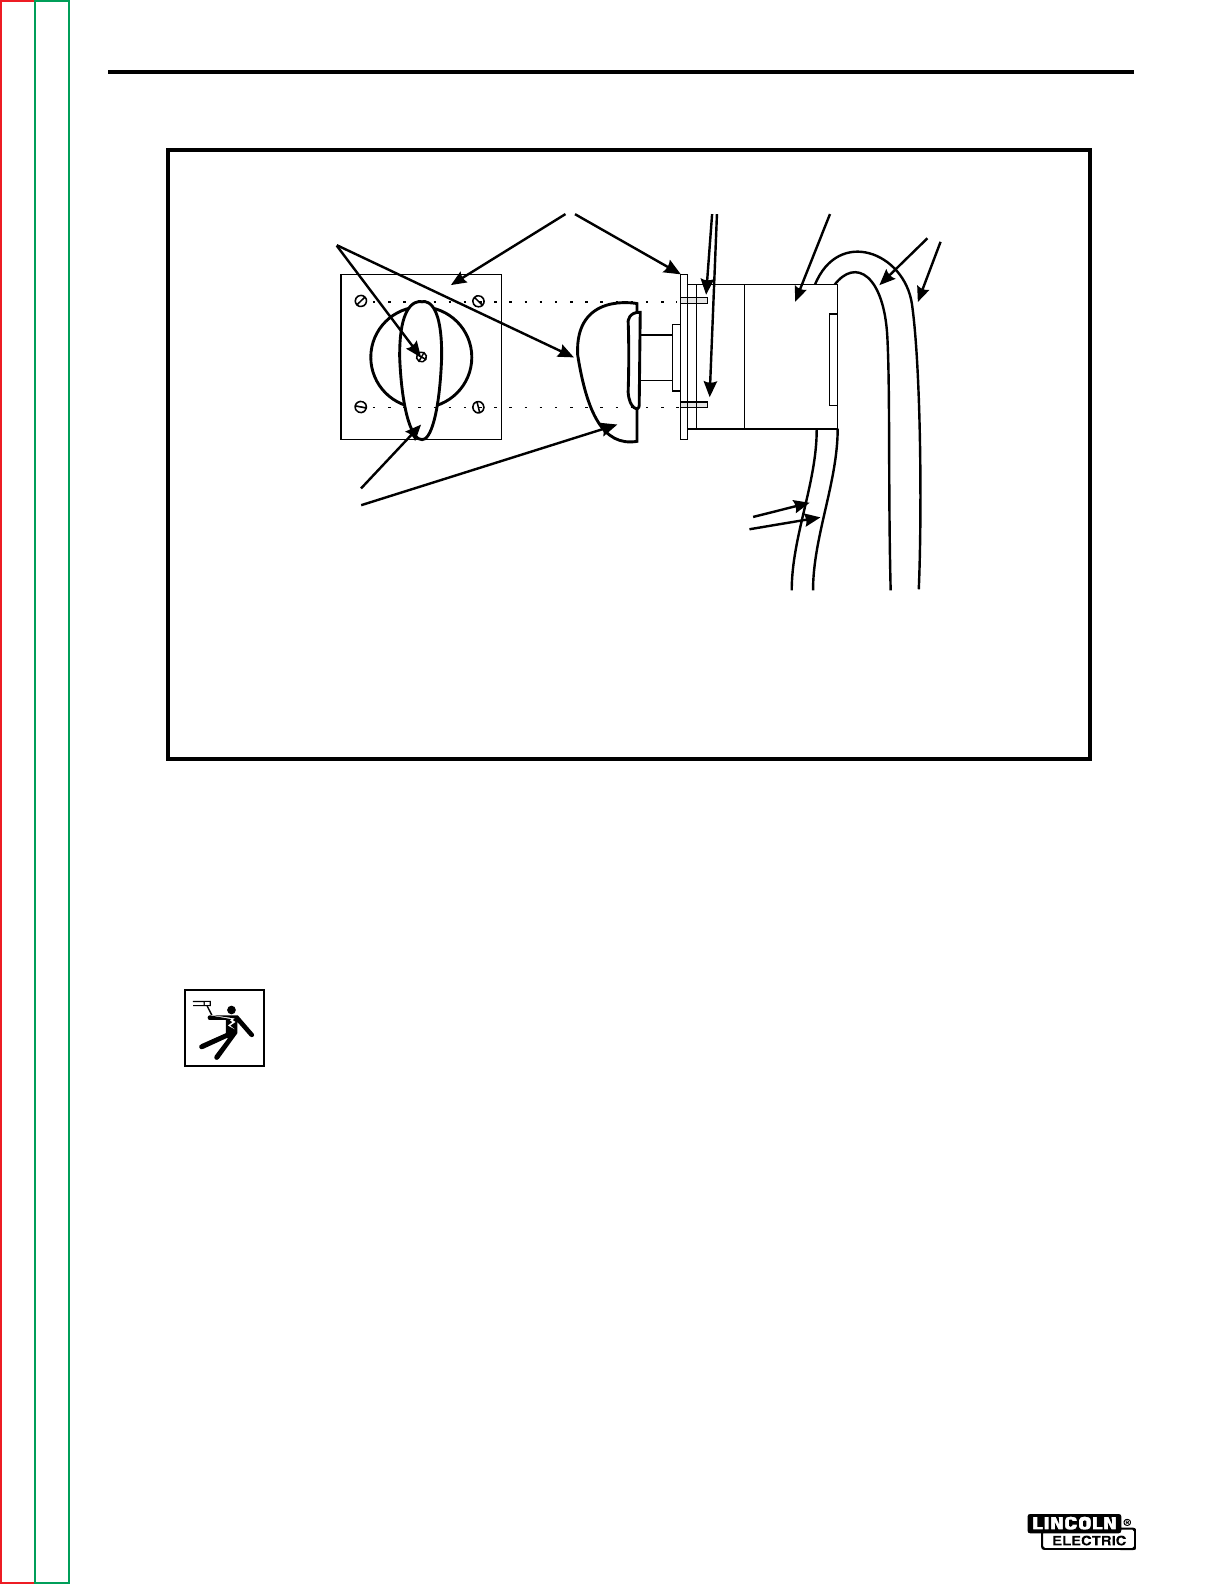
1. Disconnect input power to the
machine.
2. Perform the CAPACITOR
DISCHARGE PROCEDURE.
3. Remove the Right Case Side
Assembly by removing the sheet
metal screws.
4. Remove the black ON/OFF
Power Switch knob and plastic
insert by unscrewing the small
screw in the center of the knob.
Remove from the shaft. See
Figure F.13.
5. Remove the face plate by
squeezing the two tabs together
and sliding the plate off. See
Figure F.13.
6. Loosen the four screws on the
plastic frame. These screws go
through the Case Front
Assembly into the line
switch. When the screws no
longer engage the line switch,
remove the line switch so it can
be worked on.
7. Remove and save the electrical
tape. The electrical tape will be
re-applied during assembly.
8. Remove leads T1, T2, L1, & L2.
9. Install new ON/OFF Power
Switch in reverse order of
removal. Be sure to re-apply
electrical tape to switch.
0
1
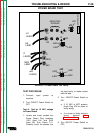
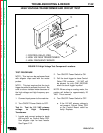
➀ ON/OFF POWER SWITCH KNOB
➁ SCREW (SECURING KNOB)
➂ FACE PLATE
➀
➃ SCREWS (SECURING FACE PLATE)
➄ SWITCH
➅ L1 & L2 LEADS
➆ T1 & T2 LEADS
➁
➂➃➄
➆
➅
FIGURE F.13-ON/OFF Power Switch Removal/Replacement