Section 2: Installing the 1700 Reader In-Sight
®
1700 Series Wafer Reader
14
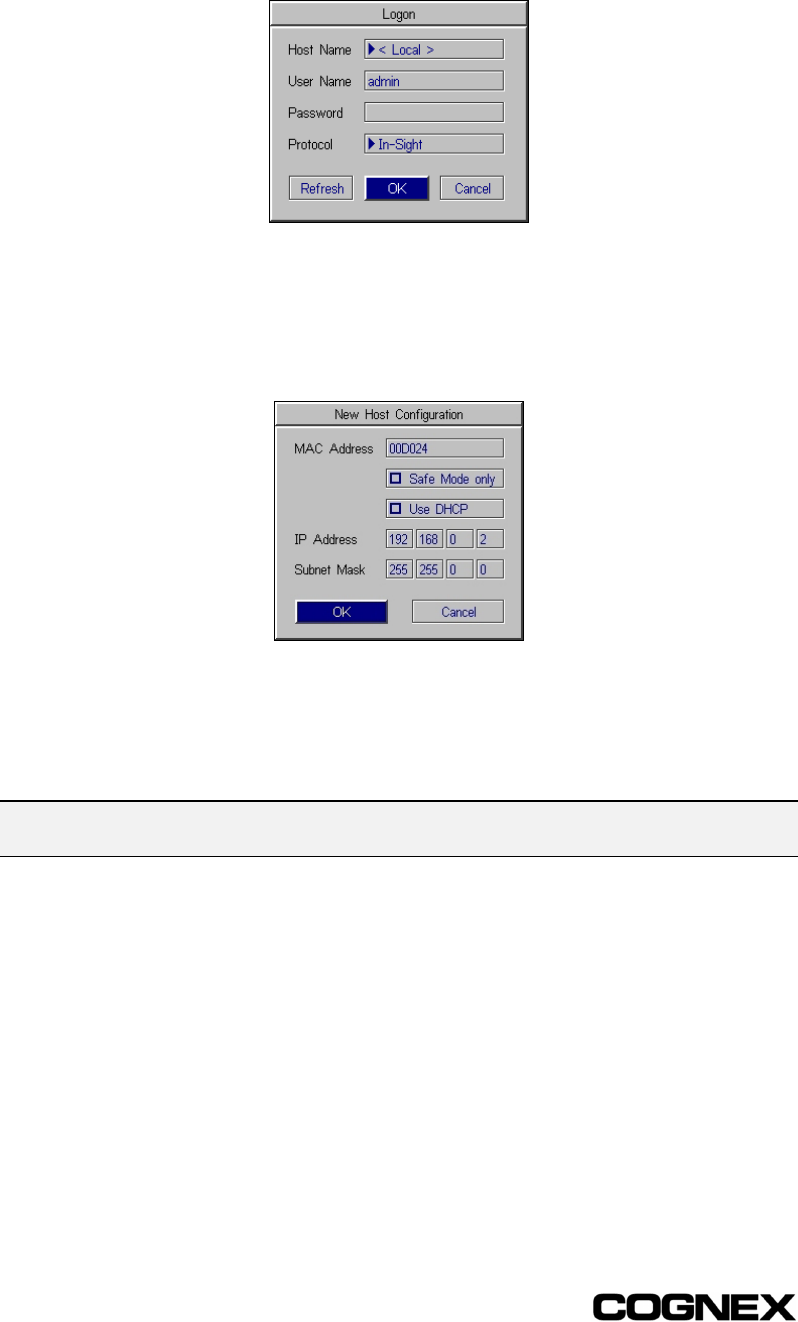
3 Select Logon to open the Logon dialog.
Figure 2-6: PC Host Logon dialog
4 Click on the Host Name drop-down list to see the names of any In-Sight systems
already installed on the network.
5 Select < New > from the list to open the New Host Configuration dialog.
Figure 2-7: PC Host New Host Configuration dialog
6 Enter the last six characters of the In-Sight 1700 sensor's 12-character Media
Access Control (MAC) address, without spaces or dashes. The first six characters
are already entered, and should not be deleted or changed.
NOTE The MAC address is located on a label affixed to the back of the In-Sight 1700 reader. This
identifier is factory-assigned, unique for every In-Sight system, and cannot be changed or deleted.
7 Verify that the Use DHCP checkbox is disabled.
8 Enter a valid IP Address for this In-Sight reader. Every In-Sight reader must be
assigned a unique IP Address consistent with the addressing scheme in use on the
network. Refer to Appendix C for more information on assigning an IP Address, or
consult your network administrator.
9 Enter a Subnet Mask for the local network. The Subnet Mask specifies which parts
of the In-Sight reader’s IP Address are the same for all hosts on the local network,
and which are unique to each host. The default Subnet Mask 255.255.255.0 is
appropriate for the vast majority of users. Refer to Section 6.2, or consult your
network administrator for more information.


