


3-15
Cisco Application Deployment Engine (ADE) 2130 and 2140 Series Appliance Hardware Installation Guide
78-18579-02
Chapter 3 Installing the Cisco ADE 2130 and 2140 Series Appliance
Cisco ADE 2130 and 2140 Series Appliance Power
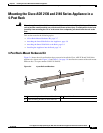
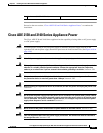
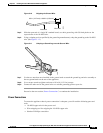
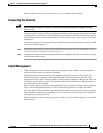
Figure 3-10 Stripping the Ground Wire
Step 5 Slide the open end of a single 90° standard barrel, two-hole ground lug with 5/8-inch pitch over the
exposed area of the 10-AWG wire.
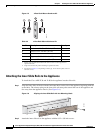
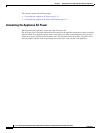
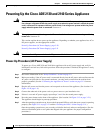
Step 6 Using a crimping tool (as specified by the ground lug manufacturer), crimp the ground lug to the 10-AWG
wire. (See Figure 3-11.)
Figure 3-11 Crimping a Ground Lug onto the Ground Wire
Step 7
Use the two nuts that were installed on the ground studs to attach the ground lug and wire assembly to
the two ground studs on the rear of the appliance.
Step 8 Use a torque wrench to tighten each nut to 10 in-lb (1.12 N-m) torque.
Step 9 Connect the other end of the ground wire to a suitable grounding point at your site.
Proceed to the next section,“Power Connections,” to continue the installation.
Power Connections
To ensure the appliance chassis power connection is adequate, you will need the following parts and
tools:
• 18-AWG copper wire for the power cord
• Wire-stripping tool for stripping the 18-AWG copper wire
• Number 2 Phillips screwdriver
Insulation
Wire lead
0.5 in. (12.7 mm)
±
0.02 in. (0.5 mm)
60528
60529