


4-17
Cisco Application Deployment Engine (ADE) 2130 and 2140 Series Appliance Hardware Installation Guide
78-18579-02
Chapter 4 Installing the Cisco ADE 2130 and 2140 Series Appliance Hardware Options
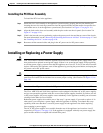
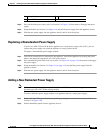
Installing or Replacing a Power Supply
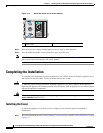
Installing the PCI Riser Assembly
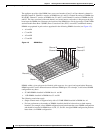
To install the PCI riser in the appliance:
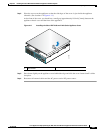
Step 1 Attach the riser card assembly to the appliance system board by grasping the two blue handles and
inserting the two riser card edge connectors into the superslot header and the smaller low-profile riser
card header next to it on the appliance system board. (See location 1 in Figure 4-7 on page 4-14.)
Step 2 Align the forks on the riser card assembly with the pins on the rear chassis panel. (See location 2 in
Figure 4-7 on page 4-14).
Step 3 If this is the last task you are performing, replace the processor air duct and the top cover of the chassis.
For more information, see the “Removing and Installing the Processor Air Duct” section on page 4-7 and
the “Installing the Cover” section on page 4-20.
Step 4 Reconnect all the external cables and plug in the AC power cord or DC power source.
Installing or Replacing a Power Supply
Caution Your Cisco ADE 2130 and 2140 Series appliance does not have a redundant power supply unless you
have purchased an optional second power supply. If there is no second power supply, before replacing
an existing power supply, you must first take the appliance out of service. To do so, turn off all external
devices connected to the appliance, turn off the appliance by pressing the power button, and unplug the
AC power cord or DC power source.
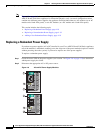
Caution If only one power supply is installed, it must be in the right-hand slot and a power supply blank filler
panel must be installed in the left-hand slot to ensure proper cooling. (See location 5 in Figure 1-5 on
page 1-9.)
Warning
Never install an AC power module and a DC power module in the same chassis.
Statement 1050
The Cisco ADE 2130 and 2140 Series appliance can be equipped with either AC or DC power supplies
and you can operate the appliance with one or two of these power supplies installed. If you have two AC
or DC power supplies, the power supplies create redundancy for the appliance, enabling one to become
a backup for the other in case of failure.
Redundant power supplies also enable you to “hot-swap” a power supply, if you need to replace it. In
other words, you can replace a power supply while the appliance is running. To maintain hot-swap
capability, make sure that there is an active power supply in both appliance slots before replacing
(hot-swapping) a power supply.
The AC or DC power supplies are accessible from the rear of the appliance (see locations 4 and 5,
respectively, in Figure 1-5 on page 1-9). If the appliance is equipped with only one power supply, the
space next the module is occupied with a blank filler panel.