DC EXCITER ARMATURE & FIELD COILS
REMOVAL AND REPLACEMENT PROCEDURE
TROUBLESHOOTING & REPAIR
F-47 F-47
PIPELINER® 200
Field Coils Removal Procedure
1. Perform the DC Exciter Armature Removal
Procedure.
2. Using the 3/8” wrench, remove the leads from
the brush holder. Note lead placement for
reassembly.
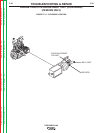
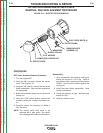
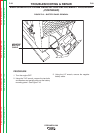
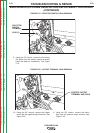
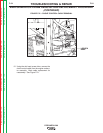
3. Using the 1/2” wrench, remove the four bolts
(two on each side) holding the pole pieces to
the exciter frame. See Figure F.15.
4. Label and remove the tape and splices from
the black and red leads that go to the idler
board and 115VDC receptacle. See the
Wiring Diagram.
5. Carefully slide the coils and pole pieces from
the exciter frame.
6. Remove the coils from the pole pieces.
Reassembly:
7. Assemble the new coils to their respective
pole pieces.
8. Assemble the coil and pole pieces to the
exciter frame with four bolts.
9. Make the necessary lead connections to the
idler board and 115VDC receptacle. Wrap
the slices with tape.
10. Assemble the armature and brushes.
See the DC Exciter Armature Removal
Procedure.
Return to Section TOC Return to Section TOC Return to Section TOC Return to Section TOC
Return to Master TOC Return to Master TOC Return to Master TOC Return to Master TOC


