


Manual 0-2533 19 SERVICE TROUBLESHOOTING
The advanced troubleshooting covered in this Service
Manual requires Power Supply disassembly and live mea-
surements. It is helpful for solving many of the common
problems that can arise with the Merlin 3000 Plasma Cut-
ting System.
If major complex subassemblies are faulty, the unit must
be returned to an authorized service center for repair.
Follow all instructions as listed and complete each in
the order presented.
Specific test procedures and LED status identification
tables have been grouped together, and are referenced
by the troubleshooting guide.
C. How to use this Guide
The following information is a guide to help the Service
Technician determine the most likely causes for various
symptoms. This guide is set up in the following manner:
1. Perform operational check(s) on the equipment to iso-
late problem to possible circuit(s).
2. Determine symptom and isolate to defective assembly
using the following format:
X. Symptom (Bold Type)
Any Special Instructions (Text Type)
1. Cause (Italic Type)
a. Check/Remedy (Text Type)
3. Locate your symptom in the appropriate Sub-Section.
4. Check the causes (easiest listed first) for the symptom.
5. Check the remedies listed for each cause.
6. Repair as needed being sure to verify that unit is fully
operational after any repairs.
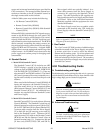
NOTE
Many signals are transfered between Printed
Circiut Board Assemblies on Ribbon Cables. If
these cables become faulty they can then cause vari-
ous problems. Do not forget about these cables
when troubleshooting.
A. No front panel LED indicators ON; Fan and pump
not operating
1. No primary power. Refer to symptoms C and D also.
a. Check for proper three-phase power at input
terminal board
2. Faulty ON/OFF switch (SW1)
a. Disconnect primary power. Check each section
for continuity. Replace switch if necessary
3. Faulty voltage selection board
a. Refer to Section 4.05-A, Voltage Selection PC
Board Check. Replace Voltage Selection PC
Board if necessary
B. AC indicator ON; Fan and pump not operating
1. ENABLE signal not ON
a. Remote ENABLE or ENABLE at TB2 must be
on. Refer to Section 4.05-B, Enable Circuit Test.
2. Blown fuse (F1 or F2)
a. Check and replace fuse if necessary. Refer to
Section 4.05-C, Blown Fuse (F1 or F2).
3. Faulty ON/OFF switch (SW1)
a. Disconnect primary power. Check each section
for continuity. Replace switch if necessary
4. Faulty Voltage Selection PC Board
a. Refer to 4.05-A, Voltage Selection PC Board
Check. Replace Voltage Selection PC Board if
necessary
5. Faulty motor contactor (MC1 or MC2)
a. Refer to Section 4.05-D, Motor Control Contac-
tor Check (MC1 or MC2). Replace contactor if
necessary
6. Faulty ENABLE circuit
a. Refer to Section 4.05-B, Enable Circuit Test.
C. No indicators are on for the RC6010 or SC10
remotes.
1. No +48 VDC power to the remotes.
a. 3 amp fuse blown on the Bias PCB, replace.
b. Defective Bias PCB, Refer to Section 4.05-P, 48
Volt Bias Test.
D. AMPS or VOLTS displays not on for RC6010 or
SC10.
1. Normal if ENABLE not on.
a. Turn on ENABLE at RC6010 or TB2 (if RC6010
not used)
b. Defective ENABLE circuit, Refer to Section 4.05-
B, Enable Circuit Test.
2. Faulty Remote Device
a. Replace as needed