


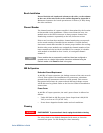

2 Installation
22 Series N6700 User’s Guide
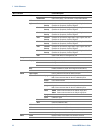
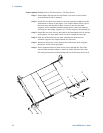
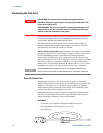
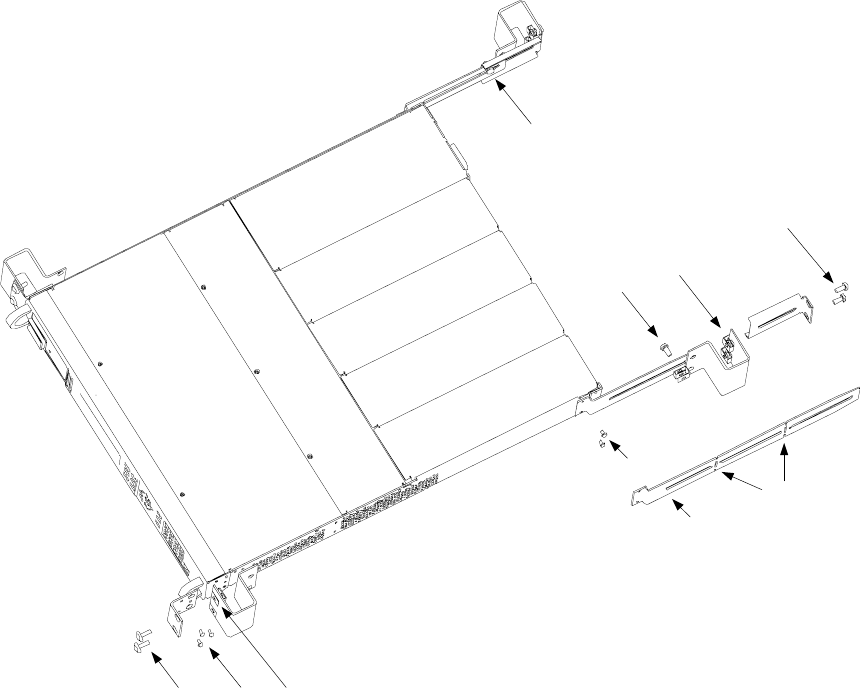
Tools required: Phillips driver, T22 Torx driver, T10 Torx driver
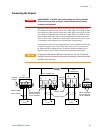
Step 1. Install eight clip-nuts on the rack frame (2 in each corner) where
your instrument will be located.
Step 2. Install the two front ears and the two rear extender supports on the
instrument as shown in the figure. Use six M3 x 8mm screws (a) for
the front ears and four M3 x 6mm screws (b) for the extender
supports. If the standard extender supports are either too short or
too long, use the longer supports (c). Cut the supports if required (d).
Step 3. Install the two rear ears on the back of the instrument rack as shown
in the figure. Use four plain 10-32 screws to install the rear ears.
Step 4. Slide the instrument into the rack. making sure that the rear
extender supports are aligned inside the rear ears.
Step 5. Attach the front ears to the front of the instrument rack using the
four dress 10-32 screws provided.
Step 6. This is optional. Insert a plain 10-32 screw through the slot of the
rear ear and extender support. Attach it with a clip-nut. Note that
this will prevent the unit from being slid out of the front of the rack.
2a
3
4
5
6
1
2b
2c
2d
1